If you’ve ever gazed at an old piece of furniture and felt the stirrings of a DIY spark, then learning to easily decoupage furniture might just be the next project you’ve been yearning for. With a simple selection of decorative paper and a dash of imagination, you can easily transform that old furniture piece.
The best part is you can pick so many different colors and materials, from brightly-colored botanical prints to whimsical patterns, the process is surprisingly simple, yet the results are nothing short of extraordinary. Let me teach you how to decoupage furniture so you can discover how gratifying it is to turn your ordinary furniture into the extraordinary.

This post contains affiliate links. Click here to see my full disclosure policy.
How to decoupage furniture questions
Here is a list of the top questions I get when it comes to decoupaging furniture.
- What do you need to decoupage furniture?
- What is the best material to use for decoupage?
- How to seal decoupage furniture?
- Do I paint before decoupaging furniture?
- What paper do I use to decoupage furniture?
I will answer each of these questions in detail in the sections below. Let’s get started!

What is Decoupage?
Let’s unveil the simplicity behind the term decoupage. Well, here’s the scoop: it’s rooted in a French word, “decouper,” which simply means to cut out. Pretty straightforward, right?
Now, if you find yourself drawn to the world of decoupage, congratulations! You’ve joined the ranks of crafters who love the magic of transforming ordinary home decor objects with a bit of glue and some creatively cut-out designs.
But decoupage isn’t just a hobby—it’s an art form that lets you express your personality and flair for design. Remember, there’s no right or wrong here; it’s all about having fun and making something beautiful.
Decoupage Furniture Supplies
I use a few different products and the same method no matter the material I am using to easily decoupage. Here is the list of my favorite supplies that I use.
- Wunda Size- This is a decoupage medium and I use it in place of matte mod podge.
- Spray Sealer(to prep decoupage paper)
- High-Performance Sealer (to seal the decoupage material and furniture)
Keep reading on how to use each of these products.
Best Material for Decoupage Furniture Projects
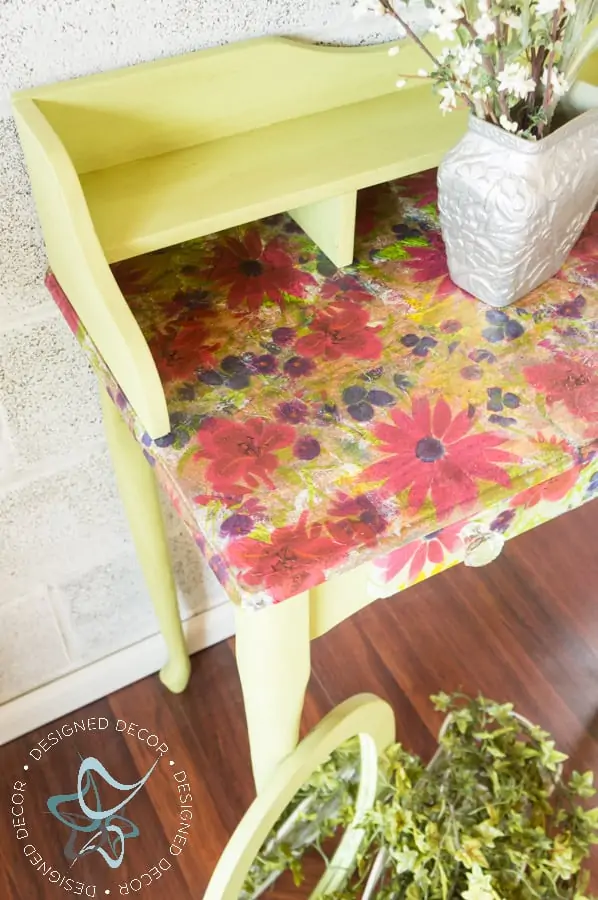
When it comes to decoupaging furniture, I believe there is not the best material. You can use any of the following materials: wallpaper, gift wrap paper, scrapbook paper, fabric, tissue paper, poster, napkins, sheet music, aluminum foil, also almost any type of paper. So this answers the question, what paper do I use to decoupage furniture? I have used all of the above materials, and each looks great. However, there is 1 type of paper I have not tried, toilet paper. I am sure it would work. If there are any other materials you have used, please leave me a comment below and I would love to add them to the list.
My #1 tip when using printed paper to decoupage, seal it first!
DeDe, Designed Decor
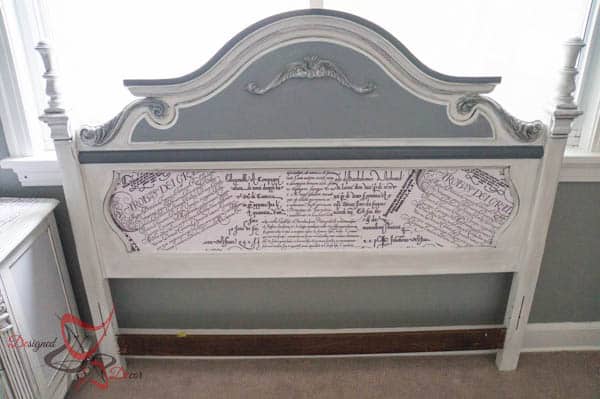
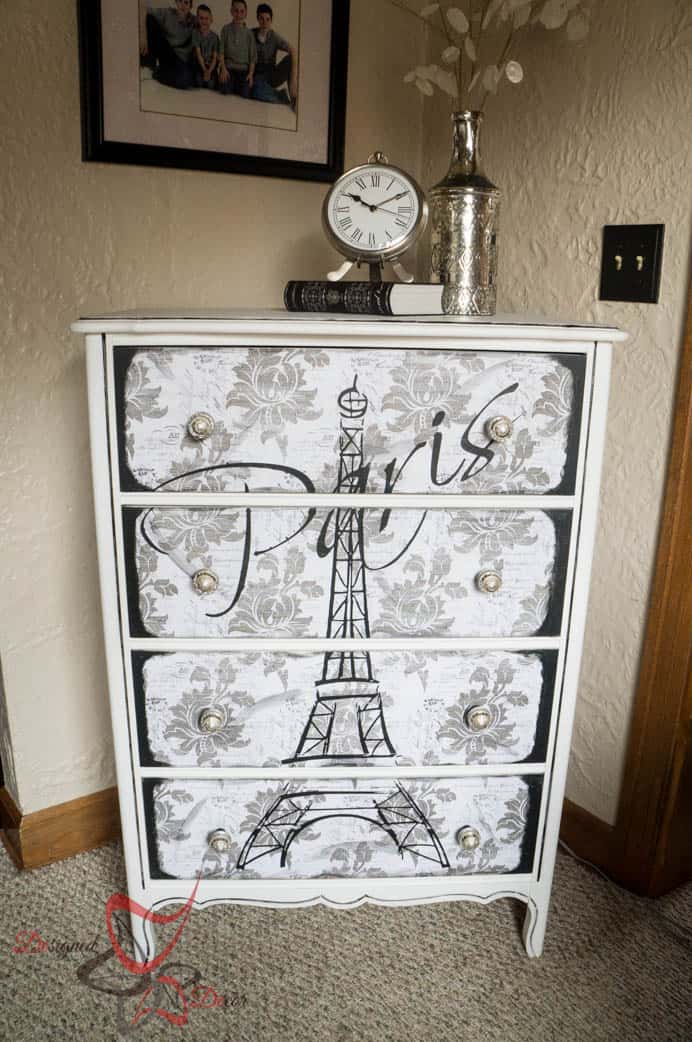
This #1 tip on how to decoupage furniture with paper comes from experience. Maybe it is better to say from my mistakes. The ink on some printed papers will smear since we are using liquid decoupage glue. After this happened to me when doing this French decoupage furniture makeover on my guest bedroom set, I began to seal the paper before using it for decoupage.
How to seal printed paper for decoupage projects
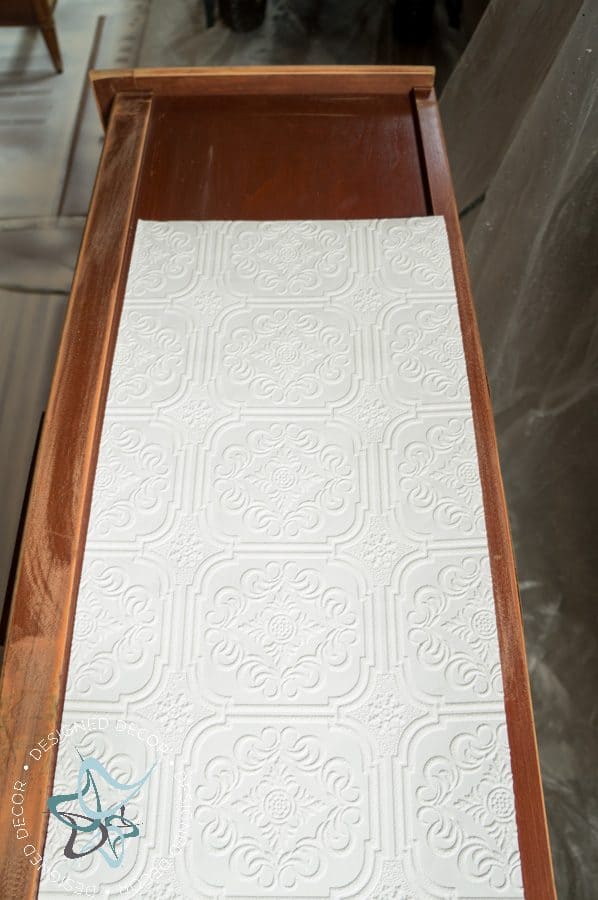
Use flat surfaces to roll out the printed paper. Spray the top of the paper (printed side) with this spray-on sealer. For best results, use light strokes when applying the sealer and make sure not to saturate the paper. After it dries, apply another light coat. This will help to set the ink and potentially prevent the ink from smearing.
Yes, you can use other spray sealers, just make sure that they are water-based. The reason for this is some oil-based sealers cause yellowing. If you are using light-colored paper, it could potentially yellow by using the oil-based product.
In my experience, I have only had to seal printed paper and no other decoupage material. It is always a good idea to test the material you are using before applying it to the painted furniture.
Do I paint before decoupaging furniture?
I always prep, clean, paint, or stain my furniture first. The decoupage techniques I save for the last step. The first reason for this answer is that some decoupage materials are thin and you might be able to see the furniture color through the material. If you have a dark piece of furniture, it may alter the decoupage and make it darker than you wanted.
The second reason is painting and staining can be messy and it is easier not to have to tape off the decoupage areas. For this reason, I recommend always finishing before applying the decoupage materials.
Here is a quick video tutorial to show you how to decoupage with floral napkins
Step-by-step decoupage instructions
Just in case you skipped directly down to the easy step-by-step decoupage instructions, make sure to prep any printed paper before decoupaging. See the information above.
Step 1: Paint Furniture and Prep material
As mentioned above, prep and paint your wood furniture piece. Select a complementary paint color to the decoupage material you are using. Cut the decoupage material of your choice to the size needed. Do a dry fit of the material in place before proceeding.
Step 2: Applying Decoupage Adhesive

I recommend using 1 of the 3 products above, Mod Podge![]() , Wunda Size
, Wunda Size![]() , or Spray Adhesive
, or Spray Adhesive![]() . My product of choice is Wunda Size.
. My product of choice is Wunda Size.
After using all 3 products I prefer to use Wunda Size as my base adhesive layer. It is a very thin liquid that you apply and it sets up within 10 minutes. I find that it tends to have fewer air bubbles than Mod Podge. Mod Podge has mobility(working time to move and place) once you place the paper or fabric on it and it does take longer to dry.
However, I do recommend using Mod Podge for crafts.

A spray adhesive works for thin paper and the brand does not matter. However, it is not forgiving and once you put some paper in place, it is there to stay or you tear it trying to reposition it. It does not move as easily as using Wunda size or Mod Podge. Also, it becomes sticky when dried and this can interfere when applying the final sealer.
Apply the Wunda size or Mod Podge adhesive using your favorite brush like a foam brush or a chip brush. If using Wunda Size let it sit for about 10 minutes or until it is tacky to the touch. Now you are ready to apply your material of choice.
Step 3: Adding Material for Decoupage

If using fabric to decoupage, it is best to cut the fabric slightly larger than the space. This allows you to make sure it is straight and lined up. I trim the extra pieces off once the adhesive has dried. Again, take my advice on letting the adhesive dry, it is much easier. Otherwise, you can move the fabric and trim it incorrectly. Use a fabric wheel cutter to trim off the extra fabric. This is so much easier and cleaner than using scissors.
When using paper for layering or overlapping, I like to use the spray adhesive on the back of the paper so the paper will stick to the base layer. Spray the layering piece in a well-ventilated area away from the base layer. Carefully start at one end slowly laying down the material and smooth out as you go to help eliminate air bubbles. Quickly smooth out your material to remove any remaining air bubbles. You can also use a straight pin to place a small hole in the material to help remove the trapped air.
I do not add a layer of the decoupage adhesive on the material after it has dried. I just apply a furniture sealer instead.
Step 4: How to Seal Decoupage Furniture
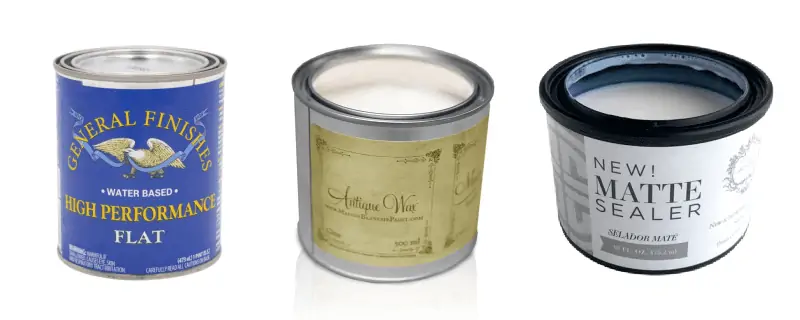
I use the above products to seal the material General Finishes High Performance, Antique Furniture Wax, or any Amy Howard Water Based Sealer![]() . My preferred method is sealing my material and furniture with a water-based sealer. I love the high-performance flat from General Finishes.
. My preferred method is sealing my material and furniture with a water-based sealer. I love the high-performance flat from General Finishes.

I will typically apply 1 to 2 coats of sealer based on the furniture. For any light-used furniture, 1 coat is fine. For heavily used furniture like tabletops or chairs, I will seal using 2 coats.
If applying sealer with a paintbrush and using paper decoupage, I recommend spraying the paper with a coat of water-based polyacrylic sealer first and letting it dry. This helps to seal the printed ink. It is always best to be safe than smearing the ink and having to fix it. The spray adhesive will seal without dragging a wet brush over the material. Again, use a straight pin to help remove any air pockets. Once the spray is dry, then apply the furniture sealer with the paintbrush.

I wanted to make this as easy as possible for anyone to decoupage furniture. Sometimes it takes trial and error when working with a new fabric or a different type of paper. Always test the material on a sample board to see how it will work with the decoupage supplies. Let your imagination go wild and I am sure it can be added to your next furniture piece.
Decoupage Furniture Inspirations
Here are some of the pieces that I have decoupaged, stop over over to see the before on these pieces!
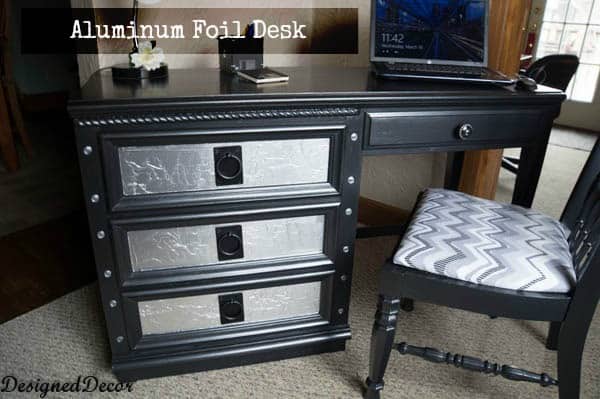
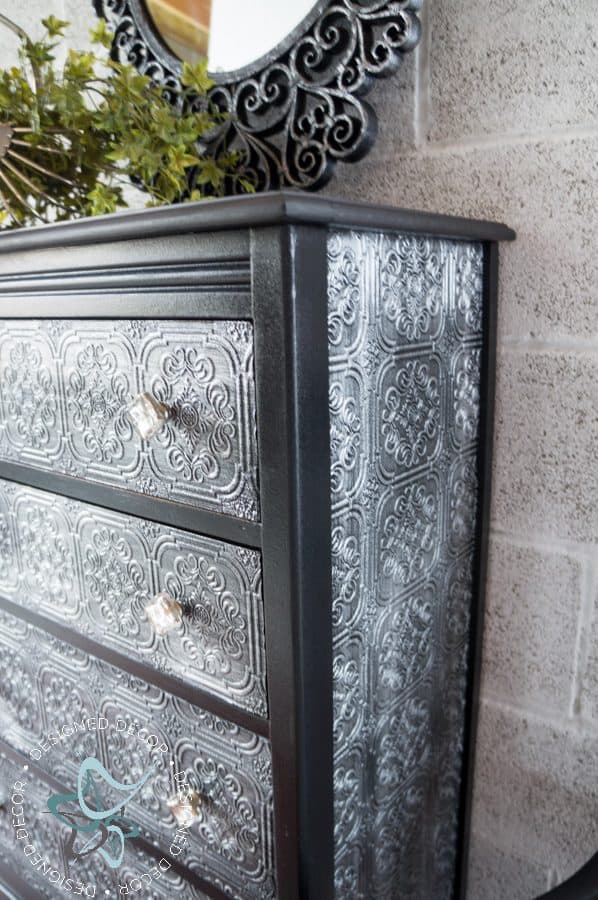
How to decoupage with aluminum foil
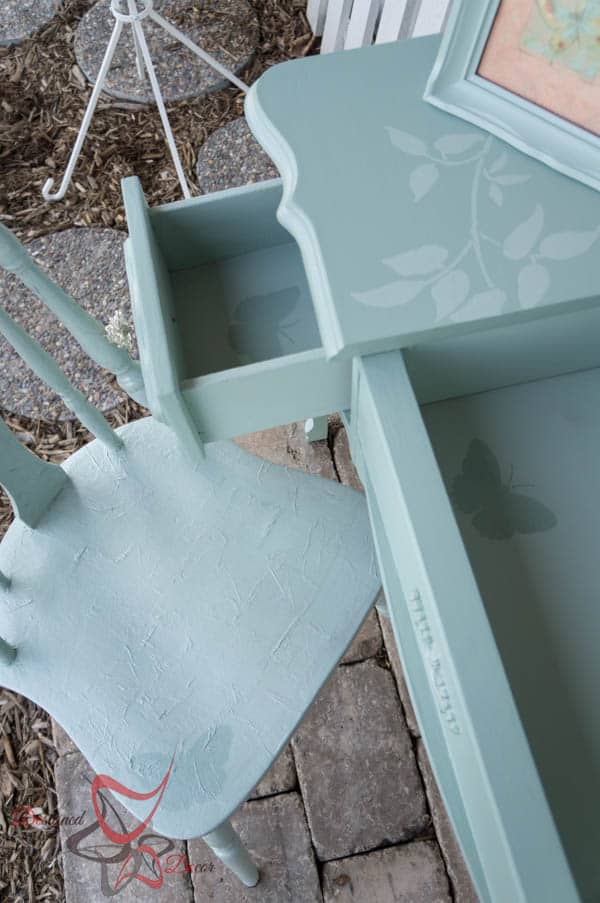
Using fabric to decoupage furniture.
How to decoupage with wrapping paper
How to decoupage with tissue paper
Floral Napkins Decoupaged onto Furniture
How to decoupage with wallpaper
DeDe Bailey
DeDe Bailey is the artistic mastermind behind Designed Décor and The Puzzle Table. With a rich background in home décor retail, she has transformed her website into a platform driven by a profound passion for helping individuals craft spaces they adore. As a self-taught furniture painting artist and thrift decorator, she loves sharing her knowledge and empowering others to beautify their homes through furniture painting and thrifting. When she isn’t sharing her wisdom on the Designed Décor blog, DeDe is occupied with showcasing her ingenious jigsaw puzzle table design and expanding her short-term rental located in NE Ohio.
Get your FREE ELIMINATE BRUSH MARKS GUIDE => How to Eliminate paint brush marks
Marcus Burns says
The step-by-step method for decoupaging with napkins and sealing is straightforward.
Crystal says
This is such a helpful tutorial! I only have one question. You said in the first step to prep and paint. I am planning on decoupaging the whole surface. Should I paint the entire surface first or just do a light sand?
Thank you!
Designed Decor says
If you are going to have any of the furniture to show through you will need to paint first. You also need to take in consideration of how thin is the product that you are using to decoupage with. If it is really thin, the under surface will show through so you may want to paint of prime the item in a light color. I always say test first so you know what to expect.
u says
I love the foil, never thought of that
Designed Decor says
Thank you so much! It is fun to discover what materials you can use for decoupage.
Erica C says
Hi DeDe,
Thank you for all the great information, tips and advice you give us. My question is when it comes to using stock paper (scrapbooking) which tends to be thicker, How can we use that on furniture? And not just to line drawers, but perhaps to place on top of a small table etc.
Designed Decor says
Erica, you use the same technique. I use fabric and that is thick like your stock paper. You just need to make sure you are using enough of the wunda size and make to seal it really well. I would always try it on a piece of scrap wood before trying it on the actual furniture.
Michelle says
Hi! Love your style! I am new to refinishing furniture and therefore confused about one of your steps. It’s the step where you seal. You say you prefer to use varnish, are the products you listed varnish? If not, what varnish do you use?
Designed Decor says
I sometimes use the word varnish when I mean a water-based sealer, sorry for the confusion.
Melanie says
Thanks so much for this tutorial! I am new to decoupage and only new about Mid Podge. This is great information!
Designed Decor says
You are welcome, Melanie! I love the Wundasize so much better than the other stuff.
Kathleen L. says
Love this! Looks beautiful. I have a question about the fabric on the drawers. Did you wrap the fabric over the ends of the drawers or just cover the fronts? No one mentions that part.
Designed Decor says
I just covered the fronts. Just make sure you have the adhesive all along the edges so you get a good seal, sometimes you may need to add some in places along the edge after the fabric dries. I also made sure to seal the edges and sides of the drawers really well with a few coats of the poly.
Yvonne says
Dede,. Thank you so much for having your expertise available to this community. I’m looking forward to learning more from you. Pinterest is a daily stop for me and I have to tell you, I am already so impressed and believe you’re at the top for content and detail of instruction. A great big thank you! Please don’t ever leavE!Hudson.yvonne
Designed Decor says
Yvonne, Thank you so much for those kind words! I love DIY’ing and teaching others to do the same.
Sue@CountryDesignHome says
This is great Dede!! I just got the Wunda size so I am going to give it a try- thanks for the tip!
Kammy's Korner says
Wow! Thanks for this. Decoupage has always intimidated me a little! Pinning.
Robin @ Redo It Yourself Inspirations says
Great tips and product suggestions!You’ve convinced me to try Wunda Size. And, of course, your pieces area always perfect! I still can’t get over the aluminum foil desk. 🙂