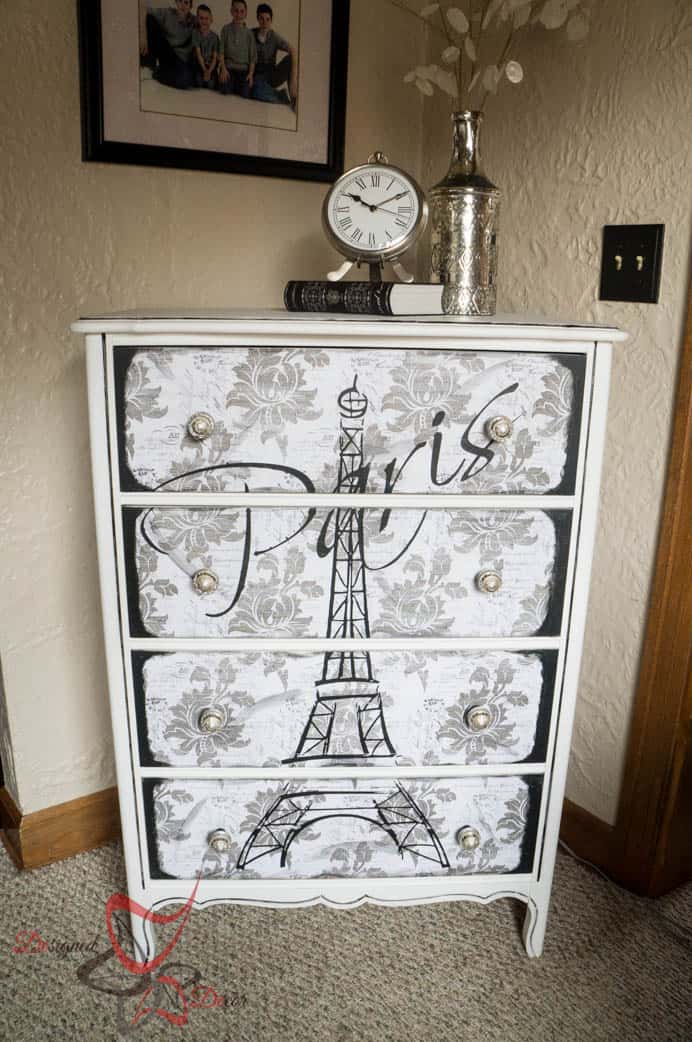
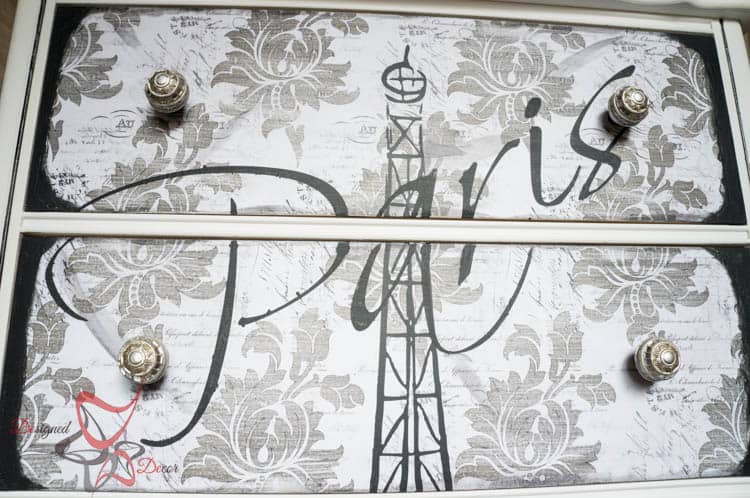
I posted an Eiffel Tower Dresser makeover that I completed for a friend and I want to share how to make the large furniture stencils using vinyl and Cameron my Silhouette Cameo Electronic Cutting Machine .
.
This post contains some affiliate links. Click here for my full disclosure policy.
I used 2 great sources to teach me how to do this. The first one is my friend Suesan from Frou FurGal and a tutorial from The Silhouette School Blog.
The first thing I did was find a free downloadable image on the internet. You need to take caution on using just any image from the internet because a lot of images have a copyright and it is illegal to use just any image you find. I found my image from OneHeart Weddings. The first thing I did was download the image as a jpeg file on my computer.
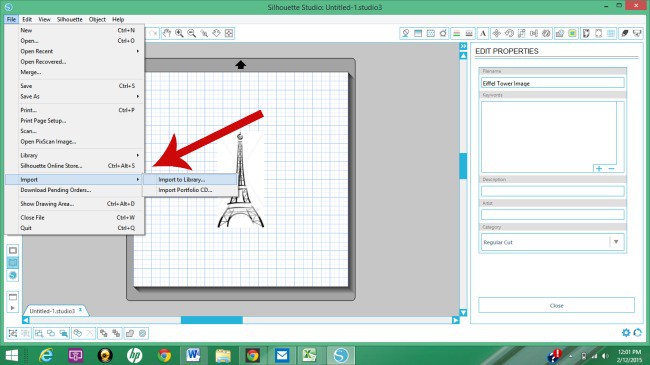
You import the image that you just downloaded from your computer to your Silhouette Software Program. Import the image by going to the file – Import – Import to Library. Now the image is saved in your Silhouette Studio.
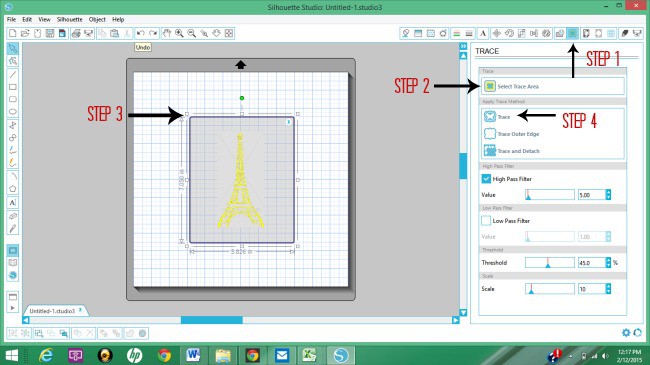
Next, you want to follow the steps above to trace and cut the image. If you are familiar with your Silhouette, you should understnad the steps above, if not send me a message and I can help.
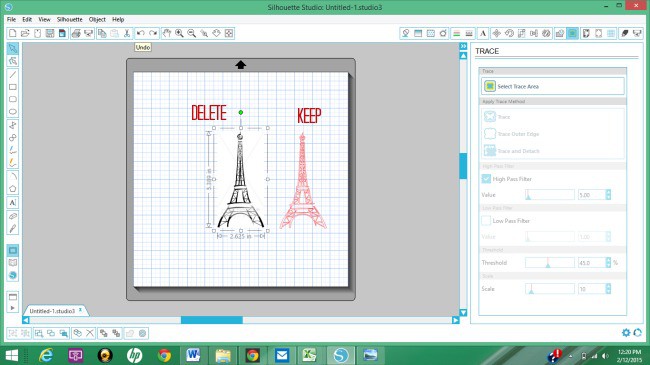
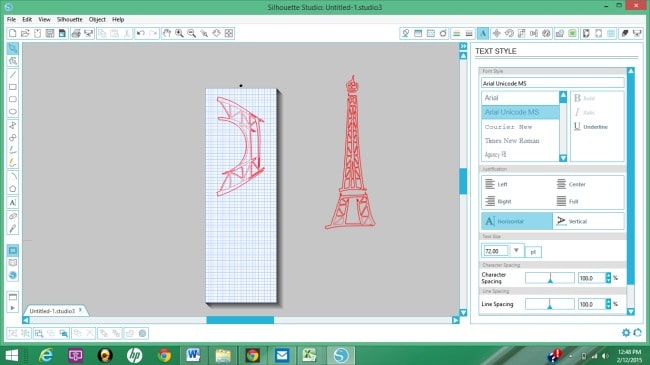
Mouse over the image and drag it and you will see 2 images. Delete the black image and now you will be working with the red image.
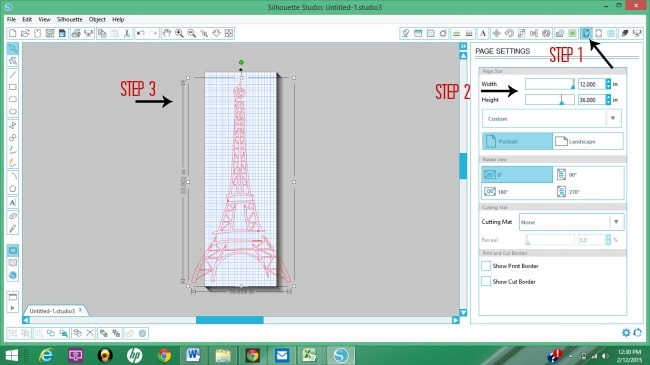
Follow the steps above to change the page settings for the size of the image you are working with. I needed my stencil for the dresser to measure 33 inches tall and 16 inches wide to fit within the size of the drawers. As you can see I am outside the lines of my cutting board and also the size of the vinyl width. This is where I will need to use the knife to cut my image.
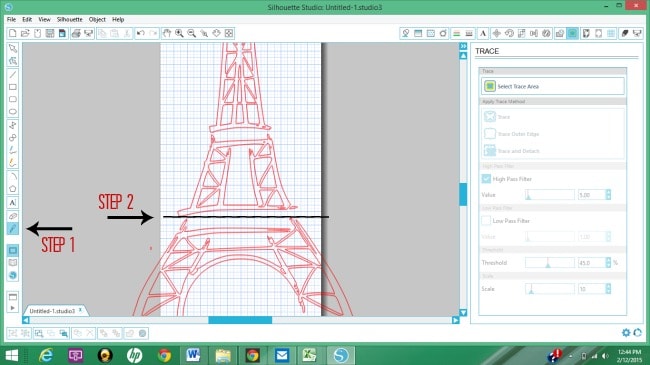
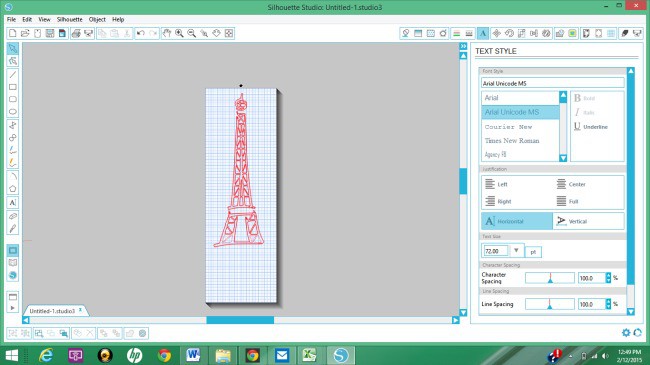
Next, is using the knife tool to cut the image. I placed a cut at the bottom of the tower and it just worked out perfectly that there was a gap in the design and that is right where I could cut and fit that piece in the bottom drawer. Dumb luck is my best friend! The best tip that Suesan gave me was to use the shift key while using the knife tool. This will make your cut line perfectly straight.
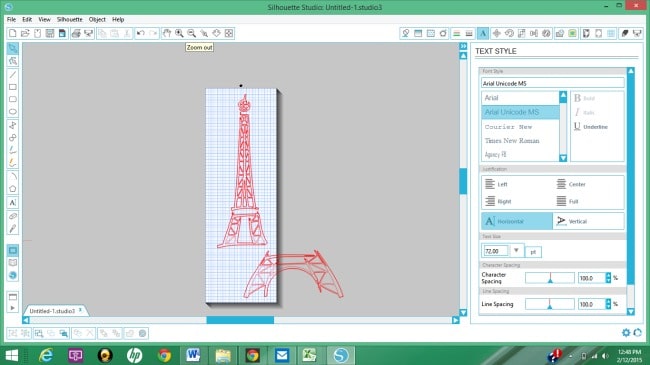
Now I have 2 separate images that are needed to fit on the dresser. I decided that it would be easier to cut the top piece as one large piece and place on the drawers as one piece. I figured this would be easier lining up than having all those separate pieces.
I saved my images as 2 separate files and cut the bottom stencil first.
I like to use my cutting mat to cut my vinyl. I find it does a more precise job and my vinyl does not slip around during cutting. Yes, I found this out the hard way, thankfully not on this project. When I make a one time stencil, I use Con-Tact Paper instead of Vinyl. Contact paper is less expensive than Vinyl
. I usually use a colored contact paper to make the stencil and I use a Clear Contact Paper
to transfer the stenciled image to my project.
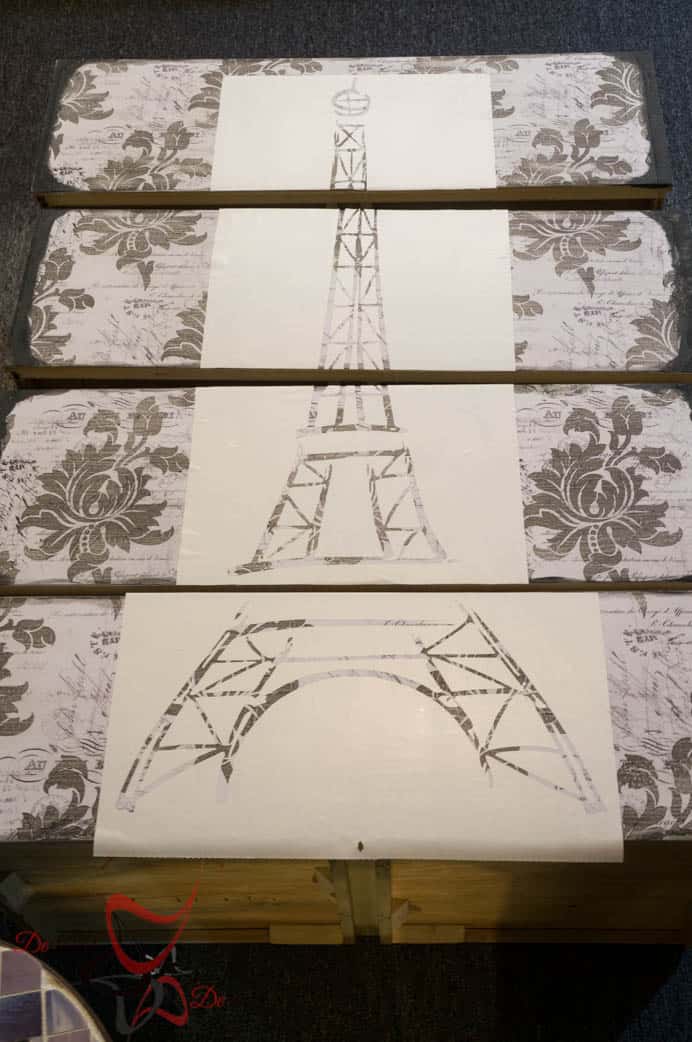
You can see how I separated the upper stencil after I placed it on the drawers.
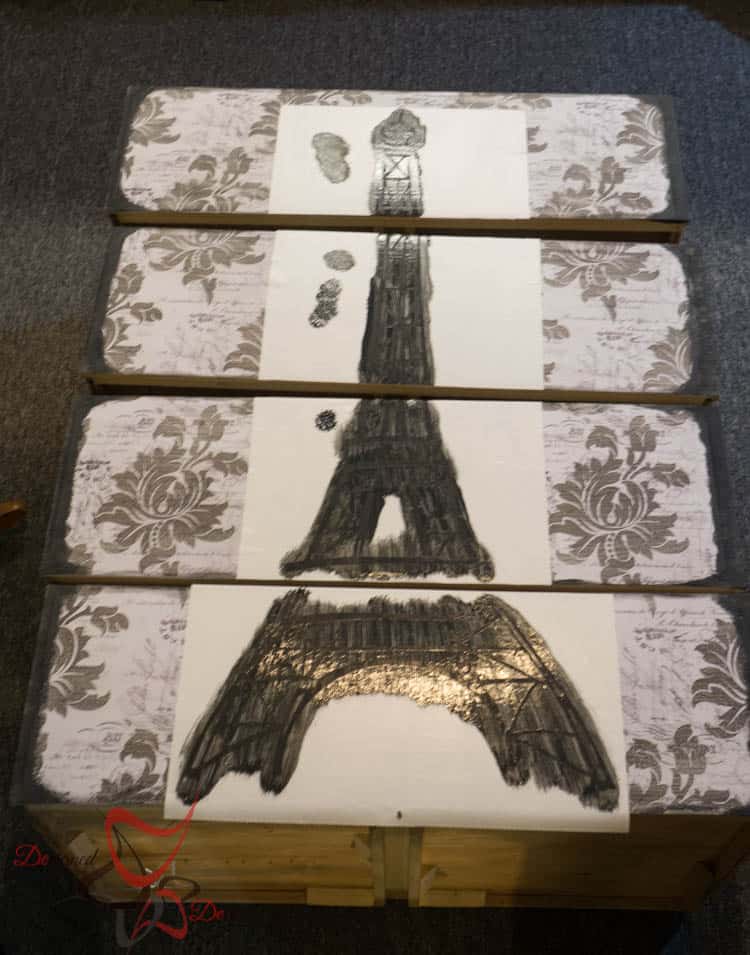
I applied 2 coats of Basic Black One Step Paint for the stencil. My advice is to apply a coat of matte sealer on the paper so the adhesive from the vinyl does not tear the paper. Once I added the Paris Script, I lightly sanded to distress the wrought iron paint and sealed with another coat of matte varnish.
I have seen others do a large image on furniture by projecting the image on the furniture and hand tracing. Ugh, no thank you! You need a projector, patience and a steady hand(none of which I have). I prefer to use the stencil method that way I can easily stencil on the paint without having to keep a steady hand! Now that I figured out how to do these large stencils this will be a favorite way for me to transform some more furniture pieces.
Make sure you sign up to receive my FREE Workshop on how to Prep Furniture the proper way!
You also might like these projects:
Join the DD Community!

Join the Designed Decor Community and receive weekly free tips on DIY home projects, painted furniture, decorating, and much more.

Szczek Szczekowych says
wow! Really awsome! Such a beautiful stencils…!
Thx so much for examples 😉
Besides, after that all, I’ve maked stencils as multiple pages… it was looking really amazing 🙂
My next try will be like yours….I really wanna try many ways 🙂 will see which will be the best 🙂
Juanita says
Such a great tutorial. I do hand painted timver signs, and old school, printing it out from word, shading lead pencil on the back, tracing and then painting it – you have NO IDEA how i am dying to get my hands on a cameo
Anna radzinsky says
this is great! what settings on the silhouette would work best for cutting contact paper?
Designed Decor says
I use the same settings as I do for the vinyl that is set in the Silhouette machine.
kyle says
Hey there! I am new to the sihloutte world! I’ve been trying to cut a large 36 inch stencil using contact paper and it keeps bunching up. Any idea why? Now, it doesn’t do it when I use a mat but I’m just doing letters, I can’t seem to get the cut or knife function to work in between the letters. Any advice??
Designed Decor says
Kyle, I always use a mat to cut contact paper. I never get a good cut without using the mat. I will also slow down the cut so it moves slower and sometimes that helps. There is also a great Facebook group called the Silhouette Challenge, I have always found them to be extremely helpful with technical questions.
Audrey says
Love this idea and I have an old chest that I wanted to experiment on. Is it possible to just buy a stencil from you instead of investing in a Silhouette machine?
Thanks, Audrey
Designed Decor says
Audrey, I don’t do custom stencils at the moment. If you look on Etsy.com there are many shops that do custom stencils. Just type “custom stencils” in the search bar.
Marianne says
Beautiful, very creative. What programme did you use for the stencilling? Is it Microsoft Word?
Designed Decor says
Marianne, I used my Silhouette Cameo to make my stencils.
Betty L says
What did you use for the design on the drawers, behind the Eiffel Tower?
Designed Decor says
Betty, I used wrapping paper. You can read about it here: http://wp.me/p30WfZ-35n