Have you ever fallen in love with a piece of furniture? You know that feeling, you can’t stop thinking about it or have that warm fuzzy feeling of how it would look in your home. I have and I fell hard for this one and let me tell you the lessons I learned from this antique apothecary cabinet makeover.
This post contains affiliate links. Click here to see my full disclosure policy.
In the fall of 2014, I had a fun vintage market trip planned with my friend Karen. We attended the Springfield Ohio flea market on a Friday. We shopped, we ate, we laughed and we were rained on, so we decided to go to the indoor antique store right around the corner to wait out the rain, and that’s when I saw her, I stopped in my tracks, we made contact and I rushed right over.
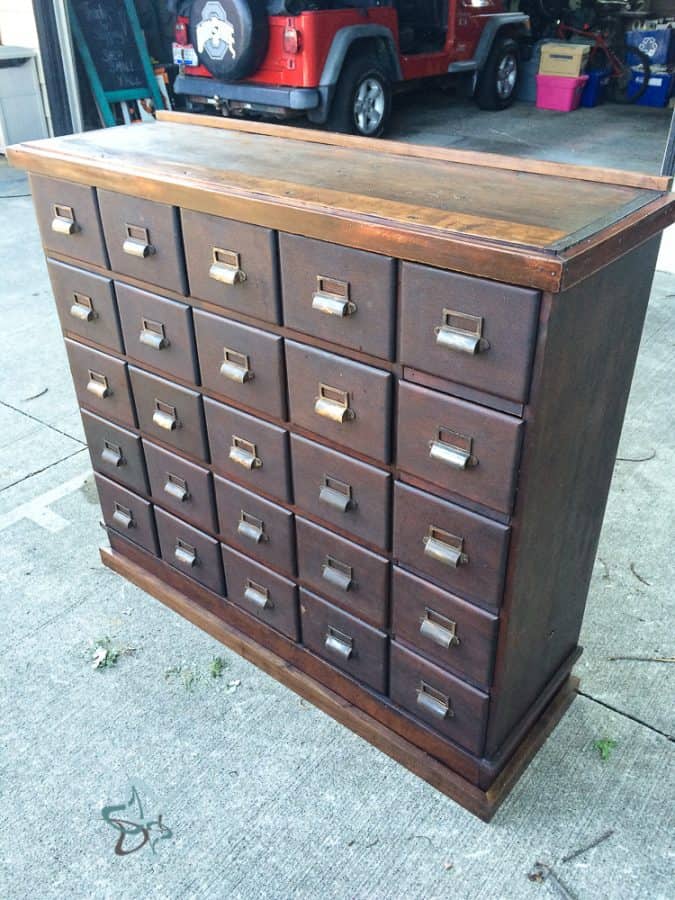
I had to touch her and pull open some of her drawers. Her aged beauty was awe-inspiring with all of her flaws(beauty marks). I took a few pictures and looked at her price tag and I walked away. I was in love with this beauty and I wanted her badly, but I am pretty frugal and could not see spending that much on an old piece of furniture.
It’s a curse to repurpose furniture because I am always wanting a bargain so I can invest my time to make her beautiful again and also make a profit for my time and talents, so the frugal side comes out whenever I make a second-hand purchase.
The next day we attended the country living fair. We shopped, we ate, and we laughed all over again and this time we did not get rained out. I could not shake all the thoughts about this apothecary cabinet, I even talked about it endlessly to a few of my other blogger friends from the fair. They all told me if you love it that much, spend the money and go get it.
I texted Mr. DD and told him what I found. He gave me his blessings and also stated, “it’s coming out of your budget so you better sell a few more items at the shop.” I called the antique store to make sure it was still there and away Karen and I drove to go get my apothecary cabinet, it was a 45-minute drive in the opposite direction of home.

Have you ever purchased an item and then had buyer’s remorse? You know, that feeling of regret that builds in your stomach, you know you can’t return the item and get a refund, so you question if you made a good buying decision or a foolish one. Well, I never had that feeling with this cabinet. I brought her home, unloaded her, and cleaned her up and never once regretted my decision to go back and get her.

Lessons from a Vintage Apothecary Cabinet
So the first lesson I learned, is to wait and don’t buy any large ticket item on the spot. Give yourself some time to make a rational decision and not an impulse buy. I made this buying decision the next day.
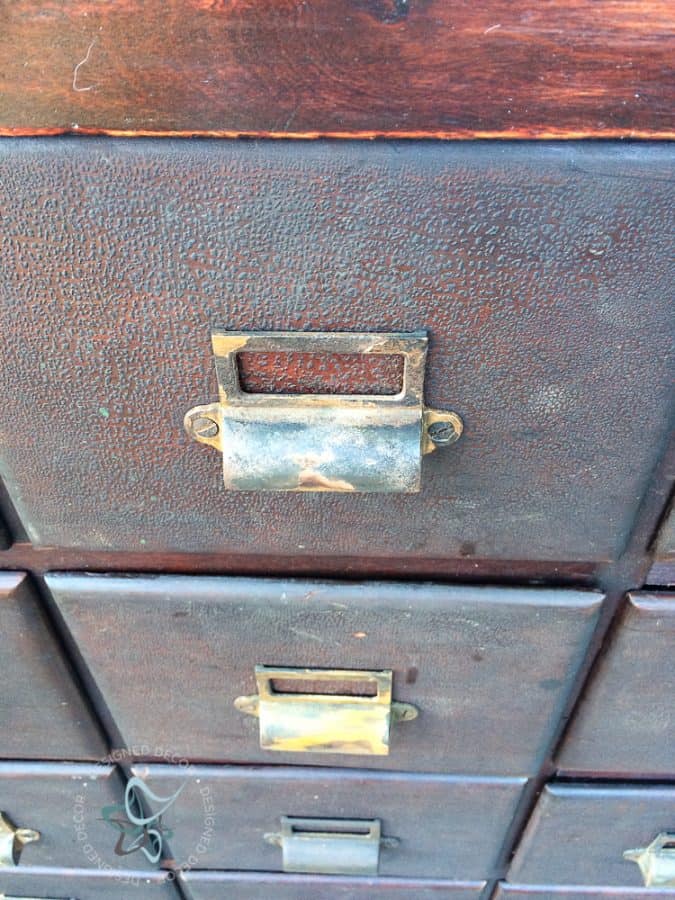
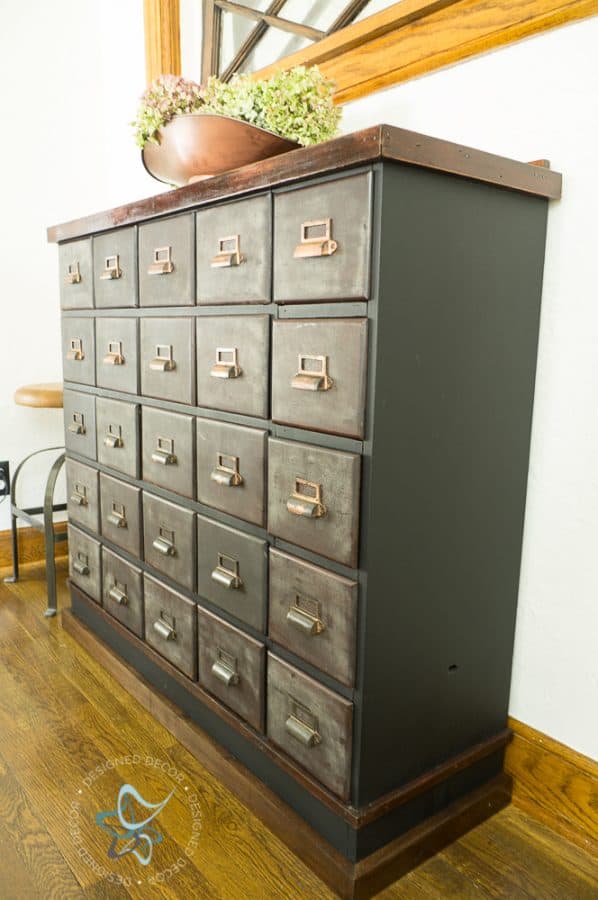
Once I started to clean the cabinet to begin the apothecary cabinet makeover, I discovered some very interesting things. She is an old cabinet, I can tell this by the aged drawer fronts. The drawer fronts have that old bumpy aged varnish, I think that is the technical term. I removed all the drawers to give them a good cleaning and was placing them back and discovered some drawers are slightly bigger than others. Now some of the mysteries started to reveal themselves. The 5 drawers on the right are the ones that are slightly smaller.
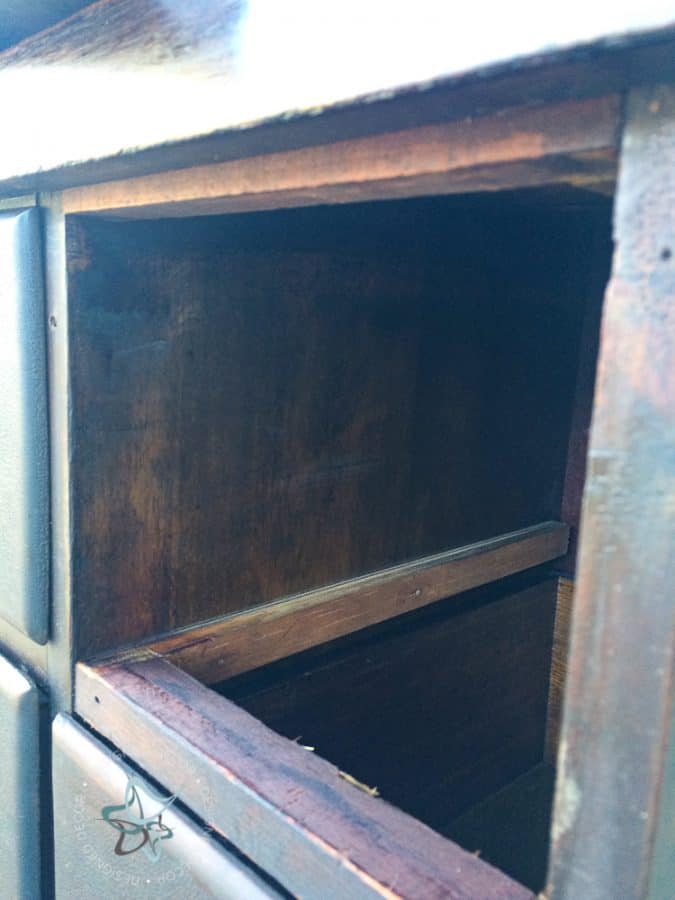
I also noticed the smooth finished wood on the left inside compartment of the far-right drawers. The others were unfinished.
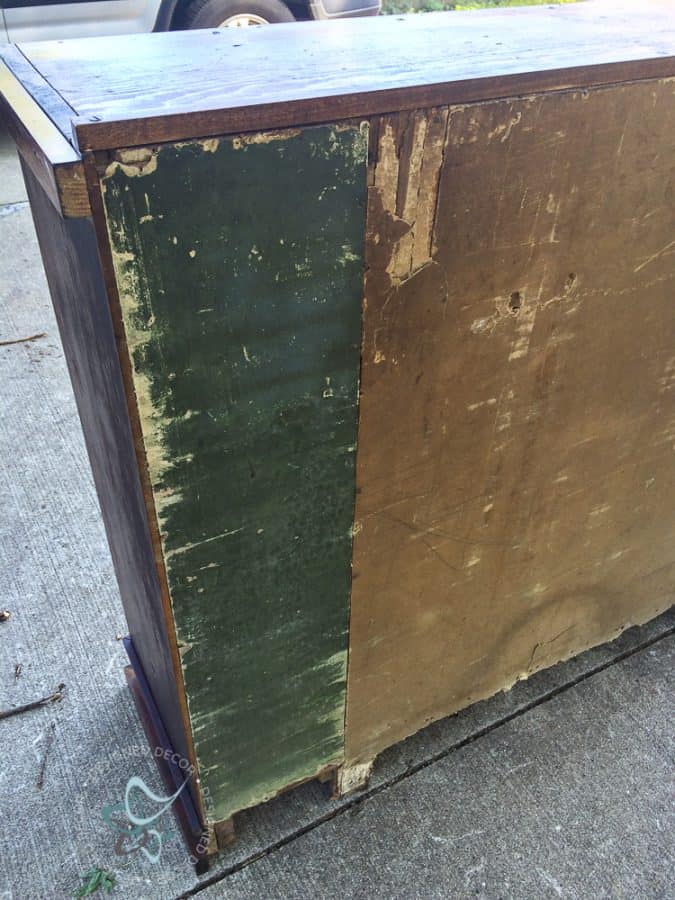
The back of the apothecary cabinet has an addition of backing, so this leads me to believe that it was originally built with 4 rows across. You can also see where the original foot base was and the other side does not have this extra foot base. The last row was probably added right away because all the drawer fronts have the same aged finish.
Whoever added the row must have built a new base and top because they are one complete piece of wood. I would love to know the story on this cabinet and why the addition of the last row, was it because it looked better with 5 rows, or was it because of function and they needed more drawers? The mystery will never be known but I love imagining my own story for this piece of old furniture.

The second lesson I learned, don’t jump the gun and refinish a piece of furniture right away. Let it sit in its space and let it speak to you, listen for its purpose and the look that will work for the furniture and the surroundings. I let this cabinet sit for 3 years before doing a small makeover. I am glad because it would have looked different if I had done the makeover 3 years ago. My original makeover idea was not this one and I KNOW I would have regretted the first idea.
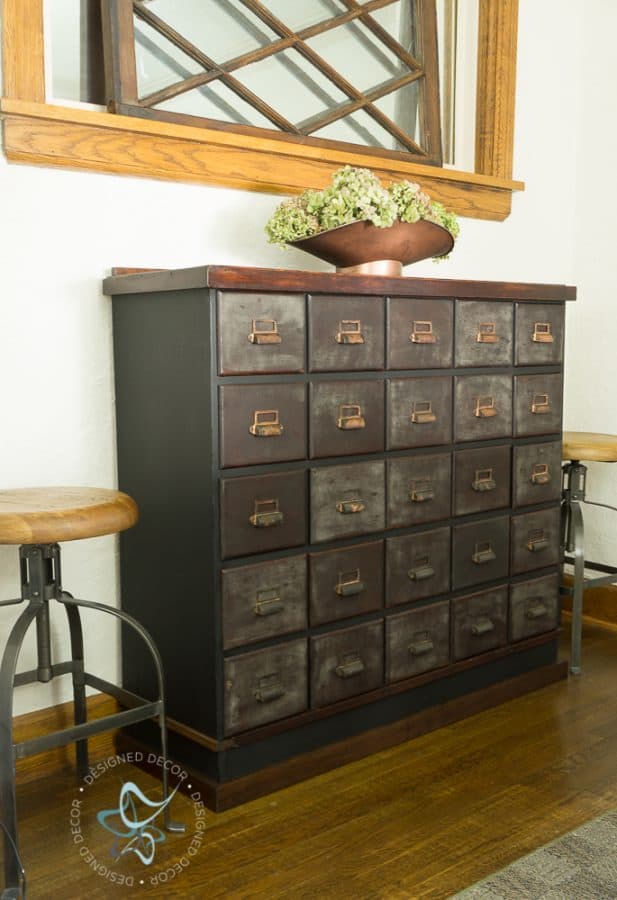
Finally, I decided how I wanted to complete the apothecary cabinet makeover. Since I loved a lot of the original natural features, I kept the top and bottom wood pieces untouched. I love wood tones on my furniture pieces, I think it keeps the original character and also gives it warmth. I painted the base of the cabinet with chalk paint, using One Step paint in black by Amy Howard.
If you need help on how to paint furniture, I teach online furniture painting workshops. I have many different furniture painting techniques for all skill levels.
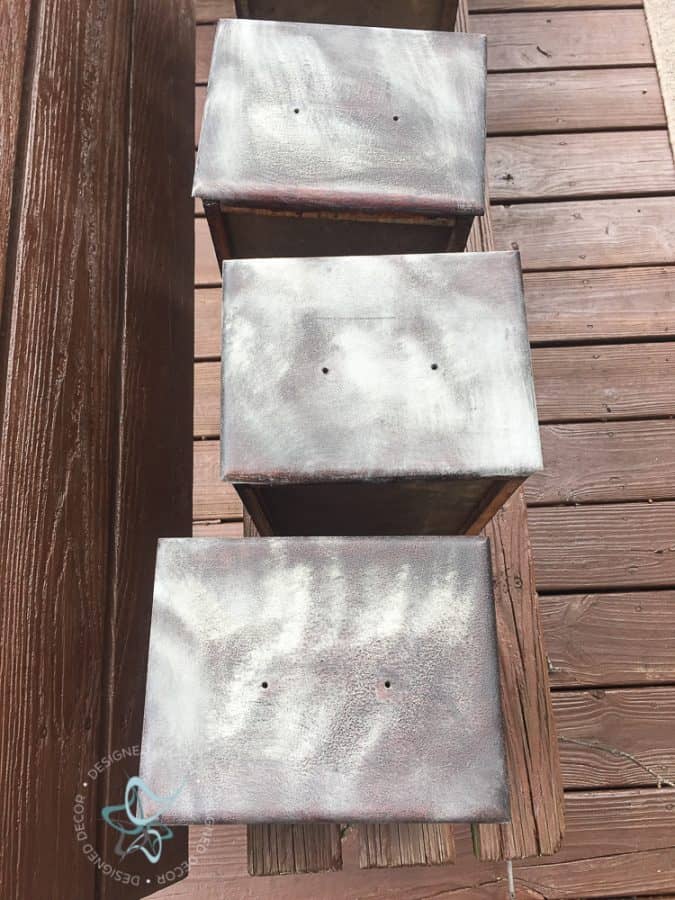
The aged look on the drawer fronts is one of the features that I loved about this antique cabinet, so I wanted to enhance that look. First I applied clear wax and then applied antiquing dust to give the drawers an even more aged look. The dust of ages worked perfectly on the drawers since they were not smooth surfaces. All that dust clung to the bumps.
Finishing Furniture Hardware
Next was deciding on the hardware finish. Do I paint them or keep them as they were with a natural patina finish?
I went back to the second lesson about not being too quick to paint them and make them uniform. I decided to keep them as is and live with them for a while and see if I change my mind.
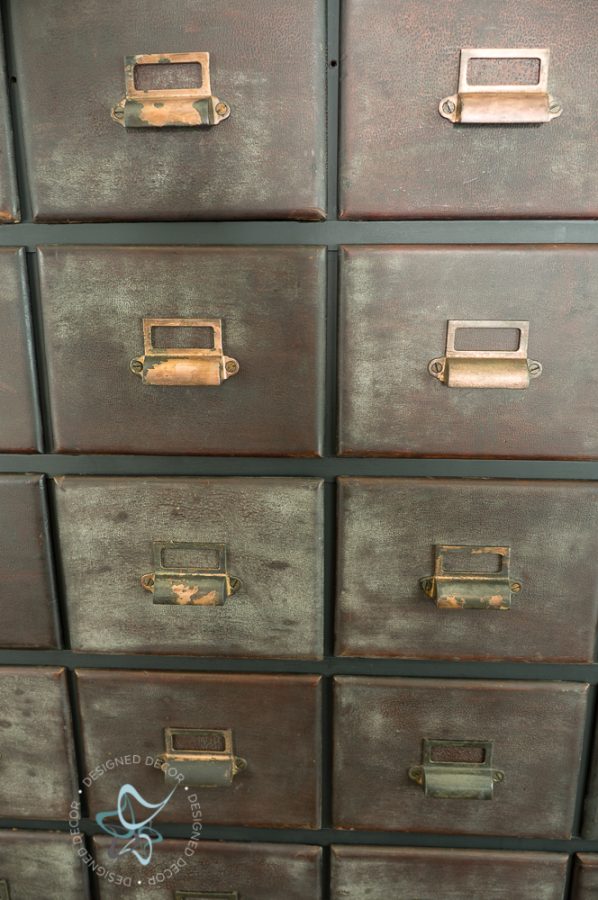
The hardware was a hard decision to keep as is or paint to make them uniform. As you can see, I kept the hardware original. After I cooked my hardware (I will tell you all about that in a few) to remove the years of grim, I discovered that they had copper plating on the hardware and some of that plating was wearing off and exposing the metal. I polished them up and left them as they were.
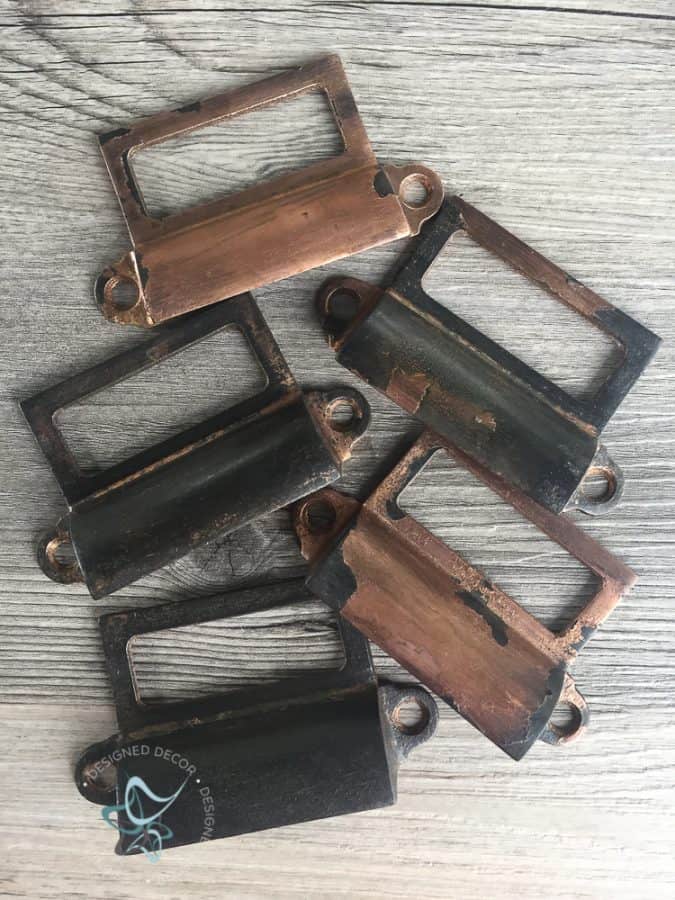
For those of you who do want a copper finish, take a look at this video. I painted a metal scale bowl to look like aged copper to match the hardware on my vintage apothecary cabinet.
Cooking hardware you ask?
I learned this trick from watching Rehab Addict. In one of the episodes, Nicole placed her hardware in an old crockpot and left them to cook overnight. This will remove layers of paint, grease, and grime from the hardware. I tried it on some old door hinges in my house that had paint on them and it worked. The layers of paint bubble up and made it easy to remove. I have been using this method ever since and will always recommend it to others.
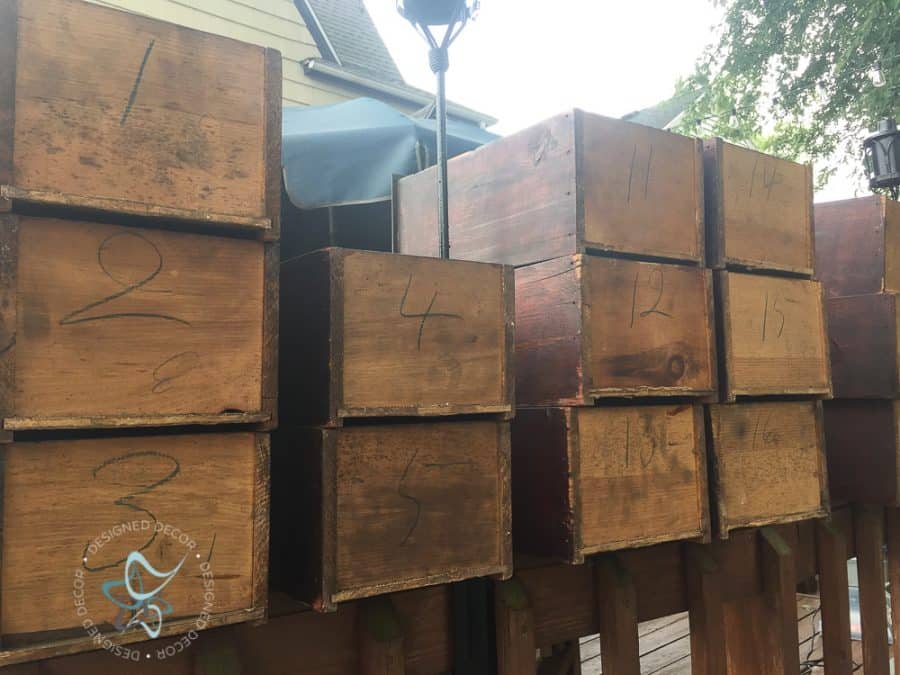
The other very interesting thing about the cabinet was the drawers. The drawers were numbered on the back and it’s missing 6 through 10, they also numbered right to left, someone does not know how to count. I don’t know about you but I would start my numbers on the left side.
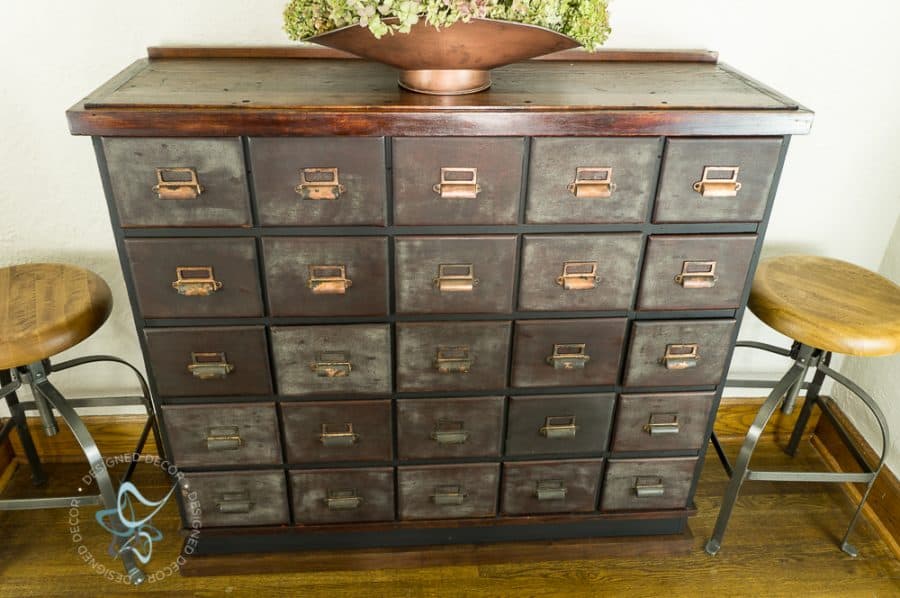
I love my antique apothecary cabinet makeover and she will be staying with me for a very long time. No regrets for spending the extra money and going back to get her. So remember the 2 lessons ~ Don’t make large purchases on impulse and wait to refinish a piece of furniture.
What is your favorite piece of furniture or have you ever regretted buying a certain piece of furniture and why? Leave me your comments below!
Pin It . . To Remember it!
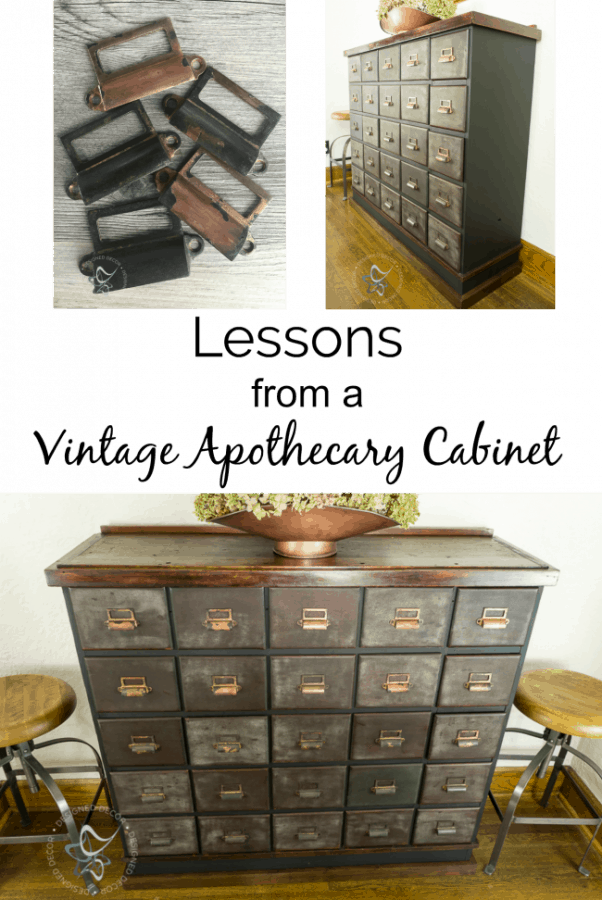
Check out these other great furniture makeovers, tips, and workshops
- Classy Black Painted Furniture
- Patina Wine Bar
- Insider Furniture Painting Tips
- Using Gel Stain on Furniture
- Upholstered Wood Dining Chairs

Join the DD Community!

Join the Designed Decor Community and receive weekly free tips on DIY home projects, painted furniture, decorating, and much more.
Mar says
But now I’m dying to know what you paid!1?! 😀😀😀
And I’m wondering if the cabinet used to be much longer and was cut down. That would maybe account for the missing numbers on the back?
Looks amazing!!
Designed Decor says
Mar, I never thought of that idea! Never the less I would love to know its story! I paid $800 for it- To some that may not be over priced in their markets.
Ekaterina says
Hey! This is a Beautiful!
What paint color did you
Used for the body and the sides of the dresser? I
Did see you write black by Amy Howard but the color looks a little greenish to me. Thank you 🙏
Designed Decor says
It is the black from Amy Howard. All screens may make the photo look different.
Robbie93 says
This is beautiful! What kind of items do you store in the drawers or is it all for decoration?
Designed Decor says
I do store some things in it. Right now I store my yoga blocks and hand weights along with candles and various smaller household items.
Most of the drawers are empty until I figure out what is best to store in them.
Dynelle Gibson says
I love this so much. Question… when cooking the hardware in the crockpot, do you add water? How exactly do you do this technique? Details please. 🥰😎👊