Have you ever gazed at your wood dining chairs and felt the urge to infuse a bit more personality into them? Upholster wood dining chairs with easy tufting may be just the magic touch they need! Now, don’t fret if you’re new to the DIY scene; upholstering is less intimidating than it sounds and can be incredibly fulfilling.
Imagine taking a seat on chairs that boast both comfort and your unique flair. With the right tools, some patience, and a bit of creativity, you can transform those sturdy wood dining staples into beautiful pieces that reflect your taste and style. Ready to forge ahead on this rewarding venture? Here’s to making those dining chairs not just a place to sit, but a testament to your handiwork and aesthetic zeal!

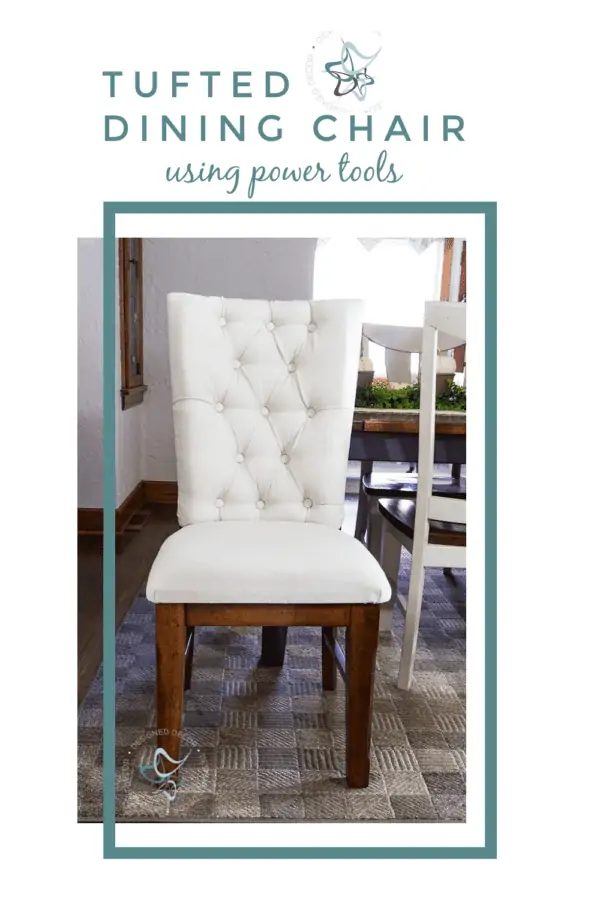
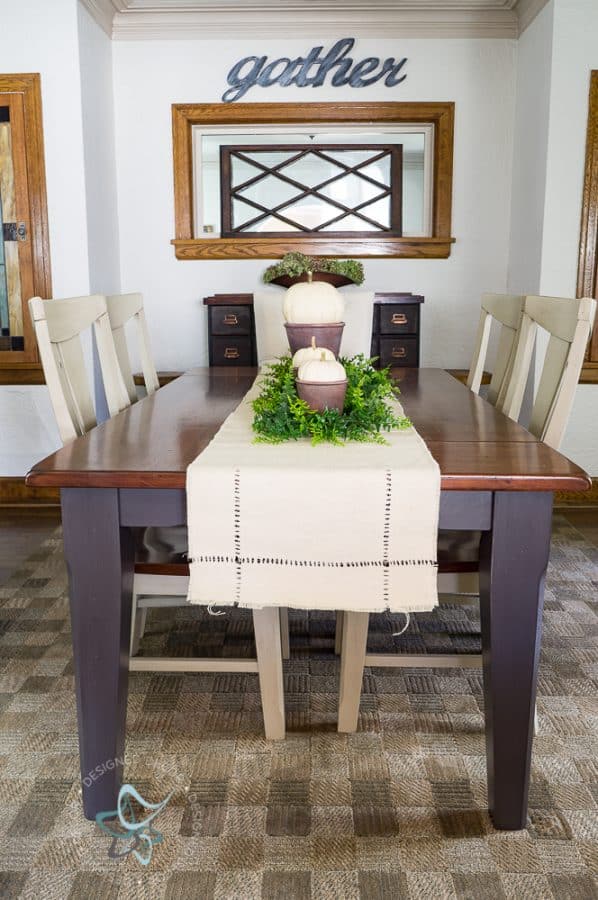
I envisioned my table having a few upholstery chairs like this inspirational photo above from Pottery Barn. My dining room was too dark with all the wood tones in such a small dining room area. As you can see in the photo below, my dining room had the start of the charter but the table was lacking the comfort that I desired.

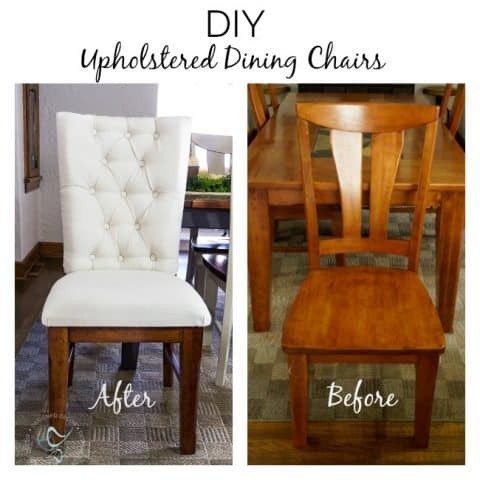
I kept telling myself that I could upholster 2 of the existing wood chairs and paint the rest. Painting the dining table was the easy part, the upholstery, not so much. I went back and forth on my decision to DIY upholstered wood dining chairs, because what if I failed, and ruined 2 of my chairs?

This post contains affiliate links. Click here to see my full disclosure policy.
I decided I would forget the whole DIY upholstery and bought some tufted dining room chairs similar to those above from Wayfair. After I purchased them, brought them home, and put them together and they sat looking so pretty in my dining room.
Now, I had the dilemma of having 10 dining room chairs because my table had 8, and now I just added 2 more and had no room for 10 chairs. What was I thinking?
Guess what happened? I changed my mind and decided I did not need the extra chairs and I would use what I had. Look at it, I did it, They turned out pretty good for my first attempt! Now, let me show you how I did it!

Full Disclosure – If you have never taken on an upholstery DIY project, I would not attempt this one as your first one. This was a challenge for me, and I have done many upholstery projects.

How to calculate fabric for your upholstered chair project
I found this great post from the online fabric store, Calculating Fabric Yardage for your Project. They also share some upholstery charts with images of furniture styles with the yards needed for that type of furniture. It is a great resource that will help you determine how much fabric you will need for your upholstery project.
My chair took slightly over 1 yard of fabric. This will vary based on the width of the fabric you choose.
How to Upholster Wood Chairs
Step 1 – Make a Hardboard Backing

This post contains affiliate links. Click here to see my full disclosure policy.
Start by making a cardboard template from the shape of your chair’s backing. I placed cardboard over the chair back and traced the outside edges to get me started. Cut out the cardboard template an inch inside the template lines. You want your cardboard template to fit just on the inside of your chair frame.
Place the cardboard template on a 1/8-inch hardboard and use a jigsaw to cut out the shape. My chair backs had a curve to them, so I needed the thinner hardboard so it would curve with the chair. If you have a straight-back chair, use thicker hardwood for the back. If you are lucky enough to have a solid back chair, omit this step.
Step 2 – Cut out foam cushions and fabric

Now, you are ready to cut out the foam cushions and fabric. Cut the foam to the exact size of your template. Place the hardboard back and chair seat base on the foam and trace. Cut the foam shapes using an electric knife. I find using an electric knife is much easier than using hand scissors.
I used a 2-inch foam , I prefer to use a 2-inch as it is thicker and looks more luxurious than the 1-inch foam cushions. When cutting out the upholstery fabric, measure the width and add the depth of the foam seat cushion and chair back cushion. Also, add an extra 2 to 3 inches. You want to make sure you have enough fabric to wrap around, and the tufting also adds to the fabric needs.
Example: My chair back measures 20w x 24h. I added 4 extra inches for foam and 3 extra for wrap and tufting. I cut a 27w x 31h piece of fabric for the front.
Step 3 – Attaching the Hardboard to the Chair Back

Attach the hardboard template to the back of the chair using the appropriately sized wood screws for the thickness of your wood template and chair.
Step 4 – Attaching the Foam to the Chair

Using a spray adhesive, attach the foam to the seat base and the hardboard on the chair’s back. I recommend that you take the foam outside and spray it. Quickly bring it inside and adhere it to the chair base.
Step 5 – Create the tufting layout
Remember, I stated that my chair’s back was curved, so I needed to tuft the chair in order to keep the fabric flat against the chair’s back. If you have a flat-back chair, you can omit the tufting.
The easiest way to lay out the tufting marks was to find the center horizontally and vertically. I measured and marked the tufting spots from the center lines(5 inches). I thought my chairs would look best with 5 rows. Your chair may be a different size, so you will need to determine your measurements on your chair.
Using scissors, cut an “X” over each tufting mark. The x is done so you can feel where to place your screw when tufting since you place batting and fabric over your marks.
Once you are done marking and cutting the holes for tufting, place both the batting and fabric over the foam.
UPDATE: I recommend that you treat the new fabric before adding it to your chairs. I used a fabric repellant on the drop cloth on my chairs after they were done. Now, I have a small rust spot on the back where the fabric tack must have been wet from the fabric spray. So, AVOID the whole thing by treating the fabric of your choice before you upholster. I am just trying to save you the work of replacing the fabric later like I need to do. UGH!
Step 6 – Begin the Tufting Process

I use these 3/4-inch washers and 1-inch wood screws to do my tufting. Yes, you heard that right, washers and screws to do tufting! If you would like more detailed instructions on this tufting process, stop over to read my DIY tufted coffee table bench. I have the complete instructions on how to do tufting the simple way with a screwdriver on that post.
I use power tools for tufting for a couple of reasons. First, I find it much easier than having to use the needle and thread method. Second, if your tufting thread breaks later on, it is not easy to fix the tufting. Using this power tool tufting method is a great way to save you time and headaches long term.

Since I did not have a solid back, I had to add a few wood pieces to the middle tufting row so those screws were secure. All but 3 screws went directly into the chair wood, so there is no going back now!
Step 7 – Staple Fabric to the Back Side of the Chair

Now you are ready to staple the front upholstery to the back of the chair. Please refer to this Tufted Coffee Table Bench, on how to carefully adjust the tufting on the front before stapling the fabric in place on the back. This is an important step.
Step 8– Attaching the fabric to the back of the chair

Place the fabric edge, inside out, at the top of the chair, in the opposite direction. Place a thin cardboard strip on top of the fabric or use an upholstery tack strip. See below if you want to make your own cardboard strip. Staple the cardboard and fabric in place. The cardboard creates a clean edge when flipping over.
If you do not do this step, you will notice the staple line. Trust me; use the cardboard strip to create a clean line.

I made my cardboard strip, or you can purchase an upholstery tack strip. To make a cardboard strip, simply measure the top of your chair and cut a straight line using a straight-edge ruler.
Step 9 – Attach Flex-Grip to the Side of the Chair

Staple flex-grip (tack strips) onto the side of the chair. The direction of the flex-grip is important, it needs to be placed on the open side facing out to the edges. See the picture above because I placed it incorrectly the first time and had to remove it and do it again. Learn from my mistakes.
Step 10 – Securing Fabric to the Back of the Chair

Place the batting on the back side of the chair, pull down the flipped-over fabric, and begin to secure the fabric into the flex-grip. The fabric is stretched around the metal teeth and slowly begins to push it closed.

Before completely closing the flex grip, trim off the excess fabric and tuck it into the flex-grip.

Tip: I used an envelope opener to tuck the fabric into the flex grip before and after trimming the extra fabric.

Gently tap the flex-grip closed.
Step 11 – Finish the Bottom Seat Frame

Finish the bottom edge by folding the extra fabric around and under the seat frame. I folded the fabric under itself to make a clean edge around the wood frame.

Again, I folded the fabric to create a clean edge before stapling the fabric to the underside chairback.
Step 12– Making the Button Covers

Using a button cover kit, make buttons and glue over the washers using E6000 . Again, click here for detailed tufting instructions. The benefit of gluing on the button covers, if one pops off, you just glue it back in place. With traditional tufting, if a button comes off, the tufting thread breaks, and that is not as easy as gluing on a button cover.


Here is a DIY card to make it easy for the steps to be in one place, and you can print the card to have with you as you take on your upholstery project.
Upholstered Wood Dining Chairs
Turn a plain wood chair into an upholstered beauty.
Materials
- Upholstery Fabric
- Foam Core
- Batting
- Board Backing
- Screws
- Washers
- Flex-grip
- Button Cover Kit
- Cardboard Strip or Upholstery Tack Strip
- E6000
- Spray Adhesive
Tools
- Scissors
- Hammer
- Drill
- Staple Gun
- Saw
- Marker
- Measuring Tape
Instructions
- Make a cardboard template for the chair back. Place that template on 1/8 inch hardboard and use a jigsaw to cut out the shape. My chair backs had a curve to them so I needed the thinner hardboard so it would curve with the chair. If you have a straight back chair, use a thicker hardwood for the back. If you are lucky enough to have a solid back chair, omit this step.
- Cut out the foam. Place the hardboard back and chair seat on foam and trace. Cut the foam shapes using an electric knife or scissors.
- Attach the hardboard to the back of the chair using the appropriately sized screws for the thickness of your wood and chair.
- Using spray adhesive, attach the foam to the hardboard on the chair back.
- Layout the marks for tufting. If you have a flat back chair you can omit the tufting.
- Begin the tufting process.
- Staple front upholstery to the back of the chair. Carefully adjust the tufting on the front before securing the back. This is an important step.
- Place back fabric on top of the chair and place a thin cardboard strip on top of the fabric. Staple the cardboard and fabric in place. The cardboard creates a clean edge when flipping over.
- Staple flex-gripon to sides of chairs. The direction of the flex-grip is important, it needs to be placed on the open side facing out to the edges.
- Place batting on the back, pull down fabric and begin to secure the back fabric in flex grip.
- Trim off excess fabric and tuck into the flex-grip.
- Gently close the flex-grip with a hammer.
- Finish bottom edge by folding the fabric under itself to make a clean edge around the chair back.
- Using a button cover kit, make buttons and glue over the washers using E6000
- Upholster the seat cushion.
Notes
See blog post for details on tufting with power tools.
Would I do it again? Yes, if I already had the chairs. It was a difficult process, so I would recommend tufting something else like this DIY~ Tufted Coffee Table Bench(Opens in a new browser tab) first.
I am so pleased with the finished chair and how these tufted dining chairs turned out. They are not perfect as this was my first attempt at upholstering wood dining chairs.
Make sure to stop over and see how I painted the old finish on my dining table with this Dining Table Makeover. You also might want to read up on 5 easy tips for picking the perfect accent chair.
Have you taken on a DIY project like this?

DeDe Bailey
DeDe Bailey is the artistic mastermind behind Designed Décor and The Puzzle Table. With a rich background in home décor retail, she has transformed her website into a platform driven by a profound passion for helping individuals craft spaces they adore. As a self-taught furniture painting artist and thrift decorator, she loves sharing her knowledge and empowering others to beautify their homes through furniture painting and thrifting. When she isn’t sharing her wisdom on the Designed Décor blog, DeDe is occupied with showcasing her ingenious jigsaw puzzle table design and expanding her short-term rental located in NE Ohio.
Get your FREE ELIMINATE BRUSH MARKS GUIDE => How to Eliminate paint brush marks
Roya says
Thank you for sharing this. I am in the process of redecorating and my husband doesn’t want to throw out our existing dining room set but has agreed to updating it. I would like to avoid tufting and add some sort of decorative trim instead. Can I just start with batting or do I still need a piece of wood for the chair back?
Designed Decor says
I used the wood as I needed something for my tufting screws to drill into. You wont need the wood if you are not doing the tufting. Best of luck with your update.
Bogale says
I want to make this project please send to me full of the documents and design because I couldn’t download it
Chris says
Great work! Are there any considerations you can think of for using faux leather?
Designed Decor says
Chris, Yes, you can use a faux leather material in place of the fabric. You just want to make sure the material is not stiff and is easy to work with.
Jackie Wallace says
These chairs are so cute! I love them so much. I have been looking for something like this to freshen up our kitchen! We are doing some kitchen cabinet refinishing next week and after that, I would love to try and make these. Thanks for sharing!
Ruth Trou says
I am so excited to follow this tutorial for my wood chairs!! I’m combining households and this will help us keep my dining set and make it fit his house!!!
Designed Decor says
That is so exciting to keep what you have and make it work. Good luck with your DIY projects.
Jean says
You did an awesome job on your chairs! They look great!
Designed Decor says
Thanks so much, Jean!
Debra Evenson says
This is a great tutorial. Thank you for all the hard work you put into it. I never would have thought of this. Brilliant.
Marquetta says
Is there a video of how to do exactly what you did? You did a very professional and beautiful job.
Designed Decor says
No sorry, I did not do a video as it was my first attempt so I didn’t feel confident to do a video for my first attempt. If I tackle something like it again, I will certainly consider a video.
Patrice says
Do I have to use foam and batting? Do I need cushion for the back of the chair? Thanks in advance
Designed Decor says
Hi Patrice, I like to use foam and batting, the batting makes it smoother and adds more cushion. If you are meaning the back of the upper part of the chair, you typically don’t need to add the foam depending on your chair design. However, each chair is different so without seeing the exact chair I can’t be certain if you can omit the foam or not.
Allantria says
This is so beautiful! I want to redo chairs that was just given to me. Nervous to try and got confused a little on the Tufted process. Definitely would like to have this look though
Designed Decor says
Planning the layout is the hard part- using a drill and screws is the easy part of the tufting.
Daisy says
I been looking for a tutorial on how to do the back of my chairs and ur chairs are similar like mine I did the seat but now I want the back. I will try and see how it turns out.
Designed Decor says
Good luck and please let me know how you did.
Sharon Stanton says
I love what you did, I lost my brother ,l have his old chairs, but I just I just couldn’t ever get rid of them, so thanks to you I’m going to reapolster them. I’m so excited.I’ll let you know how it turns out, wish me luck!
Designed Decor says
Hi Sharon, I am so touched to have been your inspiration with using your brother’s chairs. Please share with me your chairs when they are done. Good luck with your project!
Sharon stanton says
I love what you did with dining room chair, I’m going to try, wish me luck!
Renitta Thomas says
I have chairs very similar to the ones in the photo and not only looking to reupholster the seat but create a backing. My question is how much fabric did you use for the seat and the back of the chair? I am trying to measure but configuring it into yards so I have enough for the seat and the new upholstered back. Love your post and it is exactly what I was looking for I am just not sure of how much fabric I need to order.
Designed Decor says
You need to measure each section add extra inches for the thickness of your padding and allow a few extra inches all the way around for the tufting and attaching the fabric. So an example would be a seat being 17 x 20 with 2-inch foam padding with no tufting. You would need to add 2 inches all the way around for the padding and 2 extra to staple onto the bottom. The fabric needed for the seat would be 24 x 28. I would allow for another 2 extra inches for the tufting. I will be updating this post on the amount of fabric I used for this chair, as others have the same question. Thanks and good luck
Ashlee says
What was the approximate price for one chair to completely upholster like you did?
Designed Decor says
Ashlee, it is hard to know the price for one since so much of the supplies I had to buy more than I needed. If you find the flex-grip in smaller amounts you could redo a chair for under $40 or even less if you find used fabric for a steal. Sometimes you can find used shower curtains or draperies at a thrift store and use that as your fabric.
Eva Guete says
Just gorgeous and perfect! I have been searching loooong for a tutorial just as perfect as yours! Fall is here and I cannot afford the table I want just yet, and I am a bit attached to mine, I will start this tutorial tomorrow and hope its as beautiful as yours, thank you for sharing!
Designed Decor says
Eva, You will have to let me know how it turns out!
Debra says
Very lovely. And thank you as I have an upholstery project I started …. months ago and became dejected as it just wasn’t working out the way I had hoped but, reading your steps identified where I had gone wrong. I plan to pull the chair out and give it some love.
Designed Decor says
I am so glad that it helped you. I hope you can successfully finish your project and love the labor of your work. Good luck!
norma says
Ater a long search on how to do this specific diy I found yours and it looks really good. I am completely new at this kind of projects, so my question is how do you treat the drop cloth? I know it said that you used a spray but is that all or is there more to it?
Designed Decor says
Hi Norma,
I am so glad you found this post. I love how my chairs turned out. Remember all chairs will be different but this post gives you the basic how too. Yes, I just used the fabric sealant spray, which should be done before you recover the chairs. You can reapply according to the directions, which I would recommend for chairs that are heavily used. I am getting ready to reapply the spray to the front of my chairs since it has been a while since I did it the first time.
Maddie says
They look great! Excited to try it myself. How much material would you suggest per chair?
Designed Decor says
I used a drop cloth as it would easily do 2 chairs and more, and it is a lot cheaper than furniture fabric. You would have to measure your chair and figure out how much material you would need as all chairs are different sizes.
Amy says
Inspired!! Thank you so much for sharing the detailed process.
Designed Decor says
You are welcome!
Emmy says
Wow, what a beautiful job you did in this chair! I was wondering if you did all your chairs like this and if so, how many you did and how long it took. I am considering doing this to my dining chairs, but I have 6!! Thanks for your help, and your post!
Designed Decor says
Hi Emmy, I only did 2. It was a pretty big project and the second one was better than the first since I was learning as I went. I had 8 chairs for my table and decided to only do the 2 for the ends of the table. It was pretty time consuming, but it can be done on all 6. I had plenty of the materials to do all the chairs, as I had to buy a big roll of the tacting and the drop cloths are inexpensive. If you use fabric, it may be cheaper to buy new chairs as some fabrics can be expensive. Advice- I sprayed my chairs with a fabric repellant after they were done and the moisture caused a small rust spot where the tact is, so spray the fabric before you place on your chair. I need to update my post to state this.
Marguerite FinnTymczyn says
I am reupholstering a dining chair. The back has no upholstering so I will be starting from scratch with that. The seat is covered but I want to replace with new cushion and fabric. How should I do this. Thank you, Marguerite
Miriam says
How long did it take you and how much did all the supplies cost? I’m looking to refurbish some old chairs and a table and a hutch, but don’t want it to be an overwhelming project! I’ve done tables before, but not chairs!
APRIL says
I absolutely love it! There is nothing wrong with my dinning room table and chairs but it definitly needs a new look. I am going to try this!! Thank you for the instructions!!
Designed Decor says
Good Luck April!