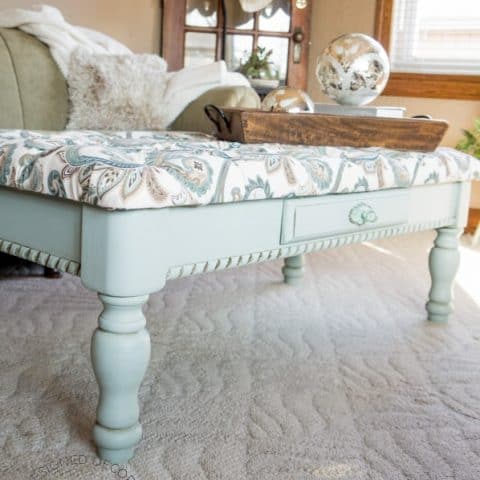
Are you in love with the look of tufting? Have you wanted to give it a try and the tutorials always look so complicated? Stick with me because I am going to share how to do tufting WITHOUT sewing, stitching or needles. This Tufted Coffee Table Bench turned out better than I visioned and now I can do tufting! Now I can’t wait to do some more repurposed coffee tables and turn them into DIY tufted ottomans.
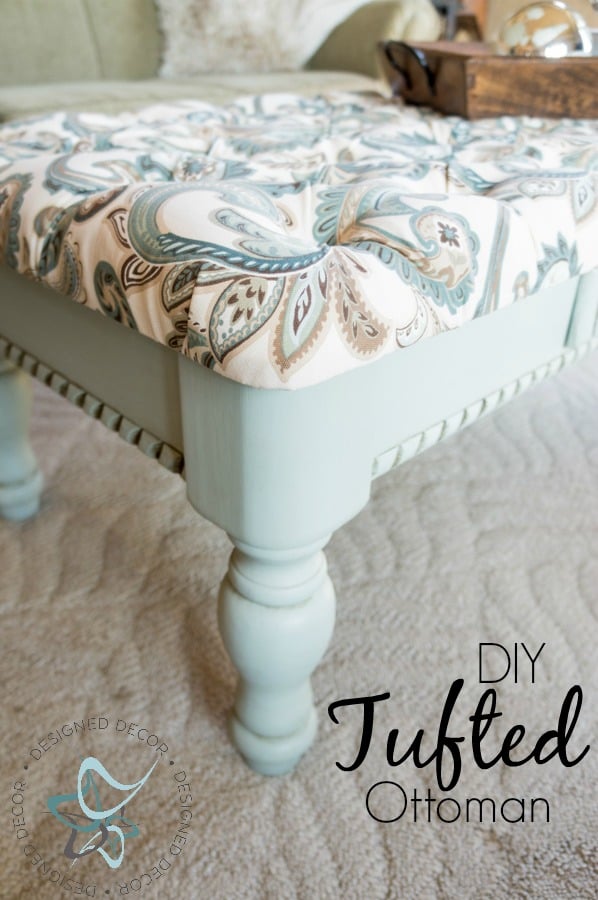
I am super excited about today’s post since I accomplished another task that has been on my “To Do” list for a year. I accomplished tufting without sewing or needles and I am going to show you how you can do this too with a few simple tools. After searching on Pinterest for how to do tufting, I decided I would tuft with my tools instead of a needle and thread. I found inspiration from Addicted to Decorating but changed up a few things from her tutorial.
This post contains some affiliate links. Click here for my full disclosure policy.
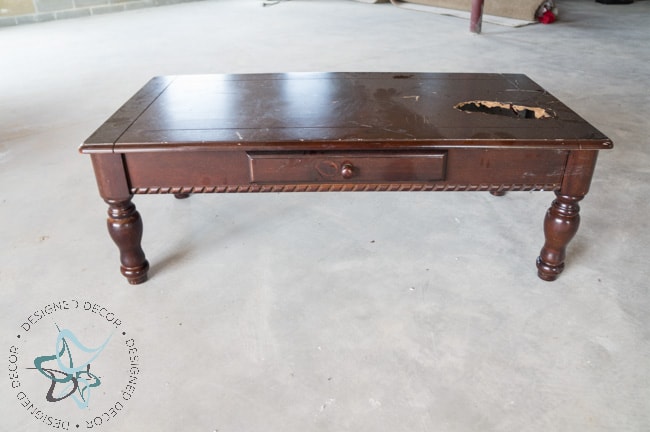
This coffee table was thrown in the trash because of the large hole in the top, makes you wonder how it got there. I obviously had to replace the top of the table with a new piece of wood. The stars aligned on this project as the tabletop was 24 x 48, Home Depot had sheets of wood already cut to that size and my 2-inch foam came in a 24-inch width. It was meant to be.
DIY~ Tufted Coffee Table Bench
Make a tufted ottoman using power tools
Materials
- 1 yard of fabric
- Foam Cushion
- Batting
- Button Covers
- Glue
- Spray Adhesive
- Table or Bench
Tools
- Scissors
- Pliers
- Drill
- Staple Gun
- Marker
- straight edge
- measuring tape
Instructions
- Cut Foam Cushion
- Measure and Mark Foam Cushion
- Cut marks for tufting holes
- Tuft fabric using screws, washers, and drill
- Secure Tufted fabric to the underside of the top
- Attach the tufted top to the table base
- Make button covers and glue on
Notes
See instructions details in the post below
Step 1 – Cut Foam:
Start by placing the piece of wood from the tabletop on top of the foam and draw a line to mark the cut line.
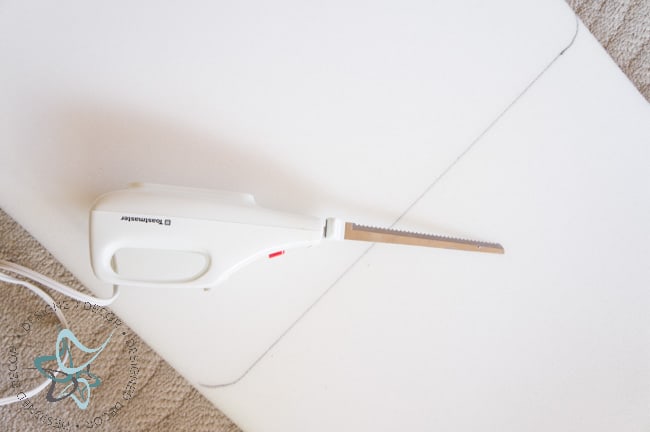
Tip: use an electric knife to cut the foam. This is so much easier than using scissors and your hands will thank you. Spray the wood with a spray adhesive and place the foam on top of the sprayed wood piece to hold the foam in place.
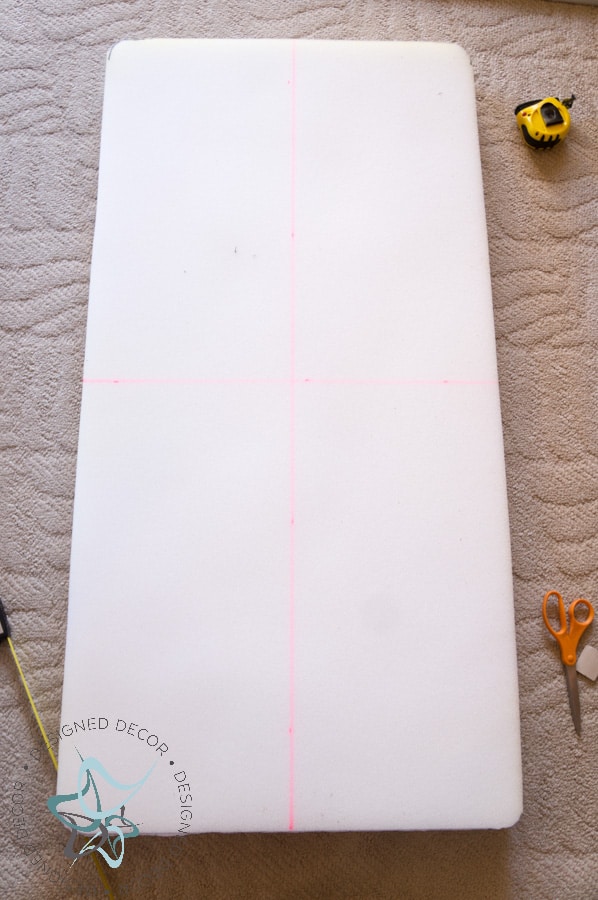
Step 2 – Mark Foam for Tufting
Start by drawing a color line for the center marks. This gives you a guide as to where to start to place your marks for the diamond tufting. You will not have a mark in the center spot where the lines intersect.
I have a confession, I needed Mr. DD. to figure out the spacing. I struggled with it for a while and decided this was a perfect task for him. My brain works in whole and half numbers and even fourths, but once you get 3/8 or 3/16 in the equation, my eyes gloss over and the brain shuts down. Can you relate to this?
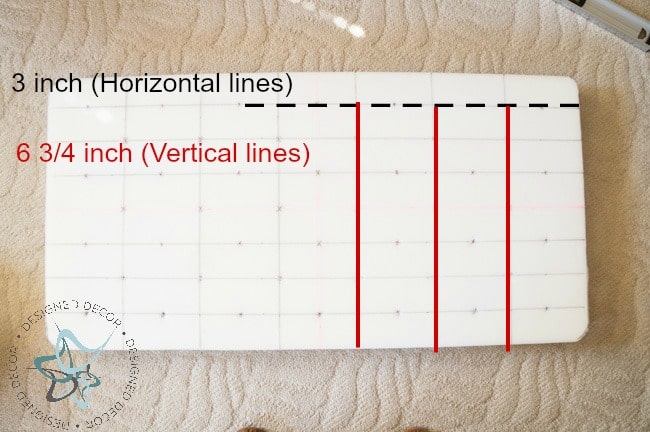
The horizontal lines are 3 inches apart and the vertical lines are 6 3/4 inches apart. When I marked the vertical lines, I started from the centerline, measured to the right and placed a line vertically and did the same on the left side. I had 3/4 inches left over, so the ends have a slightly bigger measurement than 6 3/4.
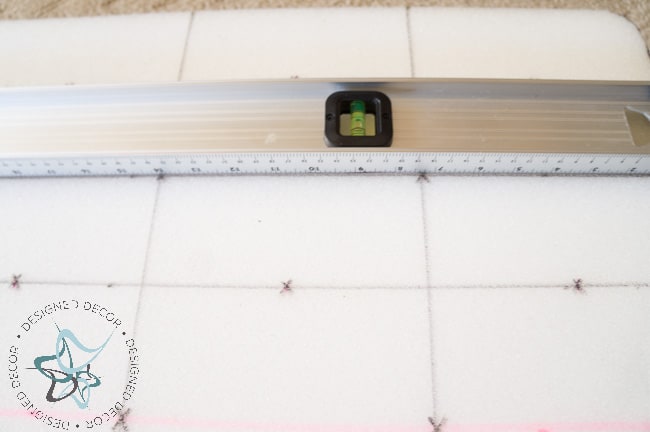
I use this 48-inch level and measuring bar to mark my lines. This tool comes in handy for many projects, like measuring and cutting fabric. Place an “x” on the spots where the screws/buttons will be going. Yes, screws, I said I was using my tools to tuft this ottoman.
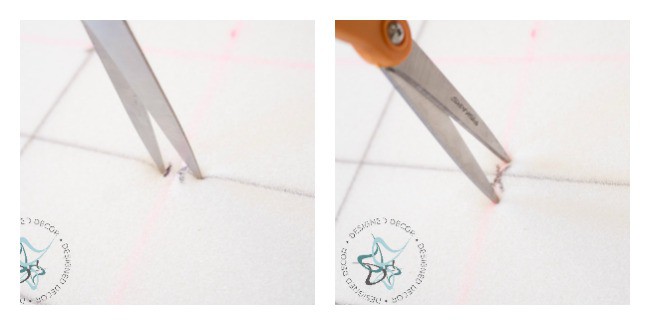
Step 3 – Cut Marked Foam
Cut a small cross cut on each X using sharp scissors.
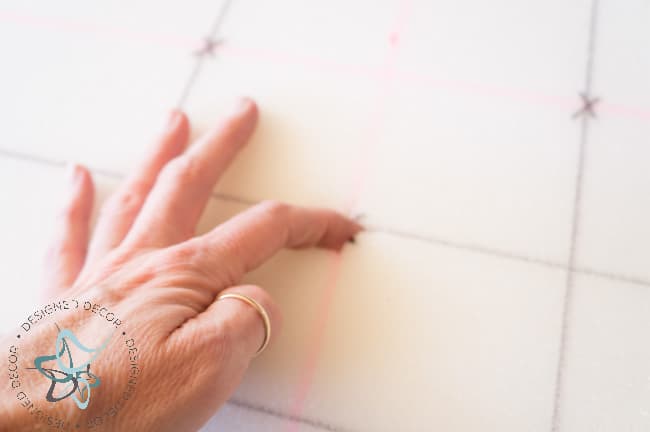
Tip: Place your finger in each cut to make it bigger. You will need to feel the spot through the batting and fabric. Also run your mark lines down the side of the foam so you can use the line as a reference when trying to find the next “X” spot to drill. Once all spots are cut, place the batting and fabric on top of the foam. I used upholstery fabric that was 54 inches wide, so I only needed a yard of fabric for the ottoman. The fabric was purchased at Hobby Lobby.
Step 4 – Begin Tufting
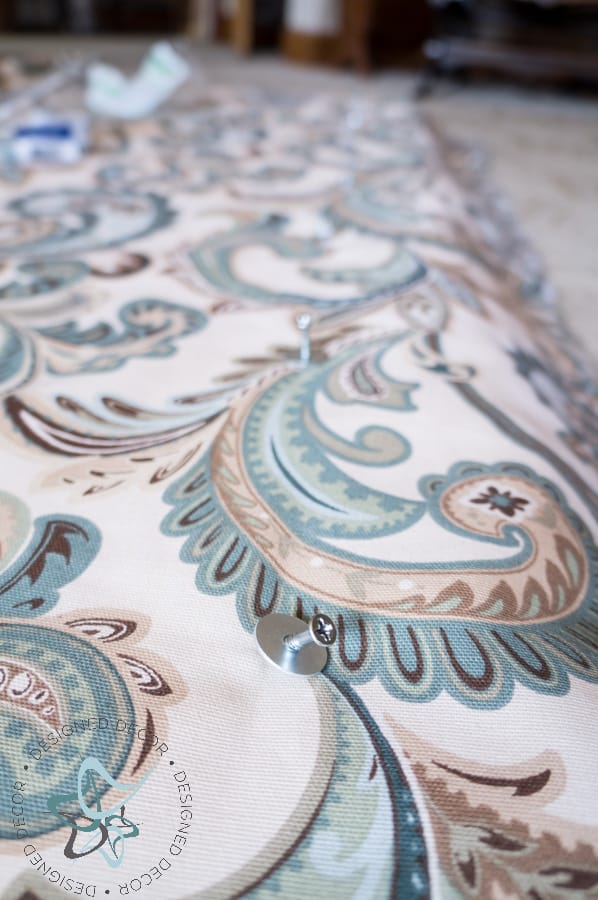
I used #8 1-inch wood screws and a 3/4 washer to do my tufting. You will need to change the size of the washer based on the size of the buttons you are using as well as the size of the screw, based on the depth of the wood. Place the first screw with the 3/4 washer in the marked spot on the bottom row and screw through the foam and into the wood tabletop. This pulls that fabric and foam to create the tufting. Tip: Do not screw all the way down, you want to just go deep enough to secure the screw and washer. You can do this by hand but I would highly recommend using a power drill, as I used my Ryobi drill.
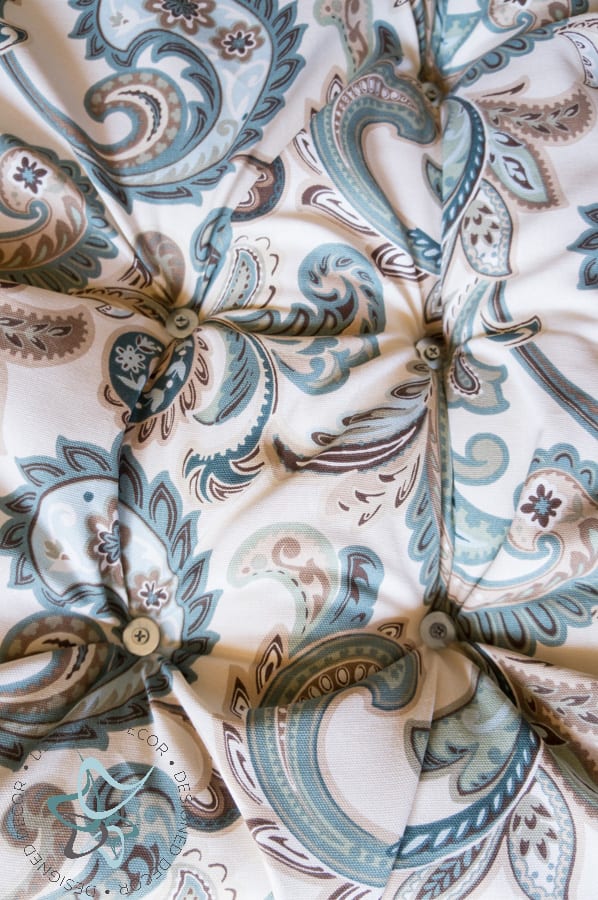
Once you get the bottom row complete, you start the next row opposite your original screws, not the offset row. Once the second opposite row is complete, work your way down the offset row.
Step 5 – Securing Fabric to Back
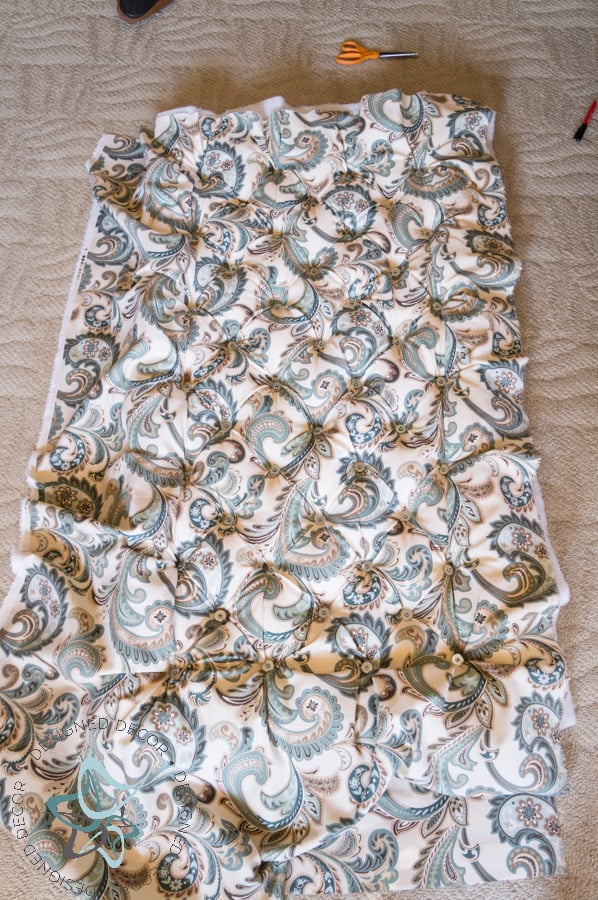
Here is the completed screwed tufted top. Now it’s time to staple the fabric on the back of the top.
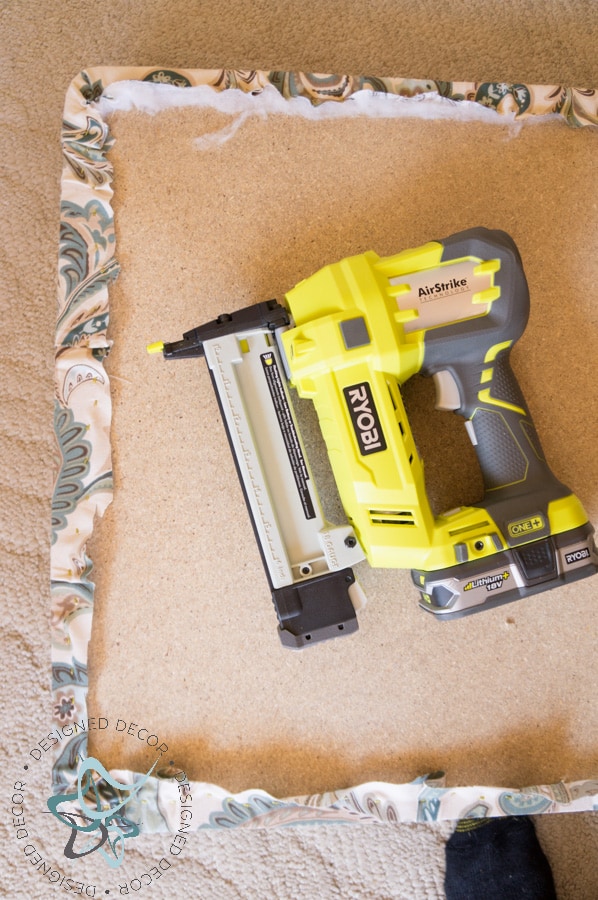
I used my Ryobi AirStrike crown stapler to get this job done. This is so much easier than a standard staple gun.
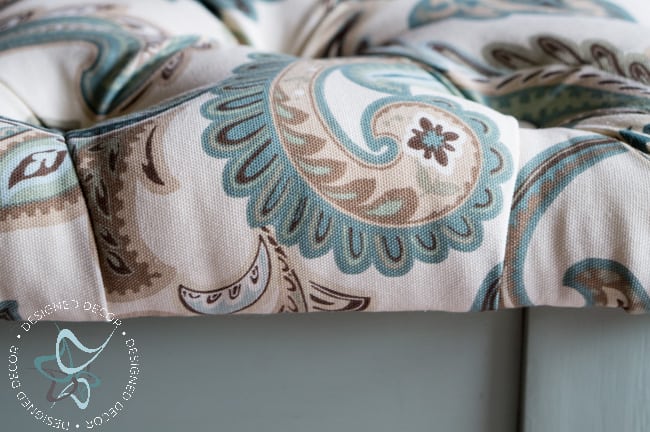
You need to staple the fabric with a method and not just randomly attaching like you would a chair seat. Start by stapling down the smooth sections between the screws, then fold the fabric to get a nice crease before stapling down the rest of the fabric. Make sure you have the pleats on the edge before stapling down, as this makes a big difference in the final look of your tufted ottoman.
Step 6 – Attach Top to Table
I only had to use the existing screw holes on the bottom of the table to the new tufted top. Depending on your table or bench, you may have to predrill holes and secure the tufted top to an existing top.
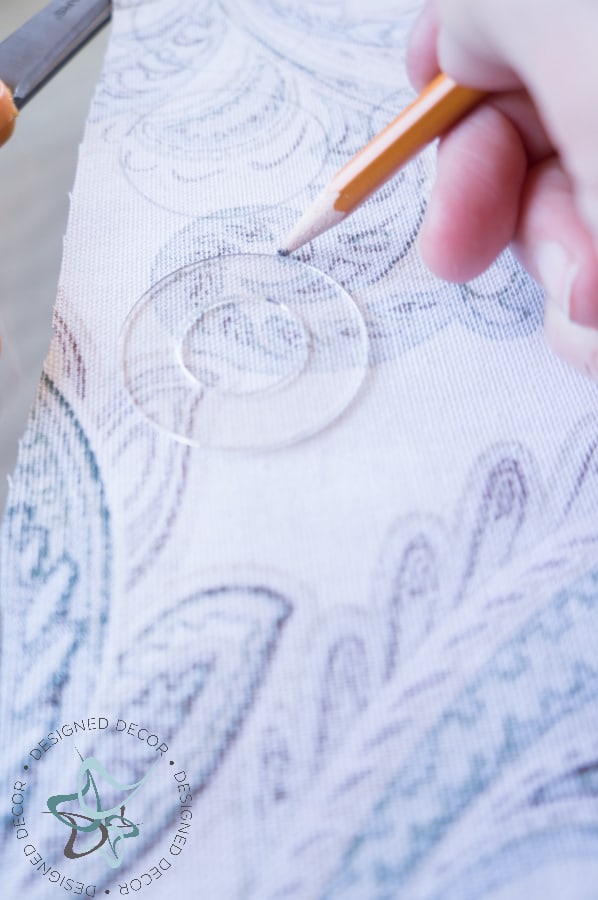
Step 7 – Button Covers
Next, is making the buttons using a button cover kit. I used the template in the kit to cut out the fabric for each button, I needed 46 circles of fabric.
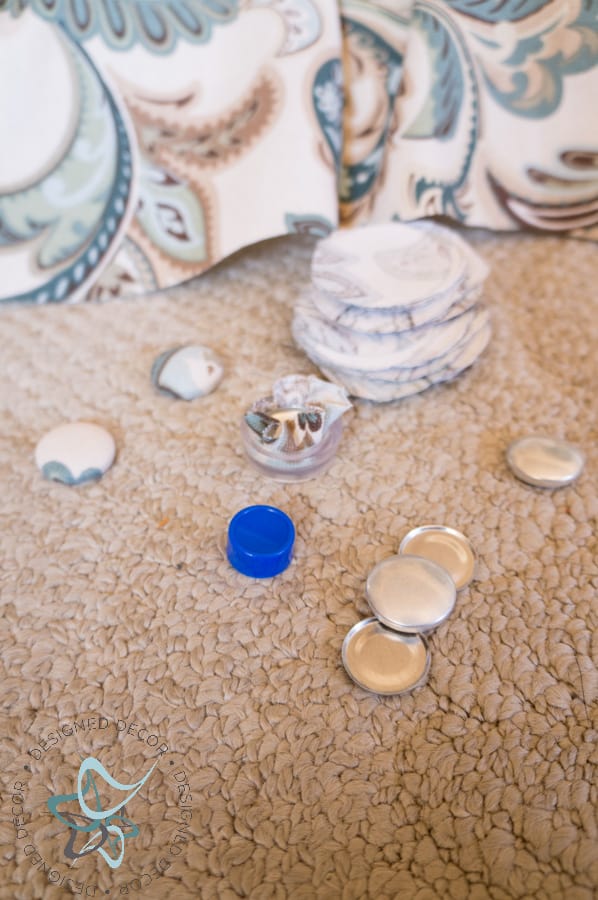
Follow the instructions on the package on how to cover your button. I used 7/8 size(#30) buttons for this ottoman. Tip: Use pliers to help close the back onto the button and fabric, again your hands will thank you.
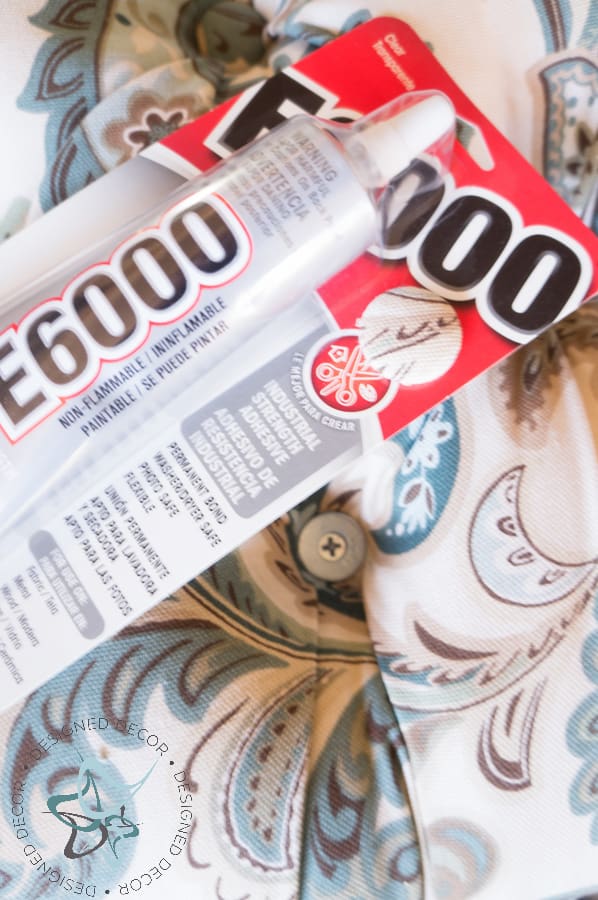
Next, use E6000 to glue on the buttons. I know, glue? It works and they are pretty secure. I figured if a button loosens up and comes off, your tufting would not be ruined because the screw is what is holding the tufting in place, not a button and thread. You can always glue the button back on.
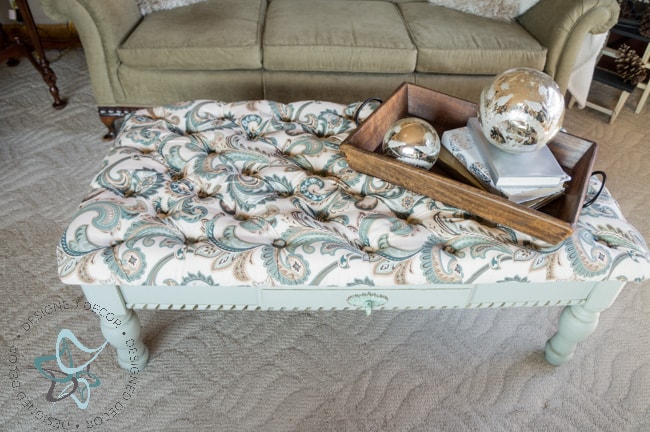
Now, it’s time to sit back and enjoy the beauty of your labor.
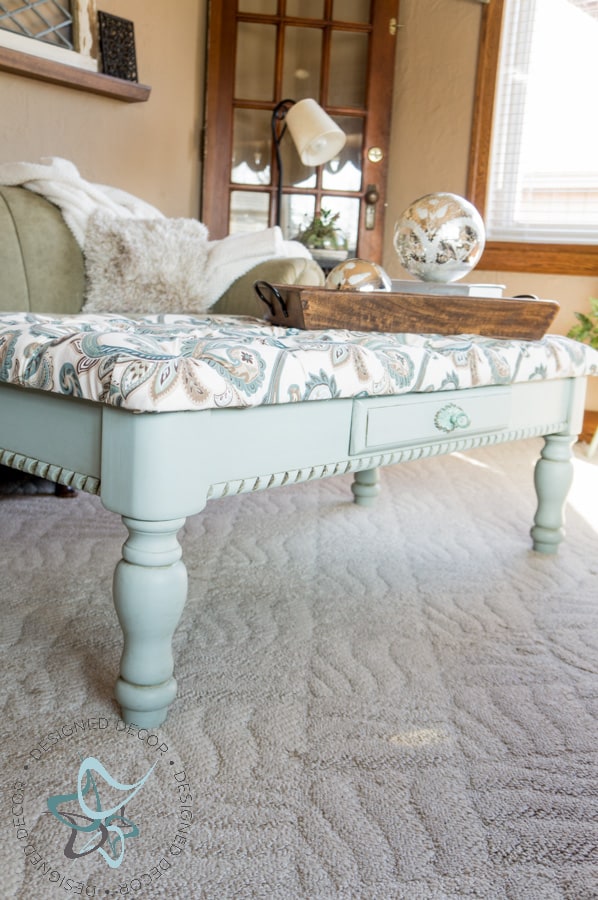
Since making this tufted ottoman coffee table, I am actually thinking in my mind, what can I tuft next. It was not as bad as I thought it was going to be. I guess anytime I can use my power tools, that is my kind of re-purposing. Where would you use a DIY tufted bench in your home?
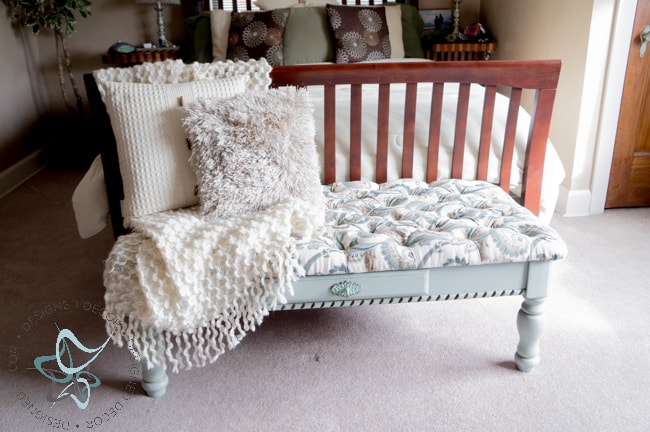
UPDATE: I have received a few questions on the paint I used for the bench base. I mixed 2 colors together since I did not have enough of one color to paint the bench. You can achieve this same look by using Persian Blue from General Finishes, Seal with High-Performance in flat, and apply Glaze Effects in Pitch Black.
Need help making over that old furniture piece or building something with repurposed wood? Sign up to receive my newsletter and get updates on the latest DIY projects.

Join the DD Community!

Join the Designed Decor Community and receive weekly free tips on DIY home projects, painted furniture, decorating, and much more.

Hayley says
Hello! Absolutely love this table. Please may I ask – how big does the foam need to be in relation to the table top? Does it need to go over the sides? My table top is 36” x 24” so debating whether I need the exact same measurements for the foam or slightly bigger. Thank you 🙂
Designed Decor says
Hi Hayley, You can go slightly larger but not to exceed 1/4 inch. You can also cut a thin strip of foam to go around the edge of the table and use a spray adhesive to hold it in place.
Hayley says
That’s perfect thanks very much for your reply 🙂
Rhonda says
Thank you. Love love the fabric
Rhonda Fugitt says
Where did you get the fabric
Designed Decor says
Hi Rhonda, Joann Fabrics – it has been a while ago and it is probably discontinued as they don’t seem to keep the fabric patterns for very long. I don’t even know the name of it, sorry.
Lynn Heard says
I loved this and actually made this for our place in Montana. My question is how you ever tufted a headboard in this manner?
Designed Decor says
I have not done a headboard but you certainly can. It is the same process just on a bigger piece. You can use an existing headboard or make one out of plywood. I think it would be cool to use an existing one and tuft the inside and keep the edges in wood or painted.
Robin says
I have a question about the E6000 glue. I can’t stand the smell of that stuff…I’ve tried using it, but the smell makes me physically want to barf. How long did it take for the smell on the fabric to go away? Or is it just me and that glue that don’t get along?
Designed Decor says
Hi Robin, I can understand the smell issues with the glue. I never noticed a lingering smell once the cap was back on the glue. You may be just sensitive to the smell.
Susan Schweer says
How did you attach the newly upholstered board to the table?
Designed Decor says
Susan, I attached from the bottom. The table had supports on the underside of the table top.
Julie Briones says
DeDe, I just found your blog via Pinterest and this post! Just lovely! I have, obviously pinned this project, and I will be featuring it on tomorrow’s edition of Tuesday Turn About. Please let me know if this is a problem! Following you on Pinterest and IG now. 🙂
Designed Decor says
Hi Julie! Thank you so much for pinning and the feature on your site! I checked your site out too! Always good to meet fellow bloggers!
Jacqui says
How did you attached the piece of wood back on the table?
I have a good solid coffee table do I have to remove the top first?
Designed Decor says
Jacqui, I used the existing screws and holes and attached the top from underneath as the original top was attached. Each table is so different so you would have to check to see how your top is attached. If it is not glued together and only attached using screws then, yes I would remove it. It makes it so much easier to do the upholstery.
kim says
After you tufted it how did you put the wood back on the table securely?
Designed Decor says
Kim, Since this was a coffee table it had supports already built into the underside. I just screwed from the bottom side of the table where the corner supports already were.
Kim says
How did you get the peice of wood back on the coffee table after you finished with tufting?
Designed Decor says
Kim, I flipped over the table and screwed the tufted top to the base of the coffee table. The base had wood boards to screw the top to the base. If what you work on does not have boards, you could always add boards.
Nicole Albright says
What type of paint did you use on the coffee table? Sorry if this is a repeat question. Beautiful job, I can’t wait to do mine!
Designed Decor says
Nicole, I guess I never mentioned the paint. I will have to update it! I mixed a few colors together on this one since I did not have enough of one color. You can achieve the same color with Amy Howard in One step paint in “Barefoot in the Park” I sealed it with a matte sealer and glazed with black licorice glaze from Maison Blanche.
Nicole Albright says
Thank you so much for your reply! It’s a beautiful color.
dipa says
Love love love this. Thank you. I am new to diy. But I wanted a tufted bench seat. These are so expensive. I hope I can build one. Thank you and I absolutely love your your tufted coffee table. The colors are gorgeous
Designed Decor says
Dipa, You can make one once you find the perfect piece to makeover. Keep looking a thrift stores for a used coffee table. Good luck and I am sure yours will be great.
Cynthia Chilson Finger says
You did a great job on this, and your tutorial makes it seem very doable. Thanks for sharing! Cynthia
Designed Decor says
Thanks Cynthia!
Dawn Connelly says
When I saw this ottoman in my email (I subscribe) I just had to come to your site and get a better look. I had no idea that you tufted it – and what a great job you did with the tutorial Dede. You make the project look quite doable. Love the colors you chose.
Designed Decor says
Dawn, I am so glad you came over to see the project. Thank you for subscribing and yes, you can do this!
Anne says
The ottoman turned out very beautiful. But did I miss something? How was the tufted fabric top attach to the table top. Did you attach screws thru the button openings to tie down the fabric top to the table top? I would like to try this.
Designed Decor says
Anne, I am sorry I did not mention that. Since this was a coffee table and it had a top, I just used the same holes and screws to attach the tufted top as the original top. I would love to see your project when you complete it! Good luck and let me know if you have anymore questions!
karen@somewhatquirkydesign says
I’ve had a coffee table in my garage for maybe 4 years now. And yes, I’ve been meaning to do the exact thing you did. I’m so glad you did this because now if I have problems I can give you a call. I love the screw/washer method. Especially for a table. Did you order your button forms online in bulk. They are a little pricey if you buy them in kits. Did you say what thickness your foam was? I think it is a good idea for the outside edges to be a little wider than the spacing of the other tufts. It gives more stability to the edges. I think that if you look at the “storebought” ones you will find that they are made that way. So you used your 54 inch width over the 24 inch width of the table? What yardage of fabric? 2 yards?
Designed Decor says
Karen, Get her done! I purchased a button kit at Joann’s at 50% off and bought the other buttons when Hobby Lobby had a sale. They are pricey if you don’t buy with coupons or sales. 2 inches for the foam and buy this with a 50% off coupon as well. Foam can be so pricey too! The board width was 48 x 24 and 2 yards of fabric. You know you can call me anytime! xoxo
onemoretimeevents says
This came out just adorable love the color and the fabric is gorgeous… I can see a matching headboard
Designed Decor says
It would look great in a headboard too! I think you need to do that one and share it with me when you are done!
Pam Bennett says
Love the fabric and the whole concept. I’ll be adding tufting to my project to do list.
Designed Decor says
Pam, I want to see it when you are done!
Pili Gomez says
Love the fabric you bought! Tufting is on my to do list and your how to will be of a lot of help, pinning!
Designed Decor says
Thanks Phil!
Robin @ Redo It Yourself Inspirations says
DeDe, this is absolutely beautiful. From your tufted (gorgeous) fabric to the paint color on the wood. Just stunning! Pinned and sharing!
Designed Decor says
Thanks so much Robin! xoxo
From Evija with Love says
Gorgeous transformation, I absolutely love the colour and the fabric you used. Well done!
Designed Decor says
Thanks so much Evija!
Michelle James says
This so cool and so pretty. I am in love with the color you chose and the fabric. I need to get some power tools. They really would make a lot of jobs easier to complete. Great job.
Designed Decor says
Michelle, Power tools make things SO much easier!
Rachel, aka Queen Patina says
Interesting and encouraging take on tufting! It turned out so well–and I can certainly imagine wanting to tuft everything in site as well, especially after such success. Well-done!
Designed Decor says
Rachel, Thanks so much!
Molly says
Very pretty! I love everything about this.The colors are gorgeous, and after reading your how-to I think I could do one too, thanks for sharing so well 🙂 Pinning now!
Designed Decor says
I know you can do it Molly!
jessicacoplen says
I just love this beautiful tufted ottoman! Great job! I see a tufting job in my future (I have all the supplies and I keep chickening out!)