

This post contains affiliate links. Click here to see my full disclosure policy.
Don’t pass up those thrift store chairs because the fabric is outdated or you think you can’t tackle changing the fabric. Let’s dive into how to get started on how to reupholster a chair.
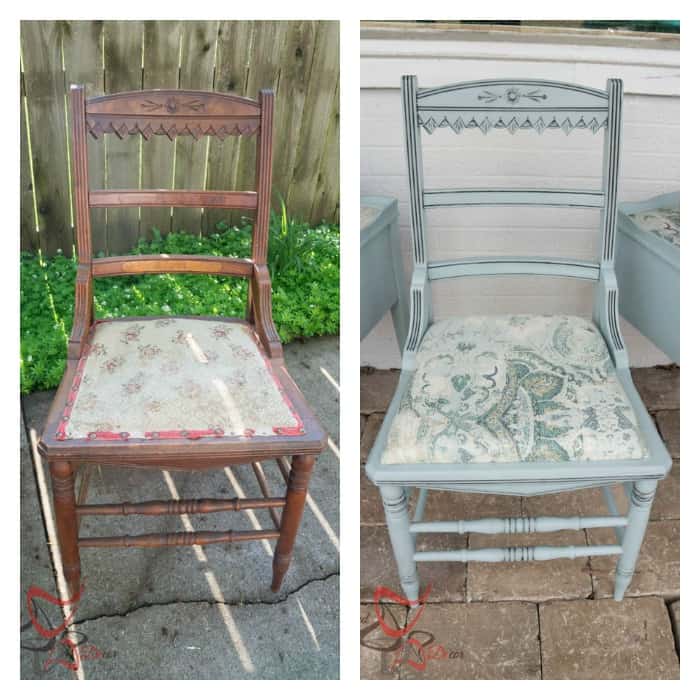
This dining room armchair is so ugly and OH so STINKY, it smells like cat pee. The best way to get rid of all the stink is to get rid of all the existing upholstery and padding. I do recommend replacing any chair stuffing, most are very old, and they are in need of new instead of stinky old insides.
How to reupholster a chair

Start by removing the old fabric and inside padding. You may need to save part of the interior of the chair and use it as a tracing guide. If the wood base pieces are in great shape, reuse them. I have on occasion had to make new wood base seats due to damage or rotting.
If you need to replace the wood seats, read all about that in this post, repurposed metal chair makeover. Or if you don’t have the seat base, discover how to make your own wood seat template with this post, repurposed cane chairs.
Step 1: Tracing and cutting foam core.

Place the wood base pieces on the 2-inch foam and trace. These chairs needed a 2-inch foam core, each chair base is different and you will need to make that decision based on the chair.

The backrest of this dining room armchair only needs a 1-inch foam core cushion. This is where the inside interior from the old chair came in handy, as I traced it to make the new cushion.

Tip: Use an electric knife to cut out the foam cushions, it is much easier on your hands.
Step: 2 Cutting out Batting and Fabric
I always use batting in all my re-upholstery projects. I like how it grabs both the foam core and the top fabric. It gives it a smoother feel and finishes.
Layout your fabric with the batting on top, place your foam core cushion and the wood seat base on top. This serves as your guide when cutting the fabric to fit over the seat base. You want to cut the fabric and battling so you have enough fabric to cover the sides and about an inch extra for stapling.

Tip: Iron your fabric before you start to staple.
Step 3: Stapling fabric to the wood base.
Mr. DD. is my upholstery helper. Some pieces are more difficult to pull taut and staple at the same time. He pulls and I staple, we make a great team.
Start by pulling the backside taut and staple. Do not staple all the way to the edge, leave the corners for last. You want to staple all sides down before working on the corners. Switch to the front side making sure the fabric and batting are smooth, pull tight, and staple. Do this same process on each side, remembering not to staple the corners. You want to make sure that you pull evenly all around the piece so that you don’t have pinched fabric.

The corners are the tricky part. As you can see from the picture above, you want to do a pleated fold and staple down. Trim off the extra fabric around the edges.

The top pieces on these chairs were a bit trickier since they are double-sided with fabric.

The backs of the chairs need to be completed first, using the same process as above and stapling the fabric around to the front side. Only use fabric and batting on the backside of the chair, no foam cushion is needed. Tip: Make sure to staple a half to an inch from the edge. This way you will not staple the front fabric in the same places.
Place the 1-inch cushion on the front with the batting and fabric. You want to make sure you are placing the staples evenly and as close to the outside of the wood frame as possible that way the chair frame or trim piece covers up the staples. Trim off the extra fabric as close to the staples as possible.

Using fabric glue, glue on a trim piece to cover the staples. This assures that the staples are all covered.
Step 4: Assembling your chairs.

Paint the base of the chairs before assembling the cushions in place. You can achieve this same look by using Halcyon blue paint, sealing with high-performance flat, and glazing with pitch-black glaze effects.
Learn how to paint furniture

Are you wanting to learn how to paint furniture but just can’t find the time in your busy schedule to go to a local workshop?
Frustrated with all the conflicting tutorials on “how–to” or “what products”?
Are you eager to learn a new paint technique but afraid you will mess it up?
Learn many different furniture painting techniques with video training from beginner to advanced.
Online Furniture Painting Workshops for Every Skill level
Insider Furniture Painting Tips and Tricks

I get a few questions of people asking if they can upholster a cane chair and the answer is yes. Come over so I can share this tutorial on how to Repurpose Wood Cane Chairs.

I also made over this bench at the same time since I had enough fabric to use on the bench. The fabric I used is Timuri Dreamie from the Online Fabric Store.

Here are a few other pieces with this same fabric.
How to reupholster a chair cushion
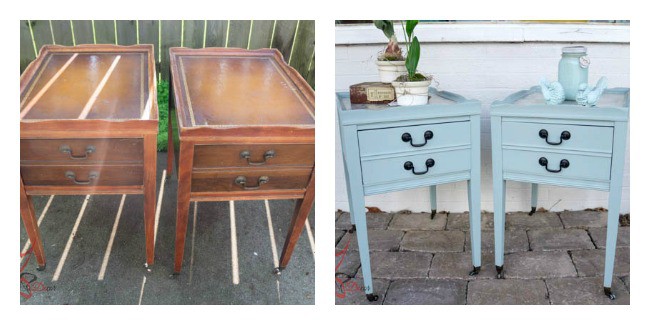
I love to see the before and after side by side! Before doing any furniture makeover you must properly prep the furniture.

Come over to review this FREE workshop on how to properly prep furniture.

Marcella Vinovrski says
Loved the step by step pictures. I would also like the steps described, like how much space to leave in the cutting of foam and fabric. I have an arm chair that needs reupholstering. I’ve done some before but not this type of chair.
Kathy Neptun says
How much fabric did you use?
Designed Decor says
Kathy, I do not recall exactly how much I needed and every chair size is different. You can use this handy guide to search your chair style and it gives you an approximate amount. I hope this helps. https://www.leatherhidestore.com/leather-fabric-reupholstery-guide
Nola Coleff says
What do you do if char has cane backs which need to be covered?
Designed Decor says
Nola, I have removed the cane and made a wood seat to replace the cane. I just cut a template and attach to the chair once I have it upholstered. Here is a post that I did this for, https://designeddecor.com/repurposed-wood-chairs/
Irene says
What color did you paint the actual frame of the chair?
Designed Decor says
I used the color Elegance in Country Chic Paint and sealed with a black wax.
Trisha says
How did you get the backs back on the chair?
Designed Decor says
Trisha, I placed the back fabric on first using my tack gun and covered the front with the foam and fabric last. My chairs were designed in a way that they had wood dowels on the top and they set in the frame and I screwed them in from the bottom. Each chair design is different so I am not sure on other styles of chairs. I hope this answered your question.
Susan - ofeverymoment says
An excellent tutorial – just the help I need for the chair on my porch! Found this at the #SoMe2 link party 🙂
Wendi @ H2OBungalow says
These are beautiful! I’ve made a mess of chairs like this in the past. Now I’ll follow your directions and hopefully not waste more fabric! LOL Pinning and sharing
Designed Decor says
Thanks for sharing Wendi!