Have you recently acquired an old outdoor metal furniture or cabinet that’s seen better days? The surface might be rusted and chipped, with flakes of paint peeling away to reveal the worn-out metal surface underneath. But with a little effort, you can breathe new life into these tired furniture pieces and restore them to their former glory.

Proper rust removal and paint preparation is key to getting a durable, long-lasting finish. In this post, I’ll walk you through the exact steps I took to transform rusty old patio chairs that I found in my neighbor’s trash. From start to finish, you’ll learn everything you need to know to tackle your restoration project and end up with gorgeously painted metal furniture you can enjoy for years to come.
I was lucky enough to pick the rusted metal chairs out of the trash before the scrapers came around or the trash truck. The bistro table I found at a Thrift store. I knew that they only needed a little attention and they would be Oh So pretty again.
This post contains some affiliate links. Click here for my full disclosure policy.
Supply List for painting rusty metal patio furniture:
Drill
Drill Mount Wire Brush
Spray Primer
Spray Gripper – Advice, don’t buy the $2 one as I did, it broke after the first use and I took it back to get the better one. The one I have linked to is a much better model and I am still using it.
Spray Paint (Rustoleum in Satin Indigo- color has been discontinued)
Spray Sealer
Wood Seat Base
Jigsaw
Foam Core
Fabric
Staple Gun
How to properly prep rusty metal furniture before painting
Step 1: Take apart metal patio furniture
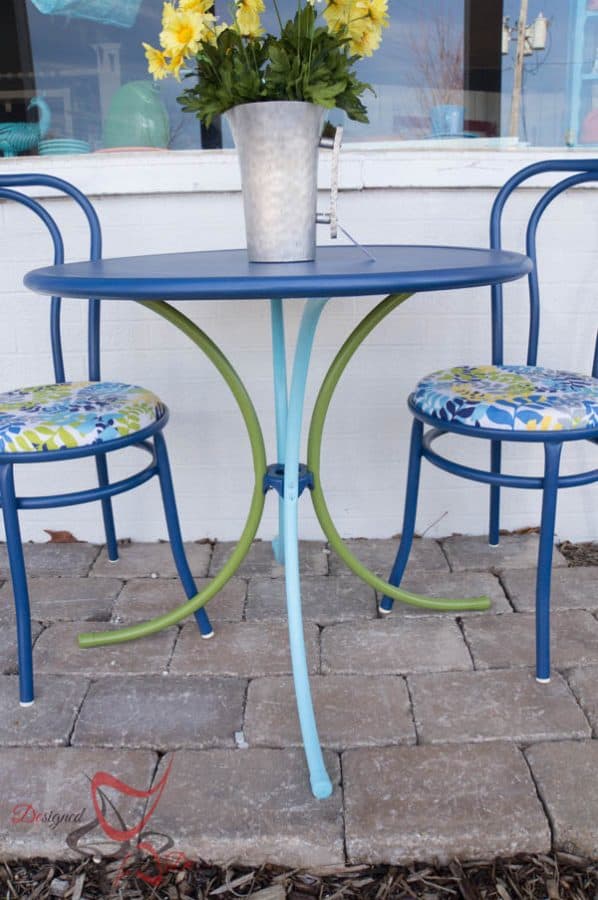
I decided that I wanted different colors on each of the legs of the bistro table. So this required removing the legs from the center support.
You may omit this step if you want to paint the bottom legs of a table all the same color and you can spray in all the tight spaces without paint drips.
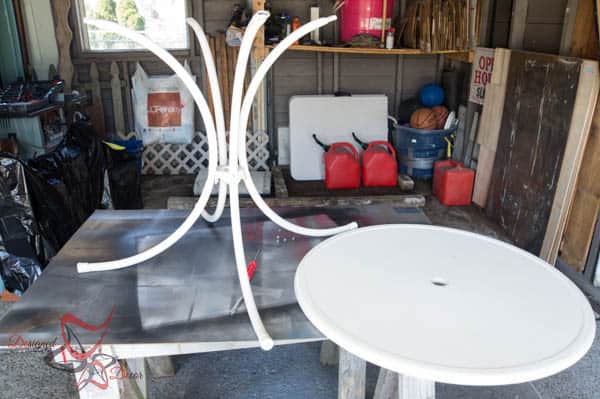
Next is to remove the gross moldy seat cushions from the metal chairs. I made sure to keep the original wood base seat as a template, this will be the best way to cut a new wood seat.

Step 2: Remove Rust
These metal chairs had a lot of rust that needed to be removed. Therefore, I started with a metal wire brush and after about 5 minutes of hand scraping, I decided I needed more elbow grease for this job. I needed the right tools to do this project. I used my Ryobi One+ 18v Lithium-Ion Drill and Impact Driver Kit![]() with a round metal brush attachment.
with a round metal brush attachment.
Make sure your backup battery is fully charged because I used 2 batteries when sanding out the rusty surfaces on these chairs. Tip: look for any bumps or loose paint in the metal, most of these spots have rust under the paint.

Step 3: Sand the metal
After removing the loose rust spots, I hand-sanded the entire piece to remove any dirt and smooth out the patches where the rust had been. Tip: Make sure you thoroughly wipe down the chair to remove all the dust from sanding. I would not use a power washer or hose down the metal patio furniture, spraying water on the exposed bare metal is not a good idea. I would use a slightly damp cloth to remove the dust. Now we are ready to apply the primer.

Step 4: How to Prime the Metal Chairs
I gave each chair and the metal bistro table, two coats of metal primer to make sure all sections had the proper coverage. I used a metal primer to make sure it would prevent future rusting. Make sure each coat is through dried before applying the second coat. Also, check for any drip marks and sand those out before applying any more coats of paint.
Spray in a well-ventilated area. If spraying outside, use a drop cloth and make sure you have a calm day with no strong wind.

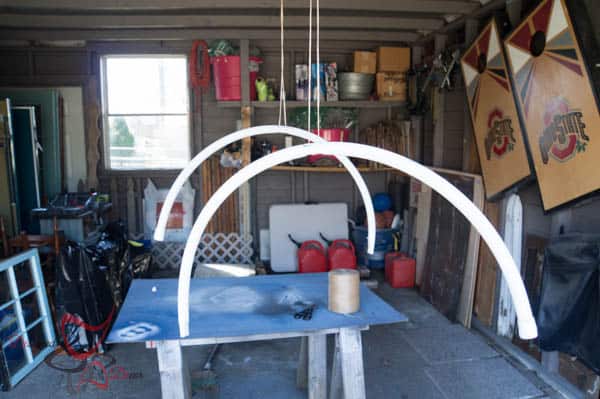
It is much easier to spray-paint the entire piece without having to flip any of the pieces over. I hung the metal table legs so I could easily spray-paint all sides.
Tip: Hold the spray paint cans of primer about 10 inches from the surface that is being painted and use even light strokes. Release the spray trigger each time you pass over the piece of furniture.

I also purchased this handy spray trigger from Rustoleum. This is a must-have when spray painting any object. It was so easy to grip the handle instead of trying to hold the trigger with your finger.
This one in the picture was the cheap one that broke. I linked to the better one that I have used for the past 6+ years with no breaking.
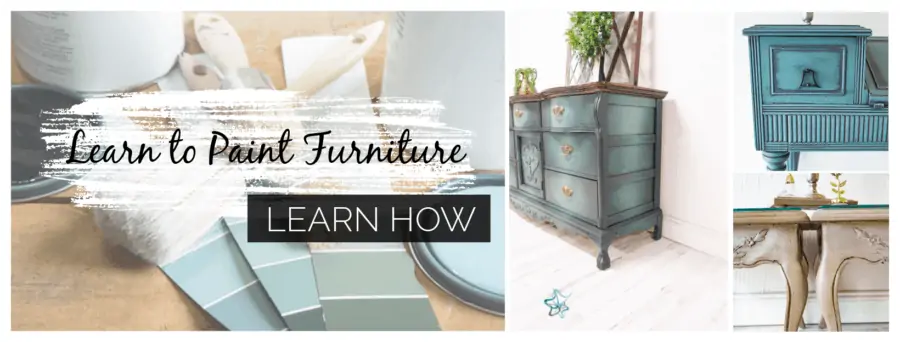
Furniture Painting Guide
- Learn the basics and more about how to paint furniture
- Discover how to find furniture and inspiration
- Tips for painting, sealing, and glazing
- Learn steps to get started along with my favorite products and tools
How to spray paint metal furniture
Next is spray painting the chairs after the primer has completely dried.
Tip: Check to make sure there are no paint drips from the primer. If you have drip marks, use fine sandpaper or sanding block to smooth out any drip marks.
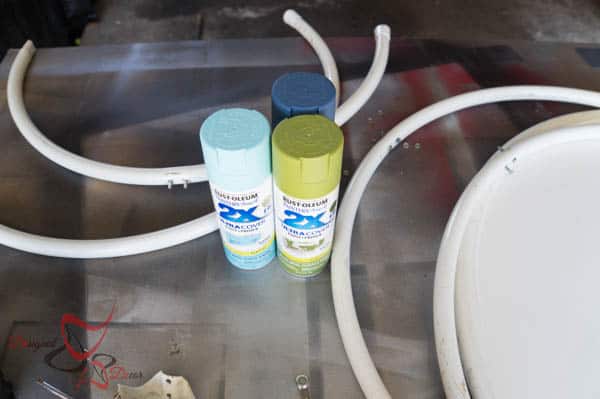
Using the same technique as spraying on the primer, apply 2 to 3 thin coats of spray paint, allowing the paint to dry completely before applying the new coat of paint.
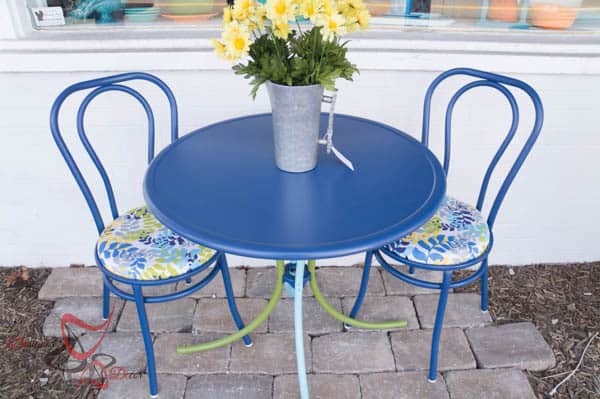
I used Rustoleum’s 2X Ultra Cover in a satin finish in the colors Aqua and Eden. The bistro table and chair base were painted in Rustoleum Stain enamel spray in Indigo. Some colors get discontinued but check for other similar colors or fun colors to match your fabric of choice.

Seal the painted metal furniture with a clear coat of spray sealer. I also purchased new rubber foot bumpers as some of the original ones were missing and the rest were just old and needed to be replaced.
How to make a chair seat for metal chairs
While the first coat of primer was drying, I started to make the seat cushions. The old seat wood bases were cracking and needed to be replaced, so I used the old base as my template to cut out the new wood bases and the foam cushions.
Making wood seat base for metal chair

Place the old seat on top of the plywood and trace the old seat. Use a jigsaw to cut out the wood circles.

Trace the wood seat for the foam cushions as well. I used a marker to draw my circles on the foam and used scissors to cut out the foam cushions. Tip: Use an electric knife to cut out the foam cushions. It is much easier than cutting with scissors.

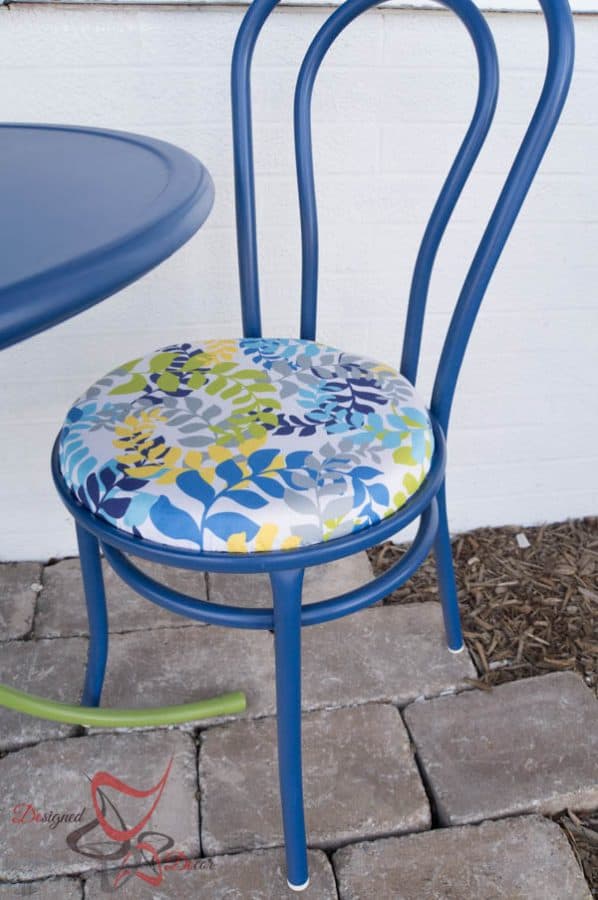
Cutting Fabric for seat base for metal chairs
The pretty fabric I selected came from Modern Yardage. This is one awesome place to order your fabric. Modern Yardage is a digital textile fabric manufacturer, that offers exclusive designer fabrics that you won’t find anywhere else. They have so many styles and colors of fabrics and they are always designing new fabrics. Don’t just take my word for it, stop on over and take a look at the great fabrics they have to offer.

Cut the fabric to be 3-4 inches larger than the foam cushion. This gives you enough fabric to pull over the wood seat base and foam cushion.
Center the fabric on the seat cushion, begin to pull the fabric, and staple it in place. Tip: Make sure to place the same amount of tension when pulling, otherwise you will pull too tight and the cushion will be uneven.
I like to staple a small section on one side and switch to the opposite side to staple. This keeps even pressure on the fabric. I start to staple at 12 o’clock, 6 o’clock, 3 o’clock, and then 9 o’clock. Once those points are stapled, I staple in between until all the fabric is secure.
Cut off any remaining fabric and attach the seat back onto the painted metal chair.

In conclusion, painted metal furniture can add a touch of charm and personality to any space, but it’s important to do it properly to ensure long-lasting results. By following our tips and tricks on prepping, painting, and creating chair seats for your rusted metal furniture, you can transform old and worn pieces into beautiful and functional additions to your home.
Remember to gather all the necessary supplies, properly prep the surface by removing rust and debris, choose the right type of paint for the job, and even get creative with different seat options. With these simple steps, a little bit of patience, and effort, you can give a new look to old pieces and create a unique look that reflects your style.
Before and After Inspiration Photos for Bistro Table Makeover
Mr. DD tells me I should carry one of the chairs down the street to the neighbor and see if they want to buy back these pretty repurposed metal chairs for their sun porch.
So go ahead and get started on your next simple DIY project, be confident in the knowledge that you now have the skills to properly paint rusted metal furniture like a pro! Don’t forget to share your before-and-after photos with me – I love seeing your finished DIY projects! Thank you for reading our tutorial on how to properly paint rusted metal furniture. Happy repurposing!
DeDe Bailey
DeDe Bailey is the artistic mastermind behind Designed Décor and The Puzzle Table. With a rich background in home décor retail, she has transformed her website into a platform driven by a profound passion for helping individuals craft spaces they adore. As a self-taught furniture painting artist and thrift decorator, she loves sharing her knowledge and empowering others to beautify their homes through furniture painting and thrifting. When she isn’t sharing her wisdom on the Designed Décor blog, DeDe is occupied with showcasing her ingenious jigsaw puzzle table design and expanding her short-term rental located in NE Ohio.
Get your FREE ELIMINATE BRUSH MARKS GUIDE => How to Eliminate paint brush marks


Bri says
Hello! Quick question, where did you find the rubber foot bumpers? I have similar chairs and I’ve been wanting to do a DIY like this! Great tutorial!
Designed Decor says
I think they were from Home Depot or Lowes.
Dottie says
I have a similar set that I’d like to refinish. The seats are not fastened down and I’m not sure how to do so after I paint & reupholster. How did you fasten seats?
Designed Decor says
Dottie, the seats on my chairs already were attached, so they had a screw hole in the metal. I am not sure what else you could do to keep the seats in place? I would ask around at the hardware store and maybe they may have an idea.
Shelly- minettesmaze.blogspot.com/ says
Good as New if not better!! Love Rustoleum paint!!!!! Thank you for sharing on CSI Project “Thrift Store Turnaround”!
Shelly@MinettesMaze
Tuula @ The Thrifty Rebel says
Your chairs turned out really beautiful! Love the colour, and that fabric is fabulous!
Designed Decor says
Tuula, I really loved the fabric and had a hard time deciding on what color to make the chairs. The great thing is, I can have a matching table with another color in the fabric!
Al says
These look fantastic! I started redoing some metal chairs a while ago but they didn’t work for me and I gave up. If they looked like yours, I might have kept at them.
Nicole Burkholder says
Thanks for a great “sponsored” post that doesn’t just sound like you’re trying to sell me something 🙂 You obviously use/need your tools and the result is AMAZING. SO pretty! I’ll take 6. 🙂
Karah @ thespacebetweenblog says
these came out so great! i love the blue color you chose and that fabric is fabulous!! thank you for taking the time to link up to the before and after party!
heidi says
I love the colors you picked, and it turned out wonderful. And I always forget to use the primer when I do projects like this. It does make a difference in how it turns out.
Jessi @ Practically Functional says
I love these chairs DeDe!!! The blue is so bright and fun, and that fabric is just perfect; great job! In case you didn’t see it earlier, I featured this on my blog today! I’m stopping by to pin, and to let you know you can grab a Featured button if you don’t already have one!
rea says
oh how beautiful these chairs turned out! i love the fabric that you chose too!
stopping by through anything blue friday!
rea
Alison @ Rubylicious Bepoke says
Love them so much, what a difference! That blue is beautiful.
Alison
Christina says
These look adorable! What a transformation! Love the tip about the spray trigger!- I use spray paint for a lot of projects- I always end up with paint covered tired fingertips!
Megan says
I adore the fabric you used!! And that shade of blue goes perfect with it!! What a great find!
Susan@organized31 says
Absolutely gorgeous! Those are two lucky chairs to be rescued by you.
Susan@organized31 says
Absolutely gorgeous! Those are two lucky chairs to be rescued by you.
Mindi says
They turned out so cute!!! Great job, gotta love free!