Are you looking for a way to add depth and texture to your garden or outdoor space? When you build a simple arbor it can be a great addition to any landscape, and it doesn’t need to be expensive.
Building an arbor is easier than you may think, and can be done on a budget. With just a few supplies from your local hardware store and some basic DIY skills, you can create a beautiful entrance to your yard that will last for years to come – all without breaking the bank.
In this blog post, I will show you exactly how to create a simple arbor in no time at all, using only around $50 worth of materials. Get ready for an easy (and fun!) project that will leave you with gorgeous results!
Supplies to build a DIY Arbor
This post contains affiliate links. Click here to see my full disclosure policy.
This is one of the simpler projects we have done in our landscape. A few pieces of treated lumber and a few simple cuts and you are ready to assemble. Here is the list of items you will need for this DIY arbor.
- 2 x 4 x 8(2) treated lumber
- 2 x 4 x 10(1)
- 2 x 6 x 10(1)
- Wood screws
- Chop saw
- Jigsaw
- Drill
- Measuring tape
- Speed square
- Paint or stain
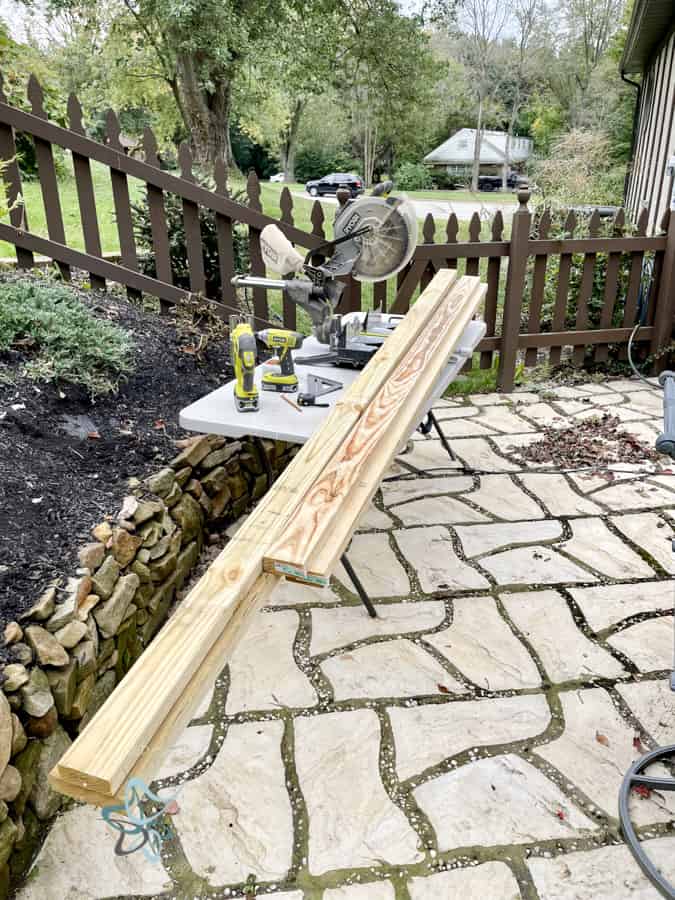
Building an easy Gate Arbor
Start by gathering all your materials and tools listed above. Mr. DD set up a makeshift workbench closer to the gate and project area.
Determine the height of your gate arbor. See the information below on the proper height of an arbor. We decided to use 8 foot 2 x 4’s. Since our house is a single-story home I felt this was the perfect height for our needs.
How to measure and cut the cross support for a DIY gate arbor
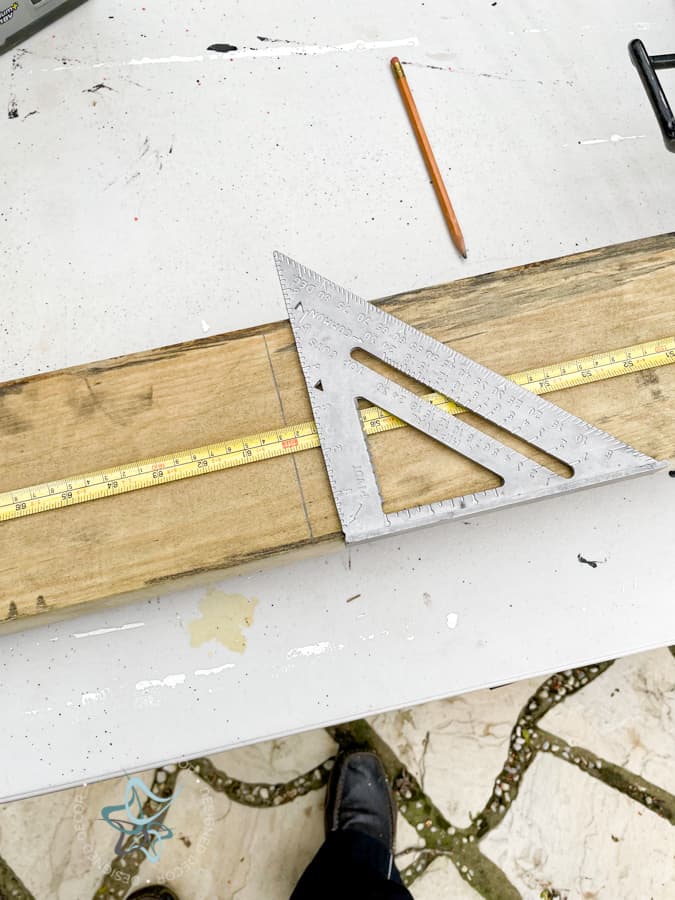
Cut the 2 x 6 x 10 in half. This provided the proper overhang over our 44-inch gate opening. Your gate opening might be wider or narrower than ours so adjust your 2 x 6 according to your needs.
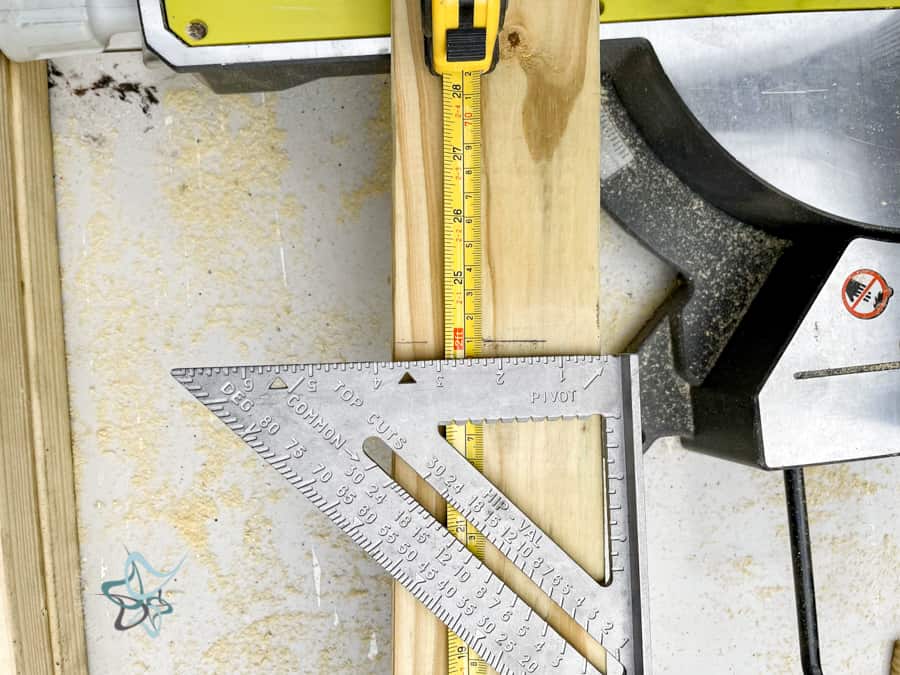
Cut the 2 x 4 x 10 into 5 equal pieces. An odd number of rungs is more pleasing to the eye. You may only need 3 for a smaller opening or 7 for a larger gate opening.
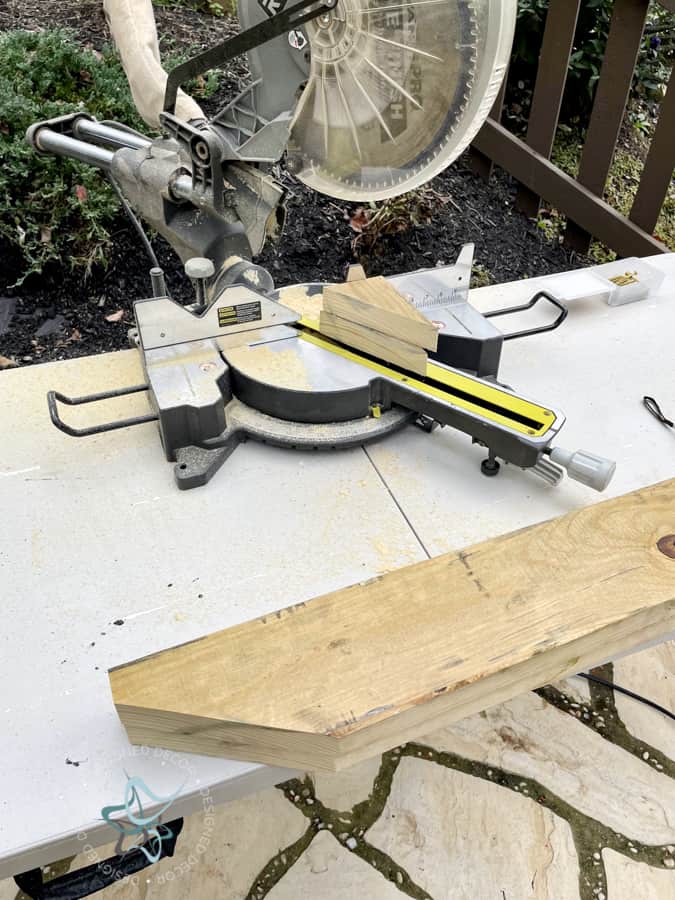
Add the angle cuts to both ends of all the upper decorative posts and also both cross supports. The cross support is the 2 x 6 x 10 that was cut in half. Mr. DD measured 1.5 inches down and made a 30-degree cut on our posts.
This is where you can get more creative with your decorative posts. You could also use a jigsaw and make the cuts rounded instead of straight cuts. If you decide to do a rounded cut, use the first cut to be your template for the other posts.
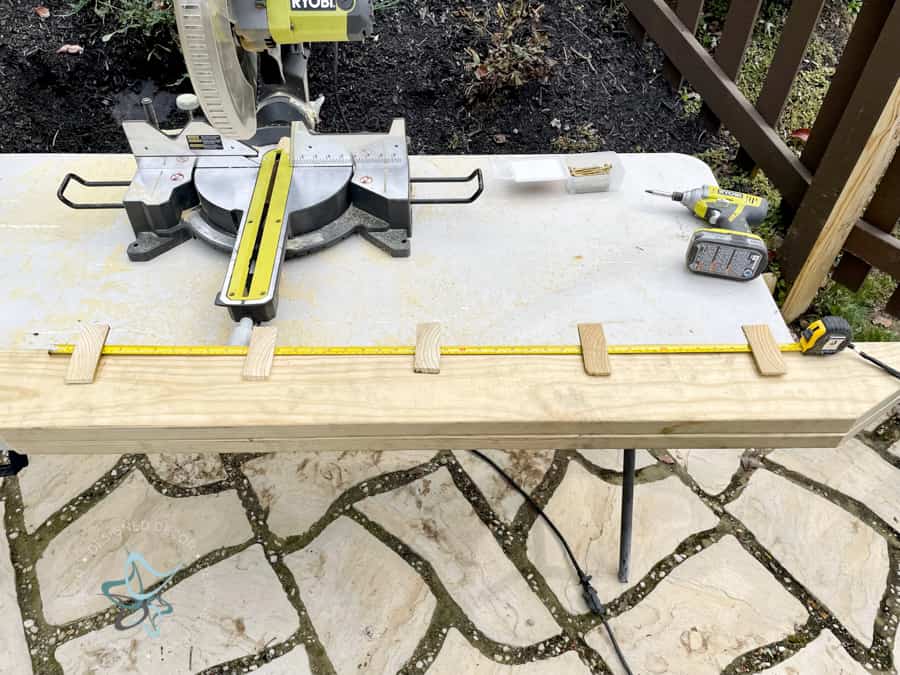
How to measure and cut for decorative posts
Measure and determine how to space out the decorative posts on the cross support. Start by placing one in the center of the support beams, this will be in the center of the gate. Again placing one in the center is visually pleasing to the eye. Also, make sure to place your marks on the top of the support beam.
Draw a line on the support beam to mark where the upright beams(2 x 4 x 8 attached to the inside of the gate) will be attached to the upper support beam. Once you have the center and the upright marks determined you can evenly space the other 2 decorative cuts. Measure down 1.5 inches from the edge of the wood and mark.
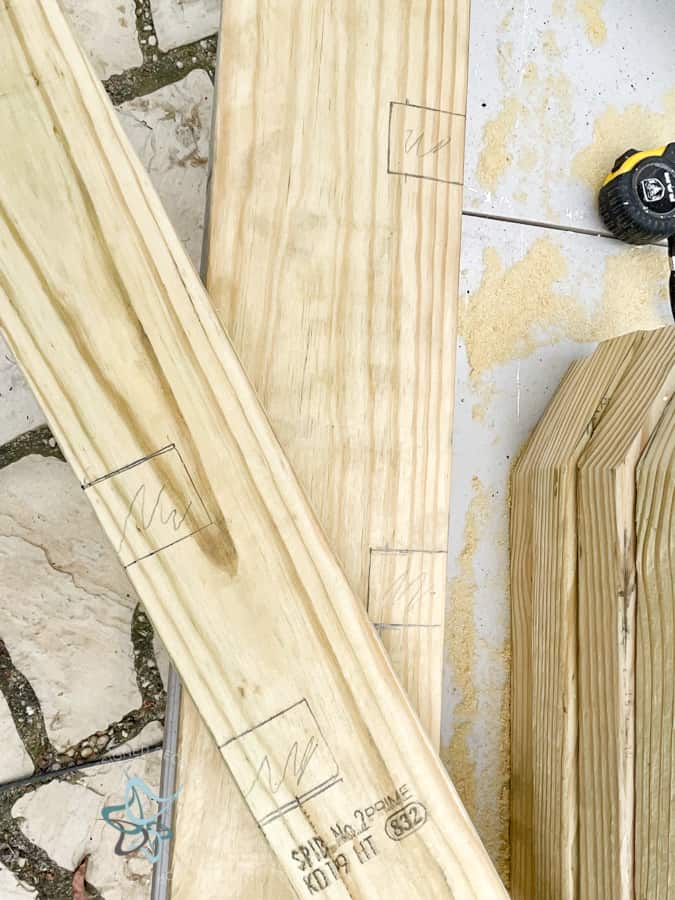
Now measure and cut the decorative posts. These are the 5 smaller posts. You will be making 2 cuts on each post. They will be 4 inches apart which is the distance of the upright beam. These need to be cut on the bottom of the decorative posts.
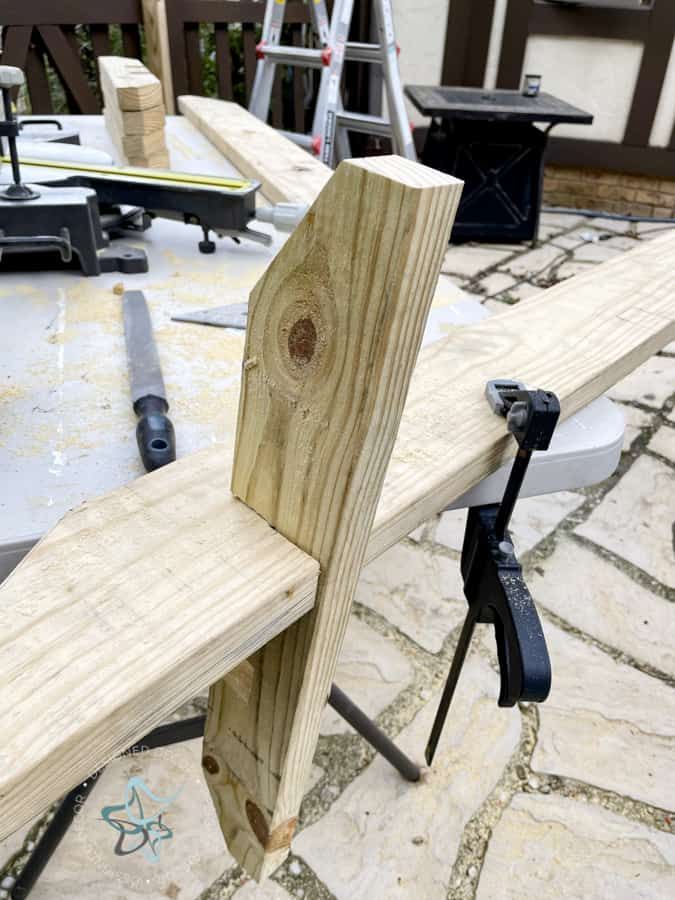
Please make sure you are making your cuts on the top of the cross supports and the bottom of the decorative posts so they fit together like the picture above. Making sure all the angles are facing down.
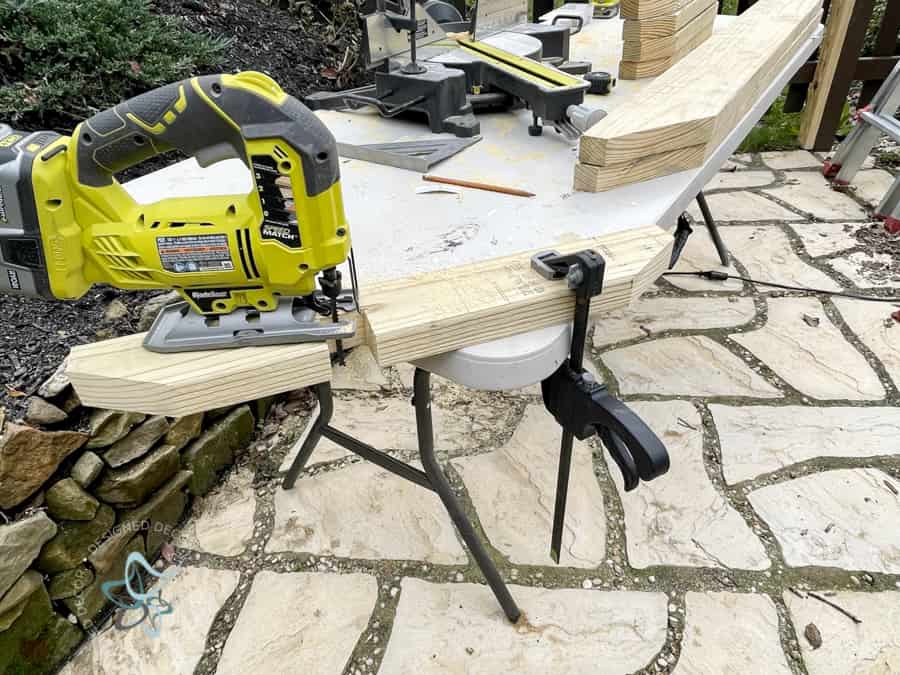
Cut out all the marks by using a jig saw.
Begin to assemble the arbor
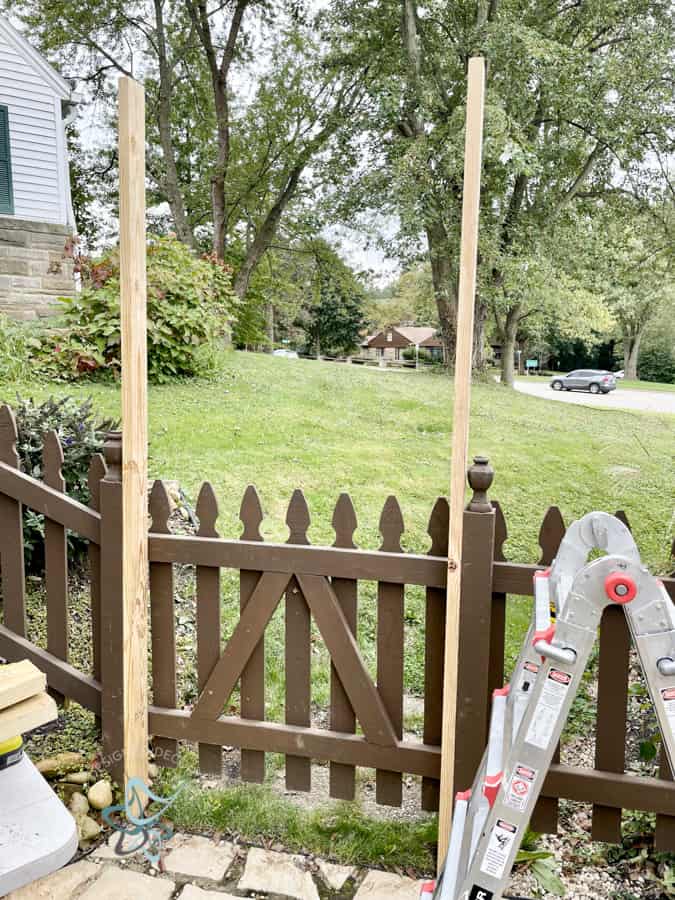
Attach the upright beams to the inside of the gate posts. You could also attach to the outside, however you need to determine this before making any cuts.
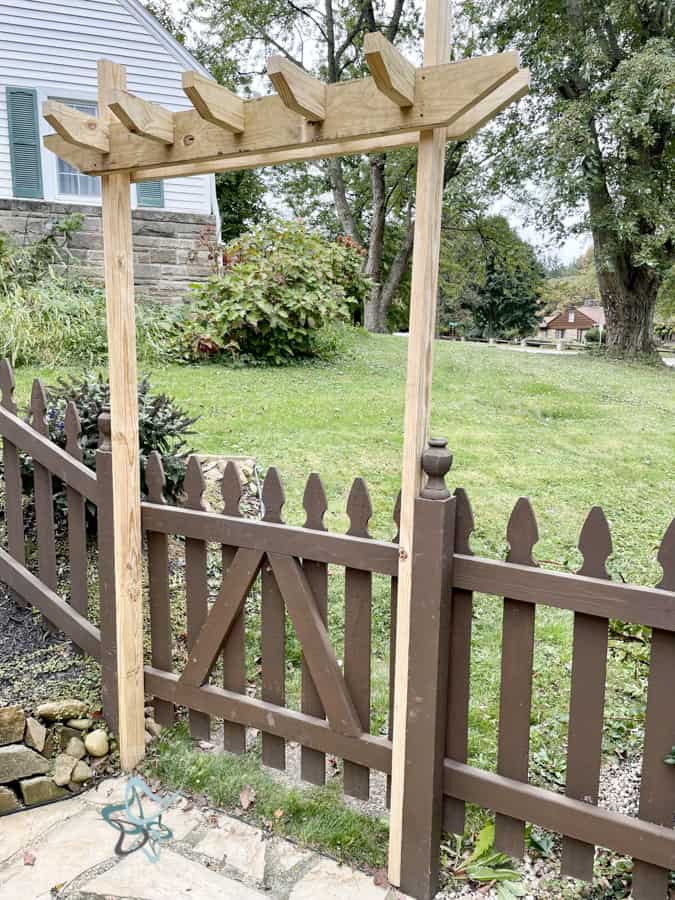
Screw the cross supports to the outside of the upright beams. Place the decorative beams into the cross support beam. Now you are ready to finish your DIY gate arbor.
How Tall Should a Gate Arbor Be
The perfect garden gate arbor is an essential element of any beautifully designed garden space. One frequently asked question is just how tall a garden gate arbor should be. Although there is no precise height for a garden gate arbor, it should be tall enough to create an inviting entrance while still being practical and functional for its intended purpose.
The ideal height may vary depending on the size of your garden space and personal preference, but generally, a gate arbor that is between seven and ten feet tall is a good starting point. When choosing the height of your gate arbor, consider how it will look with the surrounding landscape, and whether it adds visual interest and a sense of balance to your home theme. Your gate arbor should be both functional and aesthetically pleasing, so take the time to find the perfect height for your needs.
Finishing touches for the DIY gate arbor
When it comes to completing your gate arbor, don’t forget about the finishing touches! A well-chosen stain or paint can make all the difference in elevating the look of your arbor and extending its lifespan. Whether you opt for a classic stain to highlight the natural wood grain or decide to paint, the right finish will tie everything together and create a cohesive design.
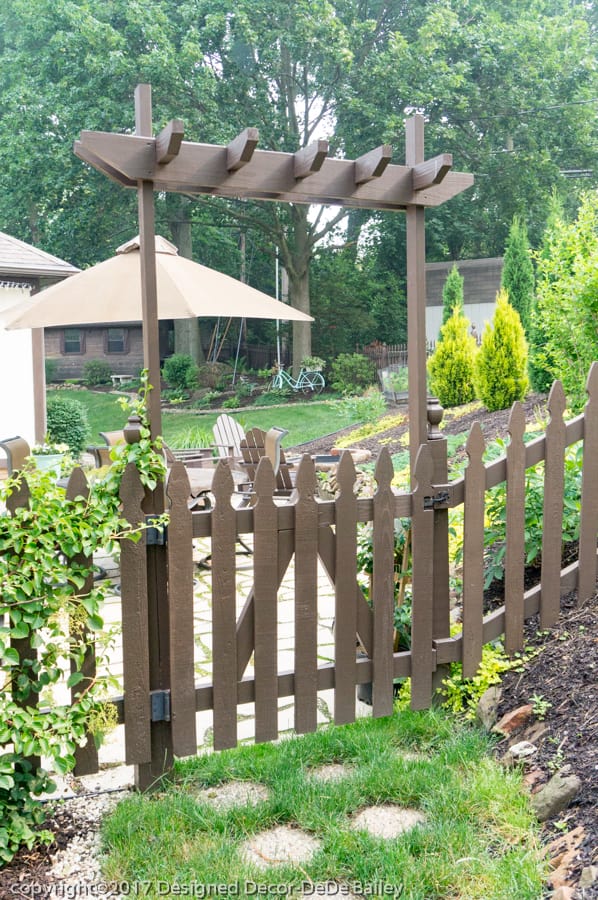
I love the look of a natural wood fence, however, our gate and fence were painted in the same color as the house trim, so we decided to keep everything as it was and I painted the arbor to match the fence.
We built our arbor so we could plant some climbing vines next to it to provide privacy as we live on a very busy street. So eventually we are hoping you will not even see the arbor as our climbing vine will overtake it in a few years. My fingers are crossed for quick climbing!

Best climbing plants for an Arbor
When choosing the best climbing plants for your DIY gate arbor, consider investing in fast-growing and flowering varieties. Ivy, clematis, and wisteria are all excellent choices, with the added bonus of adding a delightful fragrance to your garden. Of course, you need to consider your growing zone and pick the ones that will grow in your area.
After talking with my local nursery, I decided to plant a climbing hydrangea. I also was not having much luck with the clematis that I planted in that area when we moved in. It is probably going to take 4 to 5 years before I get that privacy. According to Home for the Harvest, my climbing hydrangea should grow 1 – 2 feet per year.
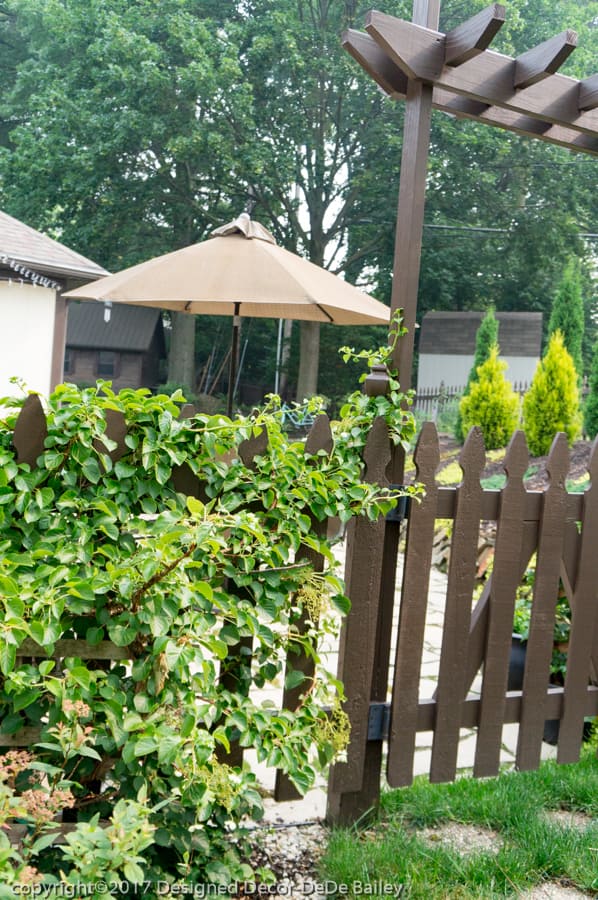
As you can see, she is starting to climb up the newly built Arbor. With careful maintenance and guidance, your climbing plants will transform your gate arbor into a stunning feature.
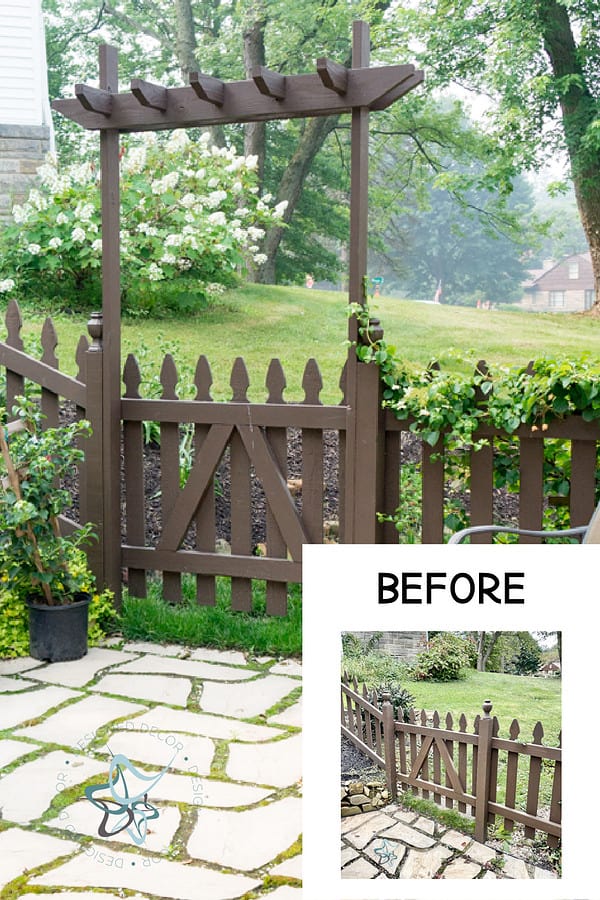
I also just planted another climbing hydrangea on the other side of the gate so we now have one on each side. I love how that simple arbor adds so much more charm to the gate.
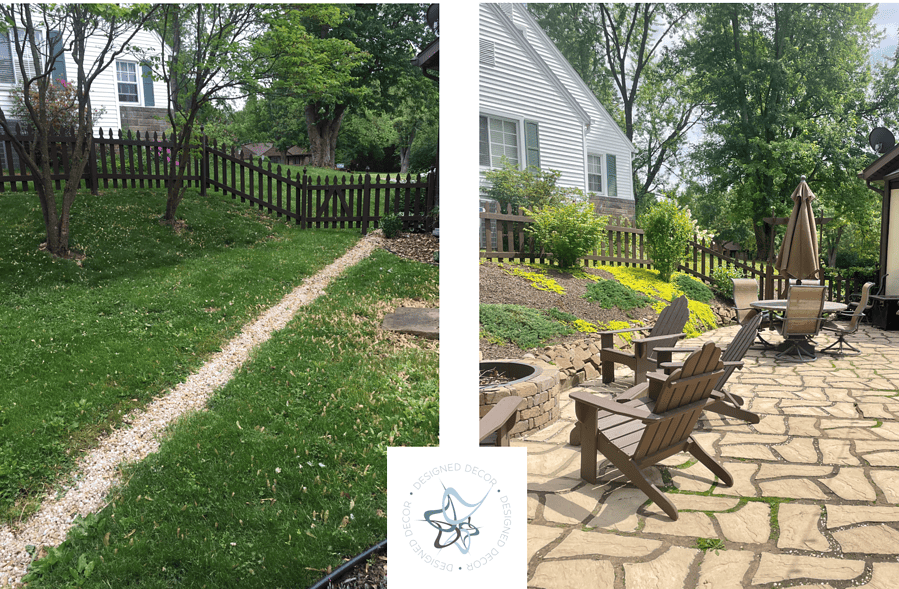
This was how the back looked when we moved in. We added the DIY paver patio extension and eliminated having to mow that grass hill. Sadly we killed the 2 dogwood trees you see in the before picture. We planted some Rose of Sharon in place of the dogwoods to give us some privacy from the neighbors house.
Decorative arbors for sale
For those of you who do not have the time, tools, or the talent to make your own arbor, I have rounded up a few affordable arbors that you can purchase.
- Reinke vinyl arbor from Wayfair
- Arch Arbor from Walmart
- White Garden Arbor from Lowes
- Cardiff vinyl arbor from Amazon
Building your own arbor over a gate can be a great way to transform the entrance of your home, yard or garden. Not only will it make your home look more stylish and inviting, but you can do it for much less than shelling out for some pre-made option. As long as you’re handy with basic tools and supplies, or know someone who is, you have everything you need to construct a beautiful arbor that’s both affordable and easy to build.
Now that you have all the steps and materials needed to build this homemade arbor, there’s nothing holding you back from building one today! Plus, you can proudly show off your work to your family and friends. So what are you waiting for? Get out there and start taking on some fun DIY projects! What is an easy outdoor project that you’ve taken on recently?
Check out these other great DIY Outdoor Projects
- Outdoor weather proof TV Cabinet
- DIY Sectional Sofa
- Shed Faux Window Flower Box
- Flip-up Deck Bar
- Easy Way to Stain a Deck


Join the DD Community!

Join the Designed Decor Community and receive weekly free tips on DIY home projects, painted furniture, decorating, and much more.

TFS says
Wow, I would like to try some of the ideas it looks great, It seems a perfect way to enhance outdoor space.