Have you ever taken on a home renovation and while in the middle of the project you wonder, “What were we thinking?” When the project is finally done, you say, “I am so glad that is over with.” And a year later, you are enjoying the renovation and say, “I love it and I am so glad we did this!” These are the exact emotions we had during and after our DIY patio extension project.
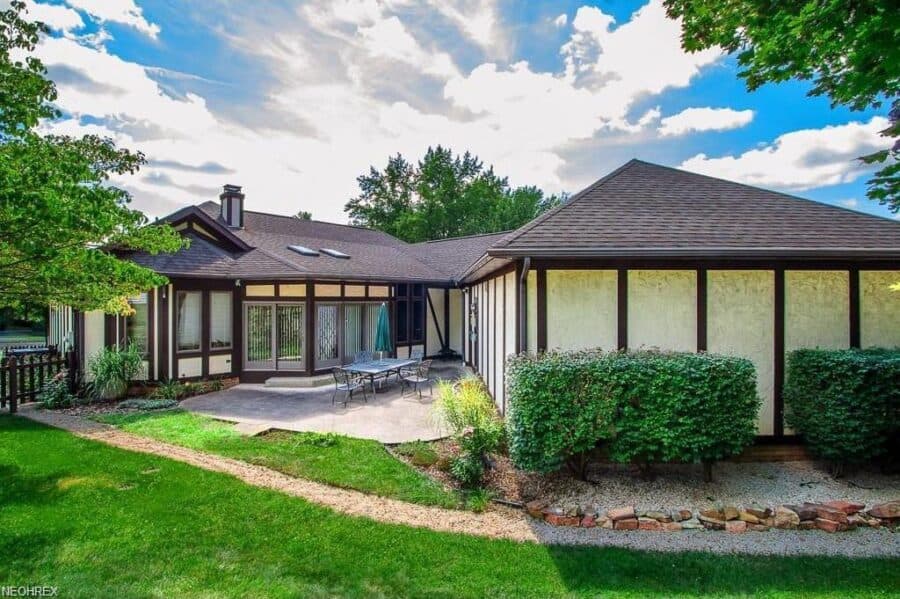
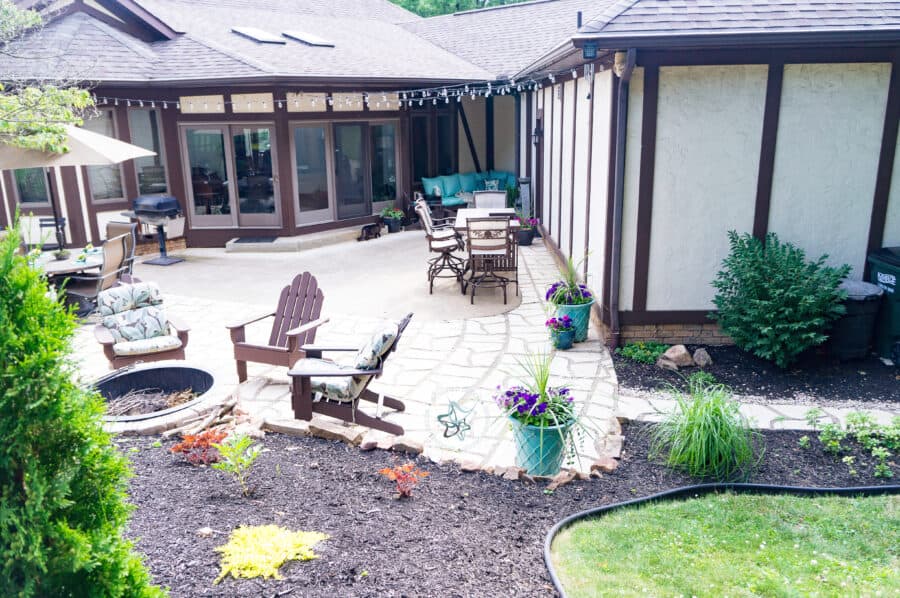
A year after building a paver patio, we are now enjoying the extended flagstone paver patio and watching our newly planted landscape grow.
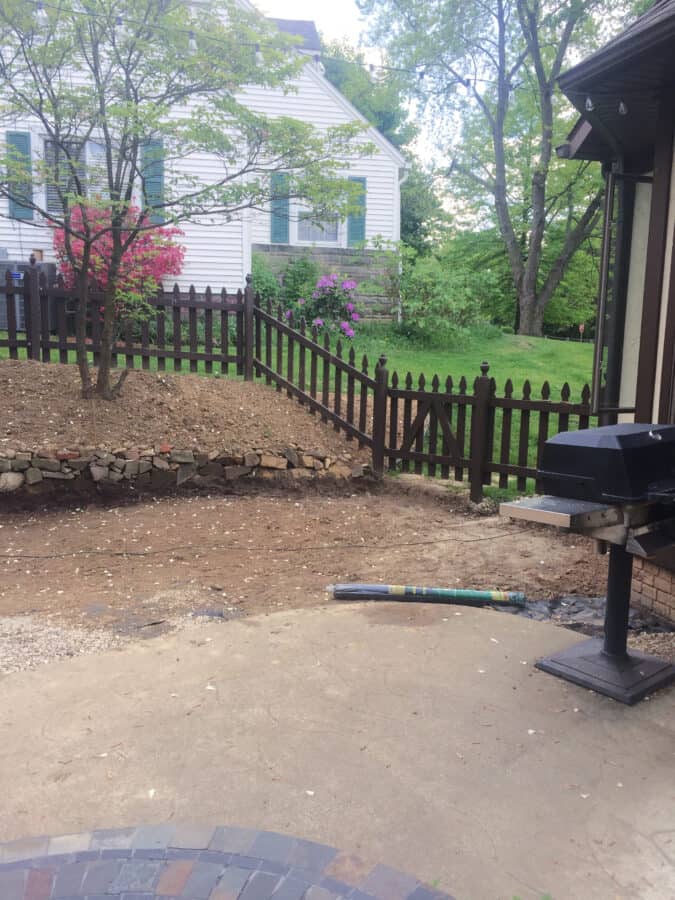
Our first major challenge was working with the french drain. We discovered that the french drain is much needed on our property as all of our neighbors sit higher than our house. In the 3 years of living here, our patio/basement section near the patio has flooded twice in heavy downpours.
We also needed to landscape the hill in such a manner as to absorb more water and to redirect the water from the patio to help prevent future flooding.
How to Extend an Existing Patio
We consider having the patio extended with concrete, however that was not an option as we desperately needed something to work with the french drain. We decided our best action was to extend the existing patio with an easy DIY patio with pavers. A paver patio would help absorb the rain waters since it is open and would have layers of sand and gravel.
This post contains affiliate links. Click here to see my full disclosure policy.
Since we are needing to divert the rainwater, we decided to landscape the hill and remove the grass. This also gave us a place for all the dirt that needed to be removed for the patio pavers. As Mr. DD began to unearth the ground for the patio pavers, he also began to build the rock wall to help support all the dirt that was being added to the hill for the landscaping. The rocks were already on the property as garden borders, so this was the perfect way to repurpose and use what we already owned.
During the building of the rock wall, Mr. DD decided he wanted a firepit. He ordered this fire pit kit and measured the proper distance from the wood structure and built the firepit into the rock wall.
Making a Patio with Pavers
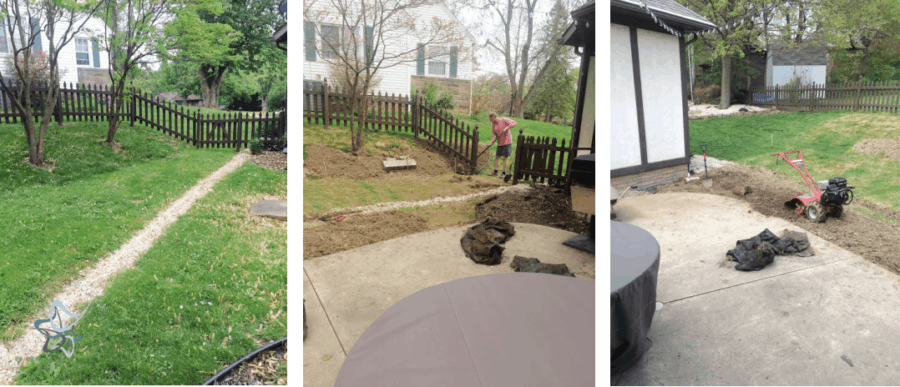
Start by digging 6 inches of dirt from the surface. Once the 6 inches are removed, smooth and level the patio area. Add a weed barrier over the smooth dirt surface.
Mr. DD began by digging up the ground. He tilled the turned-up soil and tossed the dirt up onto the hill. He did this entire process on his own with a little help moving dirt from my son.
Watch the video of the DIY patio extension in action
Adding the gravel
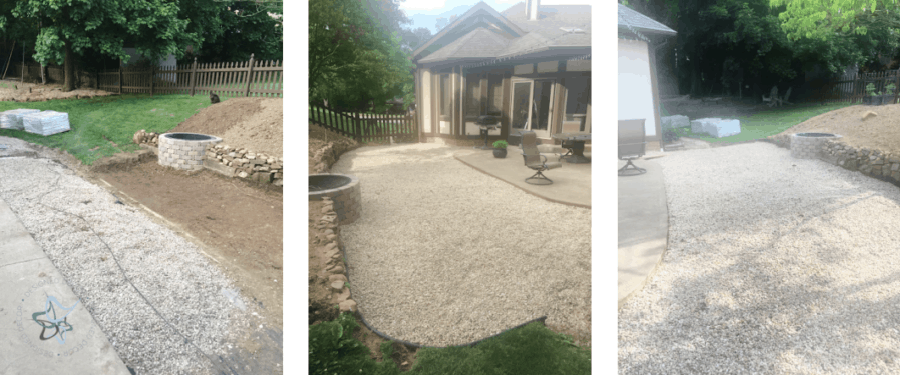
Add 4 inches of pea gravel over top of the weed barrier and smooth out the pea gravel. The best way to smooth the pea gravel is to rake out and then drag a long 2×4 over the gravel to check the gravel level.
All that gravel was on our property. The previous owners had every inch of landscaping beds covered with white pea gravel. Mr. DD shoveled up all that gravel one wheel barrel at a time. I am exhausted just thinking about the labor this man put into this project. I only heard a few times when he started how much every inch of his body hurt. This was during all the covid shutdowns, so he would state this is my workout.
Adding the sand and pavers
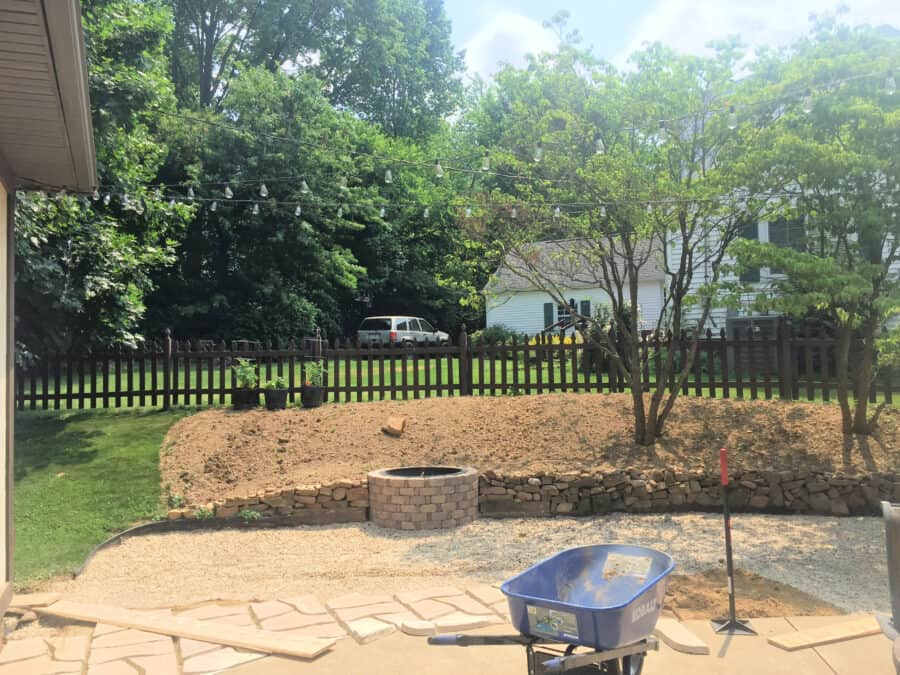
Add sand over pea gravel. Hand or power tamp the sand down into the gravel. Smooth and level the sand surface using a straight piece of wood for the leveling. This sand layer should be about an inch thick.
Mr. DD had 1 ton of sand delivered and dropped at the end of the driveway since the delivery truck could not fit around behind the garage to drop the sand on top of the gravel. One wheel barrel at a time, the sand was placed, hand tampered, and leveled before each patio paver was set in place.
Some pavers needed to be picked back up to level out the sand layer before being set back into place. This took a lot of setting and removing each paver to make sure the pavers were level with the existing patio. Mr. DD also had to have a slight grade to the french drain so the water would travel towards the drain.
The DIY patio extension is beginning to take shape and we can visualize the final project.
Adding gravel between the pavers and paver set sand
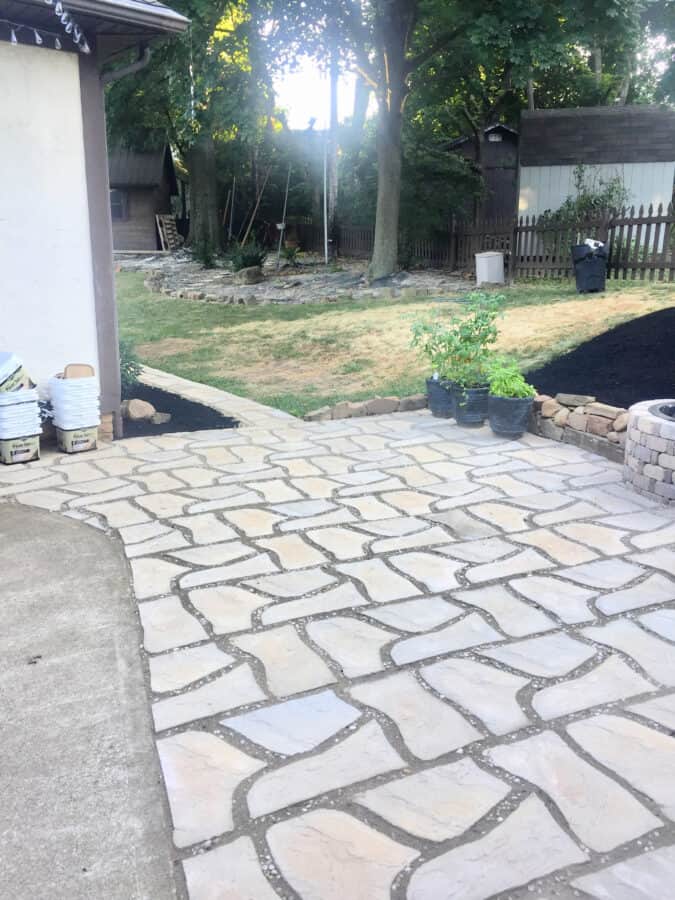
Once all the pavers were set. Mr. DD added the white pea gravel in between the spaces. He figured this would help with drainage as well as fill the gaps before adding the paver set sand. We used 10 – 40 lbs buckets of this paver set sand. Finally, a project that I wanted to help with.
Finished Flagstone Patio Paver Extension
Here we are a year after we completed the DIY patio extension and I am finally able to share the project. I needed planters, plants, and all the patio decorating items before sharing the final project. By the time we finished in July last year, there was nothing left in patio accessories due to the high surge of outdoor projects.
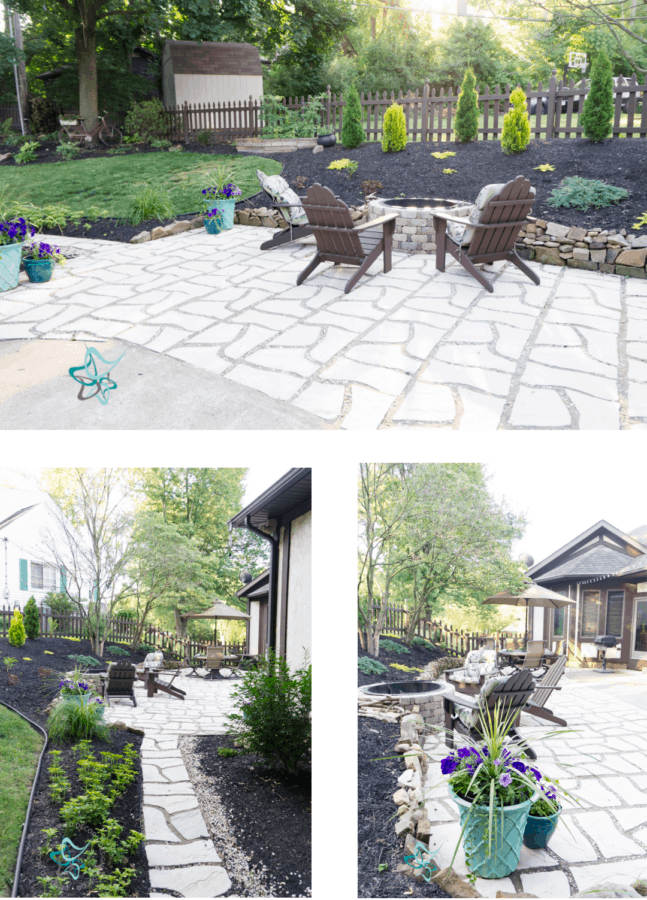
DIY patio paver extension recap
It took Mr. DD 3 months to complete the DIY patio extension.
- 52 wheel barrels of dirt moved
- 60 wheel barrels of gravel moved
- 20 wheel barrels of sand moved
- 388 pavers set in place and picked up 2 to 3 times for leveling
- 400 pounds of paver set sand added
- 300 rocks moved and layered for the rock wall (had to rebuild twice)
- 152 pavers set for firepit
List of the supplies used for this 420 square foot patio paver extension
- 19 ton of pea gravel
- 1 ton of sand- would have used more if we used a power tamper
- 2 – 3ft x 50ft weed block film
- 388 Flagstone Patio Blocks
- Steel Tamper
- Wheelbarrel
- Shovels and Rake
- 10 buckets – Paver set sand
- 64 feet of paver edging
What we would do differently
Looking back on the project there are 2 things we may have done differently. The first would be to have someone with a bobcat dig up the dirt or rent a bigger rotor tiller that could handle digging into the ground. The tiller we borrowed would not dig into the ground and so Mr. DD had to hand dig the ground before the tiller would work. We were also concerned about the french drain collapsing so that is the main reason for not using a bobcat.
The second thing to do differently would be to rent a power compactor. The power tamper would have packed the sand tighter and that was much needed since we have the french drain running under a section of the pavers. This would require more sand in the long run.
A year after the patio extension, we are having to add more of the gravel sand mix in between the pavers, as we are getting some spots that are settling after a hard rain. This is due to the fact that we placed the patio over the french drain. We were expecting this to happen and the settling will eventually stop once the sand is fully packed into the french drain area.
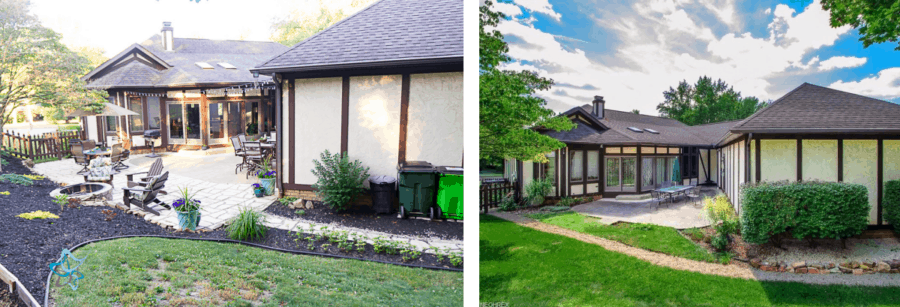
It has been a lot of hard work and everything has been worth it to see these changes side by side. I will be sharing the other patio projects we have planned ( building an arbor over the gate and an outdoor TV box) or completed (DIY outdoor sectional sofa) for our DIY patio extension.
Check out this detailed tutorial on How to build an easy DIY patio for more details. And also these other great outdoor home projects.
- DIY flip-up deck bar
- Hanging outdoor lights
- The easiest way to clean and stain a deck
- Outdoor Sectional Sofa
- Simple patio decorating ideas
- DIY outdoor TV cabinet



Join the DD Community!

Join the Designed Decor Community and receive weekly free tips on DIY home projects, painted furniture, decorating, and much more.

Marble Dining Table And 6 Chairs says
It look very cute! what an amazing idea, there are so beautiful paver patio I’m rethinking thanks for amazing post, I am very glad to see this.