Are you torn with the idea of painting oak? Afraid that you will mess it up and not get the results you were imagining? Learn how to properly paint oak with this proven process to hide the grain and achieve lasting results.
The process that I am going to share with you can be used on oak kitchen cabinets, oak paneling, doors, or oak trim. The process is all that same with slight variances in the paint you choose for each area.

Table of contents
Things to know before beginning
Properly painting oak is not a quick and easy DIY fix. It takes time and effort to achieve lasting results. For this reason, I will give you the step-by-step process on how to paint oak in order to hide the grain and have lasting results. However, I wanted you to know upfront that this is time-intensive and does take some work.
You need to be willing to put in the hard work to have the lasting results. I don’t want to scare you from painting the oak, I just want you to have realistic expectations before tackling the project. The proper way to paint oak is a messy process since you need to sand the oak and use an oil-based primer.
Not to mention, the area in which you are painting will be torn up so be prepared on how long the project can take based on your available time. If you are painting cabinets, keep in mind to make preparations on how you will manage daily tasks while things are torn up.
Project Tools and Materials
This post contains affiliate links. Click here to see my full disclosure policy.
DIY Videos from Designed Decor
Tools
- Paint Brush
- Roller
- Paint Tray
- Sander
- Shop-Vac
- Ladder
- putty knife
- Paint sprayer (optional)
Supplies
- Painters tape
- drop cloth
- 150 grit sandpaper
- 220 grit sandpaper
- 320 grit sandpaper
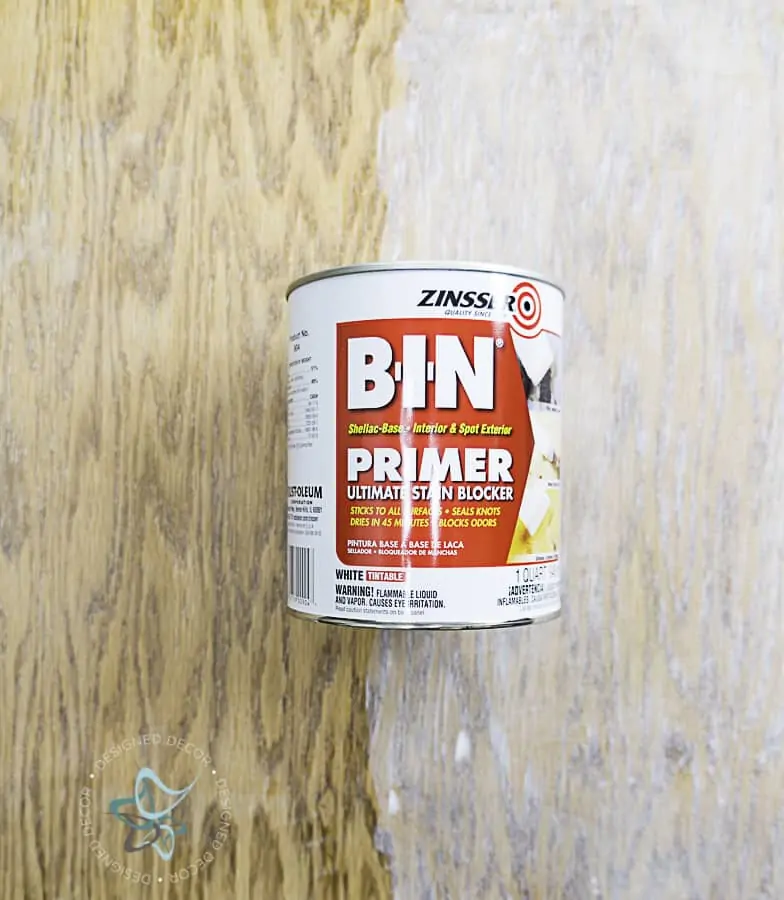
- oil-based primer
- Aqua Coat grain filler
- Paint for cabinets, doors, and trim
- Paint for paneling
- TSP substitute
Step-by-step properly paint oak
Step 1 – Gather supplies
It is important to make sure you have everything needed before you begin the project. Nothing is worse than having to run to the store in the middle of a project or worse yet, having the store closed.
Step 2 – Prep the area
Remove all items from your space and cover all the items that need to remain. Use drop cloths on the floors and tape off the area you are working. This is a must to keep the dust and fumes to a minimum. Although, If you are painting kitchen cabinets you can leave the items in the cabinets, however, you will need to tape off the inside of each cabinet until all the sanding is done.
Step 3 – Clean surface

Properly clean all surfaces. Use this TSP substitute for kitchen and bathroom cabinets. You need to make sure all the grease and grime is completely removed to have proper paint adhesion. For doors, trim or paneling, you can clean with a 50/50 vinegar and water solution. Highly touched areas of doors and trim may need the same cleaner as the cabinets.
Step 4 – Remove cabinet doors
Remove all doors and hardware and make sure you number each door and cabinet. This is a must as it makes it much easier when placing doors back on. I would also place all door hinges and screws in numbered individual baggies
Step 5 – Sand Surface
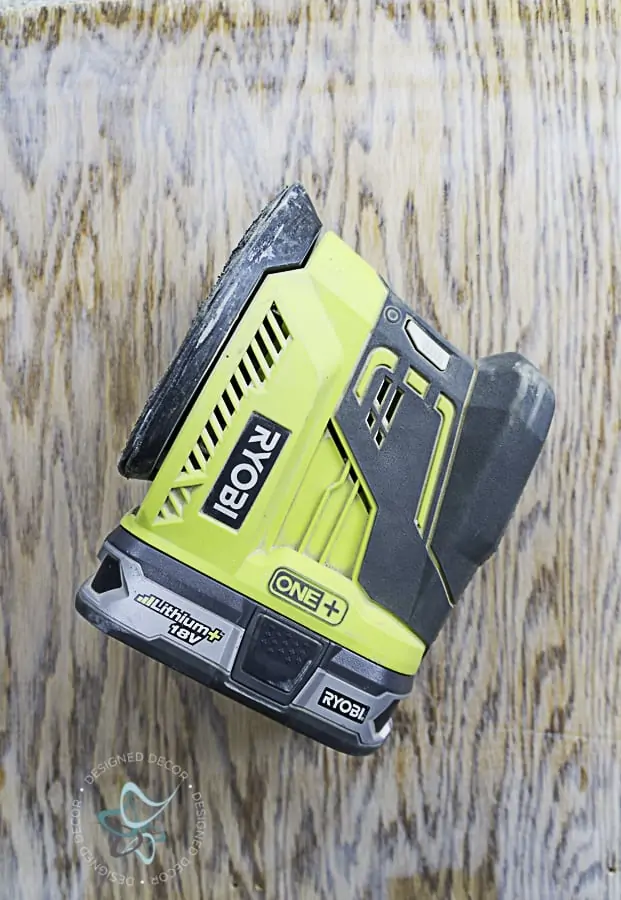
Using the 150 grit sandpaper, sand down all surfaces that will be painted. It is easier to use an electric sander, especially if painting a large area.
My electric sander has a vacuum attachment, so I used a shop-vac as I sanded down the oak, this helped to keep the dust to a minimum.
Step 6 – Fill grain
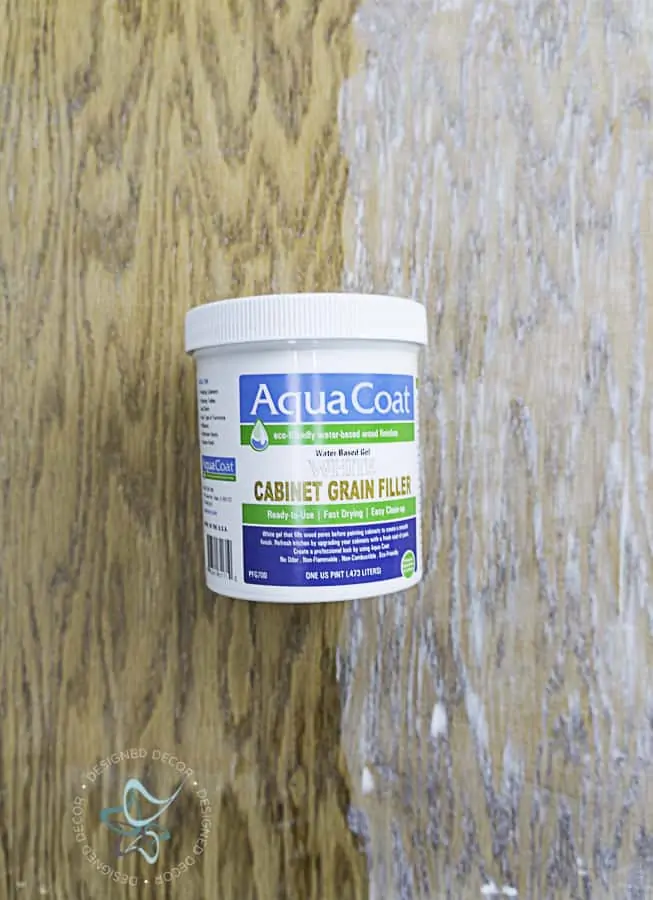
Using a putty knife or room key card, apply the grain filler over the entire oak surface. I find that using a hotel room key card works best for me, it fits perfectly into my hands. Use the key card to remove the extra grain filler. You don’t want to leave too much on the surface as it only leads to more dust when sanding.
After doing a lot of research from professional painters. I found many recommending Aqua Coat grain filler. It is a liquid gel that fills the grain easily, does not shrink, and it dries quick.
Step 7 – Sand filler
Using the 220 grit sandpaper sand the surface making sure to remove any extra grain filler. Use your hand to feel for any imperfections. Some areas may need another light coat of the grain filler. If needing a second coat and again after it dries.
Step 8 – Vacuum Surface
Vacuum the area to remove any extra dust from sanding.
Furniture Painting Guide
- Learn the basics and more about how to paint furniture
- Discover how to find furniture and inspiration
- Tips for painting, sealing, and glazing
- Learn steps to get started along with my favorite products and tools
Step 9 – Prime
Apply an oil-based primer with a foam roller. Do not use the traditional nap rollers as they will leave texture. Remember we are trying to achieve a smooth finish. You will also need to cut in the primer with a quality paintbrush. Trying to blend the paint with the roller for a smooth transition.
If you are painting cabinets you have the option to spray on the oil-based primer for the doors. Keep in mind you need a clean outdoor area free of dust and debris. in addition, you can also create some sort of spray booth in your garage to protect the doors when drying.
Step 10 – Sand
After the primer is dry, lightly sand using the 320 grit sandpaper. Vacuum up the extra dust and repeat steps 9 and 10. I like to apply a second coat of primer as the primer helps to add extra protection from grain and bleed-through.

Store your paint brush and roller in the paint tray and wrap with plastic wrap to keep your paint supplies from drying out in-between coats of priming and painting.
Step 11 – Paint
You have the option of spraying or rolling on your paint. To clarify, if using a paint sprayer, it does leave a dust film, so make sure to keep your area taped off.
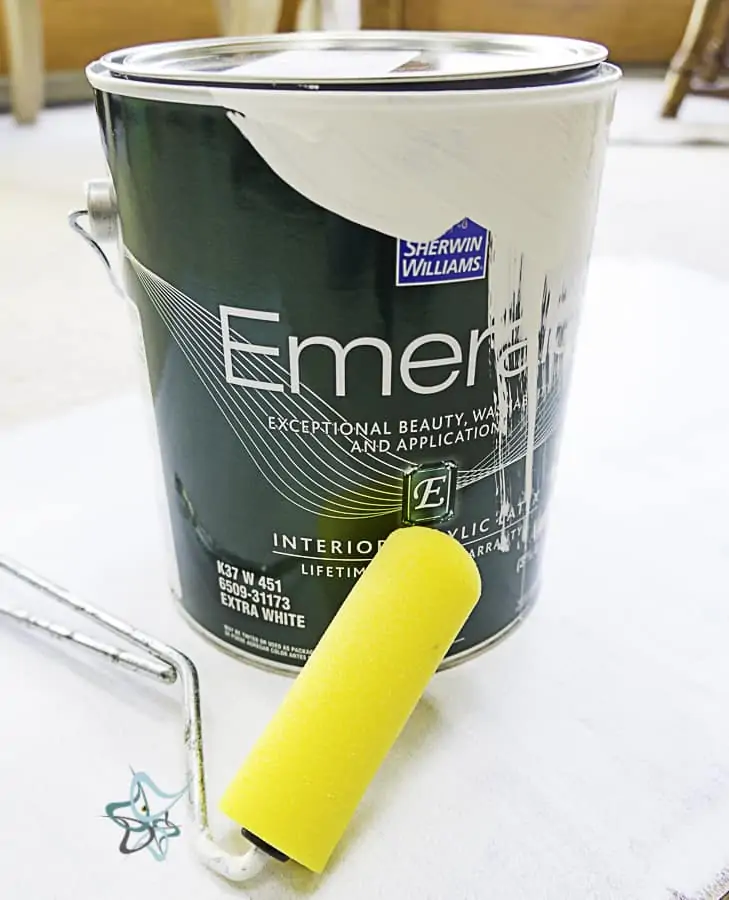
Cabinets, Doors and Trim – Use Sherwin Williams Emerald Urethane Trim Enamel. This paint has the built in sealer and it does not yellow. It is perfect for high traffic areas that need to be wiped down.
Paneling– Use Sherwin Williams Emerald Acrylic Latex paint.
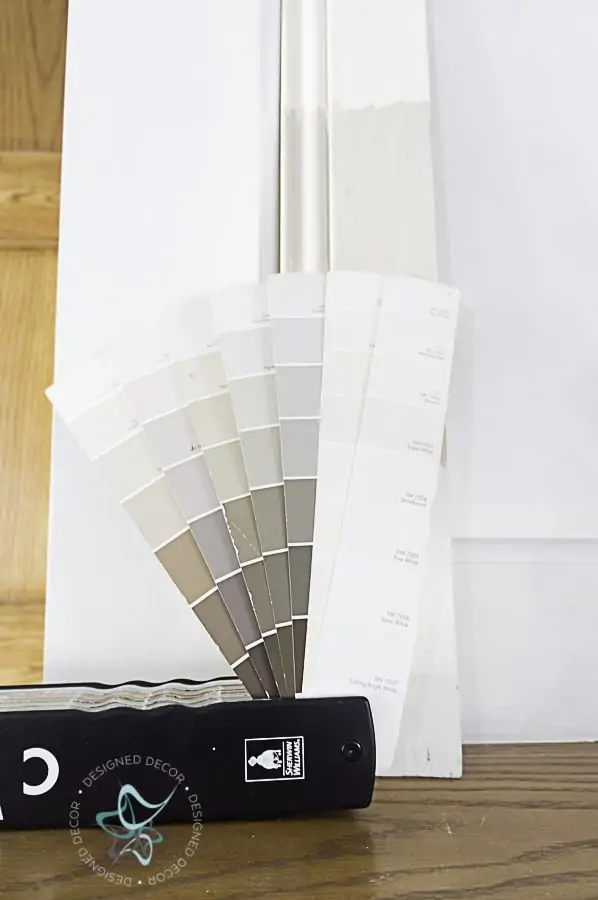
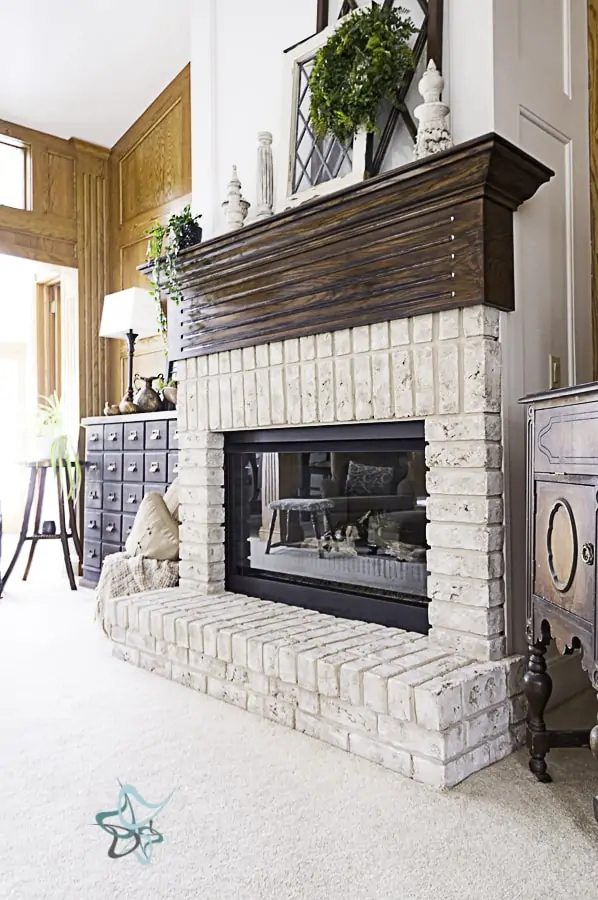
Picking paint color is one of the hardest parts of painting. I needed something light to break up all the orange oak in my living room and it needed to be a similar color tone to the painted brick. Importantly, make sure you look at the paint swatches in all types of lighting, and sometimes it is worth it to buy paint swatches and paint on the area before investing in the final color. I went with SW#7010 White Duck.
Step 12 – Clean area
Clean and put away all tools and materials. Remove all protective sheets and tape. You may begin to reassemble your room, except allow the cabinet doors to cure for a week before rehanging. Consequently, this allows the paint to harden before you start to use it on a daily basis.

Questions & Answers for painting oak
Do I really need a grain filler?
Yes, the grain filler is what helps to fill the grain to achieve a smooth finish. You may not get the same quality finish if you skip this step.
Do I have to use an oil-based primer?
If you don’t use an oil-based primer you could potentially see bleed through. To clarify, bleed-through is what happens when the oil tannins in the wood come to the surface. The only thing that blocks these oil tannins is oil-based paint.
Do I need to use a sprayer?
Using a paint sprayer does make the job easier and you get a smoother finish. Ultimately, if you can not seal off the area, then I would not use a sprayer. Make sure to use a foam roller if not using a sprayer.
Do I need to seal?
Of course, your walls do not need to be sealed. Follow the manufactures directions for the paint that you use. Some paints have a topcoat built into the paint. However, it never hurts to have extra protection on cabinets if you spent all this time prepping, priming, and painting. If you decide to seal, please make sure to use a quality water-based sealer that does not yellow. I would recommend General Finish High-performance sealer.
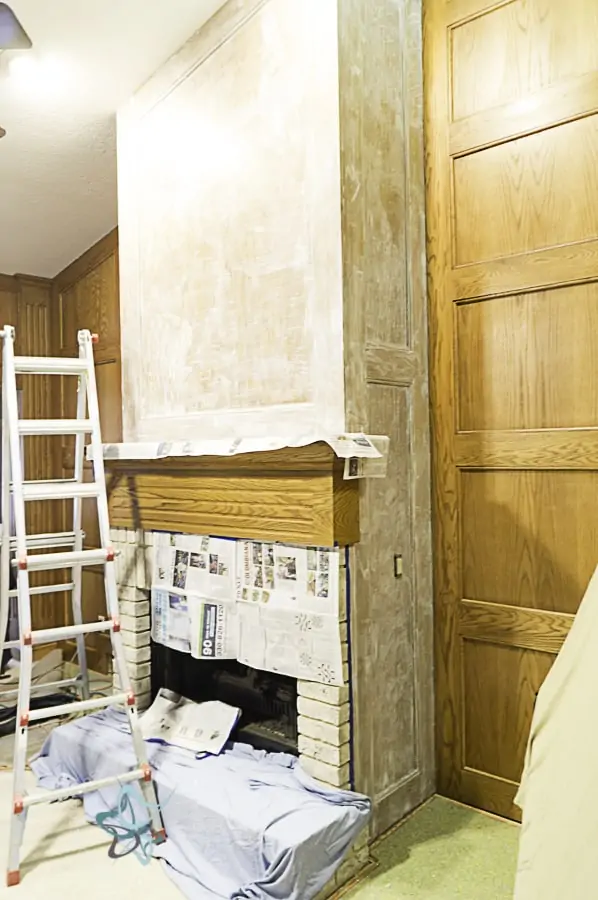
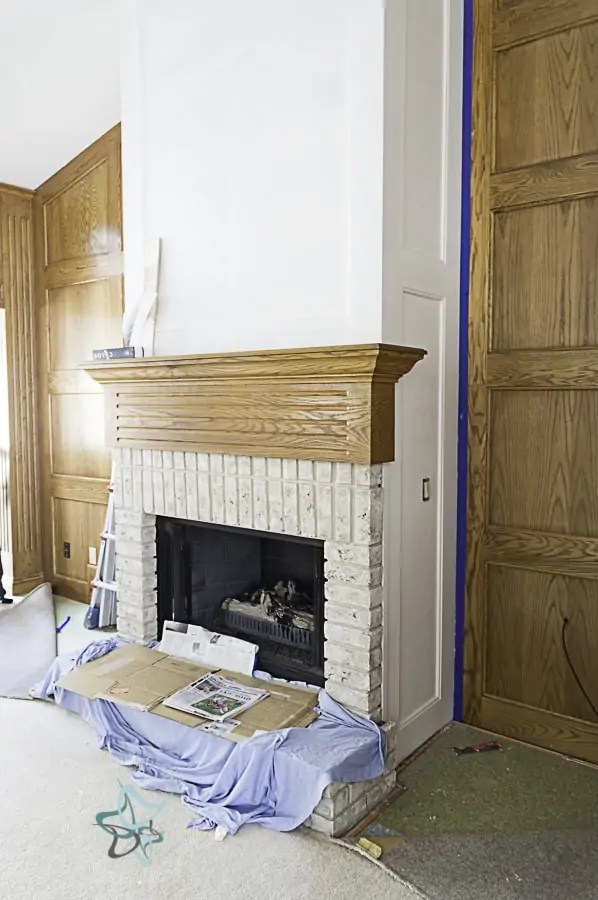
Staining the mantel
I originally was not going to stain the mantel. After painting the brick and oak surround, I decided the mantel needed to be darker to help offset all the other orange oak in the living space.
To be sure the mantle stood out, I used my favorite gel stain in Java and also black to achieve the darker stain color. Read all the details about my gel stain process.

Leave a Reply