Repurposing pallet wood is a great way to make some great home decor items. It is cost savings because most times, you can get free pallets. When you are getting pallet wood to complete home decor projects, it is import to know a few things about pallet wood. Pallet wood is treated with different methods, some are chemically treated and others are heat treated. If you are using the pallet wood for interior projects, please avoid using chemically treated pallets. Heat treated pallets will be marked with an HT stamp somewhere on the pallet. If you have a pallet with no markings, it is best not to use it and search for one that has the HT stamp. Now, let me share a few home decor projects that I completed using pallet wood and I also share the steps needed to make your own arrows, clocks, and lights using pallet wood.
Pallet Wood Arrows
Arrows are a hot decorating trend right now, so why not make a few to use in your home. I am all about saving money and making things for yourself, so I decided to make few repurposed pallet wood arrows to sell in my shop. Let me show you how easy they are to make for your own home decor.
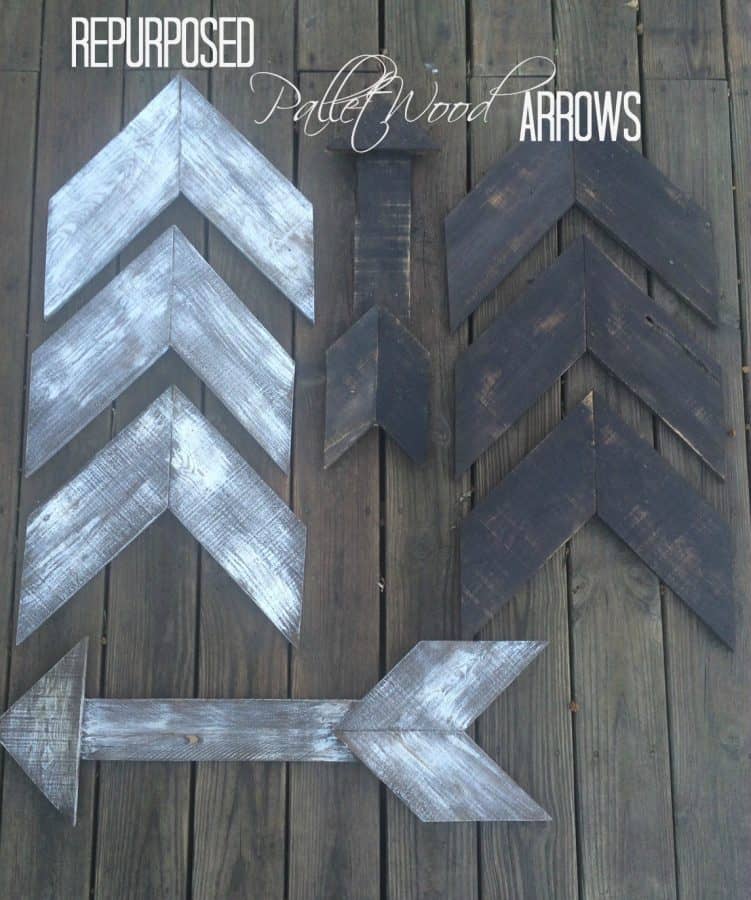
I had left over pallet wood from making the repurposed snow flakes in the winter, so this is the wood that I used for the arrows. If you don’t have extra wood, you can use new wood and make it look aged. I made a few different sizes, stained a few using dark walnut stain and on the others, I dry brushed white paint directly on the aged pallet wood.
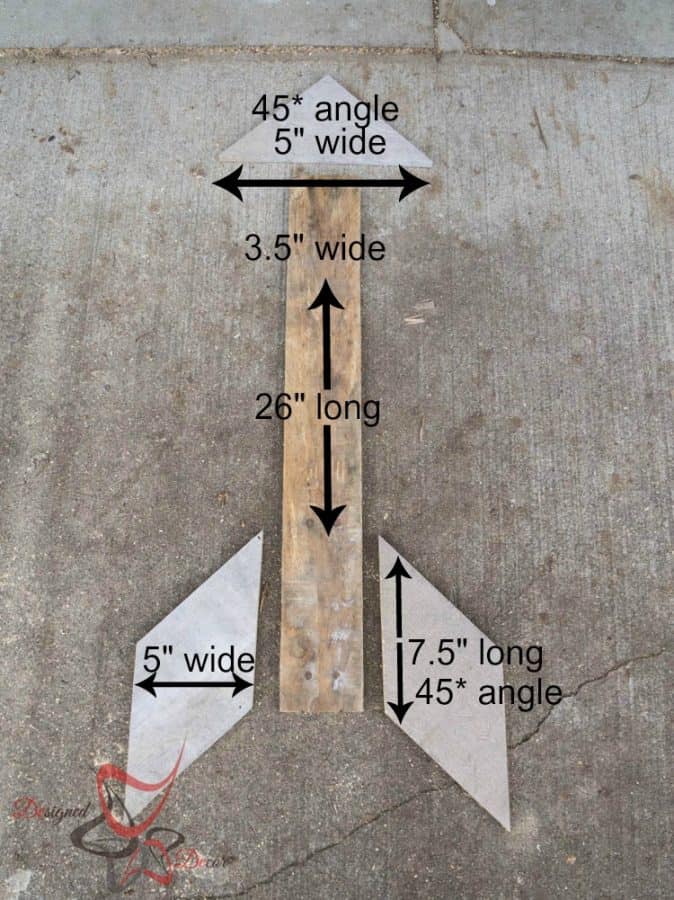
I thought it would be easier if I just posted the cut sizes on my photo instead of trying to explain each cut. The photo above is the larger size arrow. I made different sizes of this style arrow and I just decreased the sizes on each cut. I guess you can say I “eye-balled it” There are so many different versions of this arrow that you could make. You can make a skinnier middle and cut down the width of the pallet. I just used the pallet board as it was. If you decide to use a skinner middle you might need to cut down the arrow tip and the feather ends to make it look more proportional. If you are using old wood pieces, you don’t have to worry about the wood being different grains or colors. this adds to the aged look of the wood.
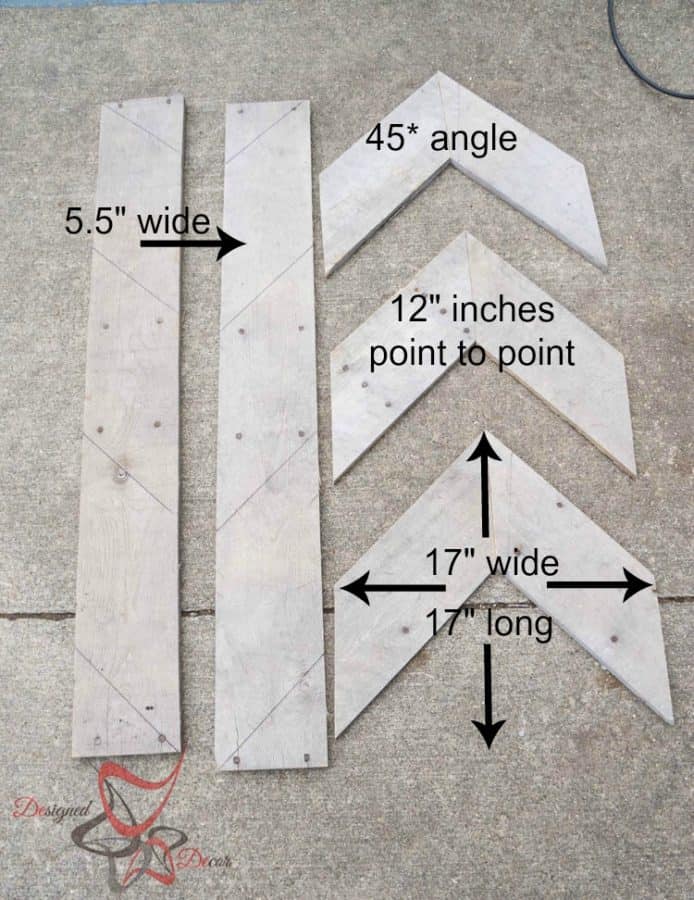
The chevron style arrows I cut 2 pallet boards with 45-degree angles and used different directions on my cuts, this way the same faded color tone would be on the same side up. You don’t have to do this, except you would need to flip the board over when assembling if you cut all in the same direction, which could give you a very different wood grain or color. Again, you could make the chevron arrows in any size or width. I liked the chunky look as it makes a bigger statement.
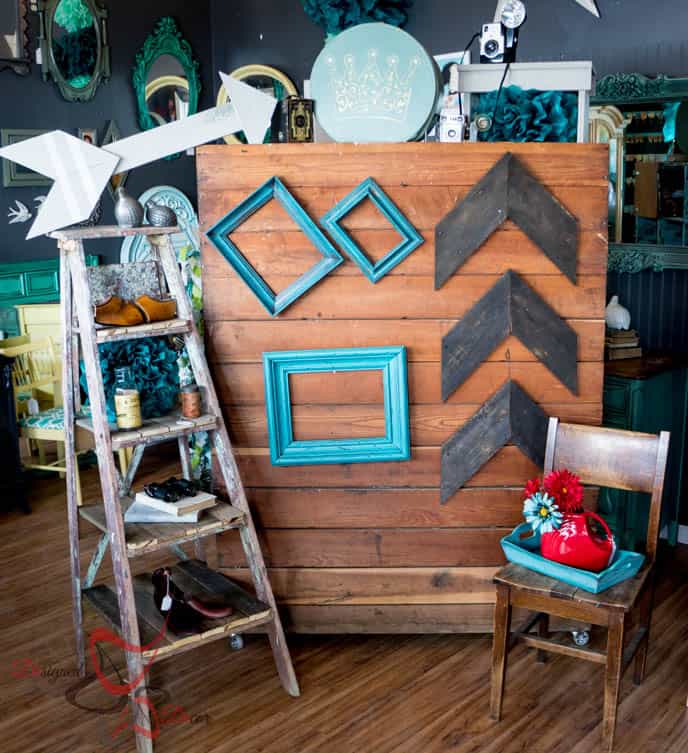
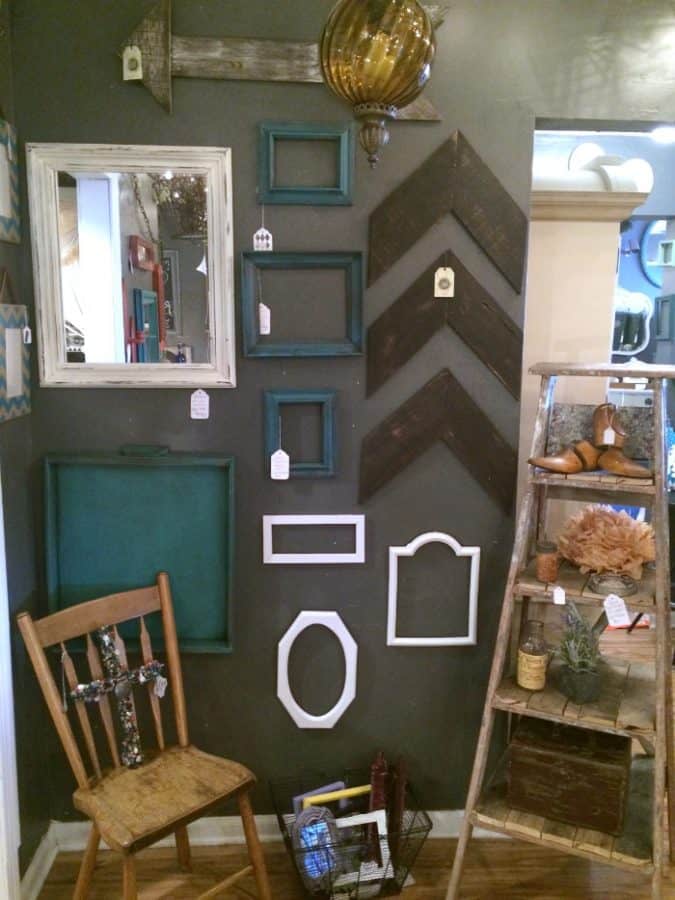
I wanted to use a set of these arrows in my home but ended up selling all the arrows at the shop. The arrows were just too rustic of a design in my home. They did not go with any of my decor, I would need a more traditional looking arrow. So here are a few shots of the arrows on display at the store.
They sold quickly, so now I need to make a few more. This is a simple DIY project that you can do with any wood scraps lying around in your garage. If you missed my post a few weeks back, you can read about how I repurposed the old paint ladder into a decorative shelf.
Pallet Wood Light
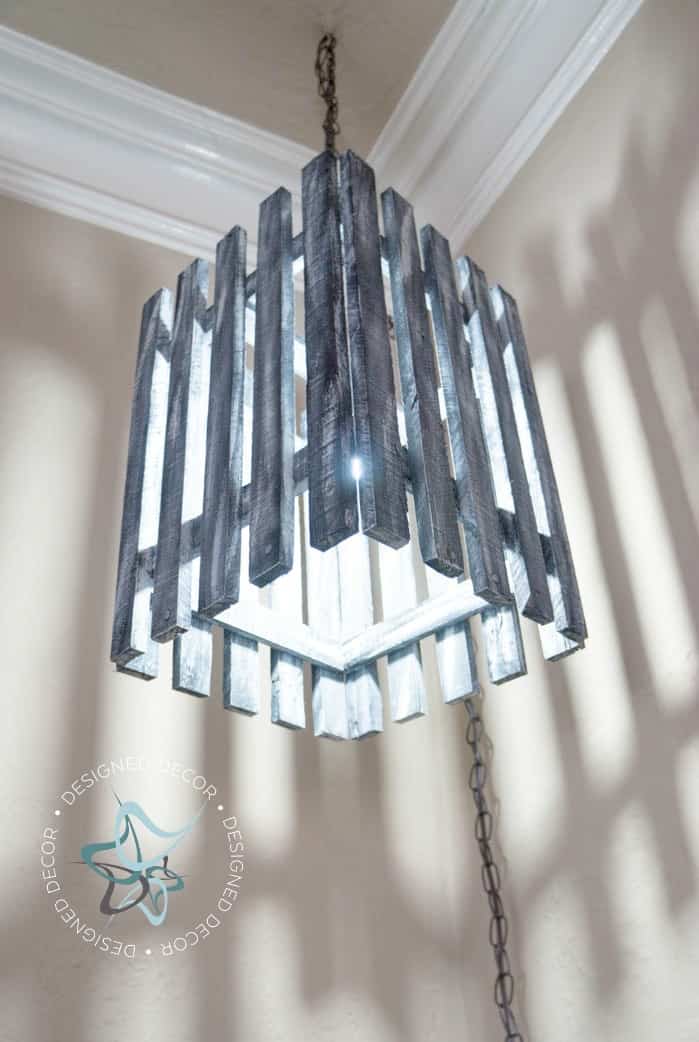
You can take an old pallet and turn it into anything, like a repurposed pallet light. I love to use pallets and I love to make lights, so why not make a pallet light.
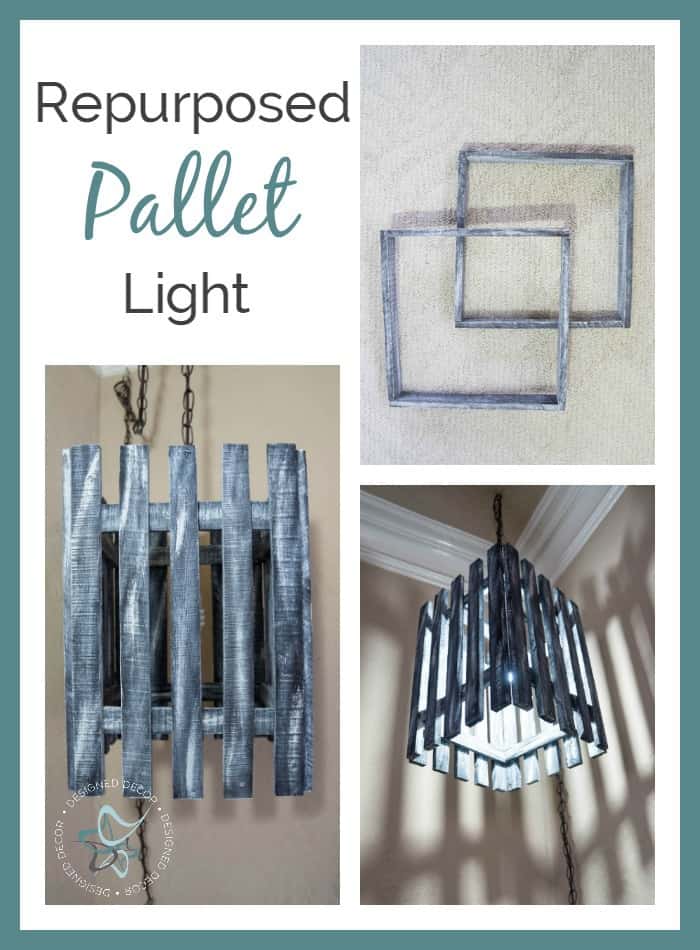
We had some leftover pallet scrap pieces and decided to build a Craftsman Style Hanging light. This is a simple project that can be completed in a few hours to add character and light to any room of your home.
This post contains some affiliate links. Click here for my full disclosure policy.
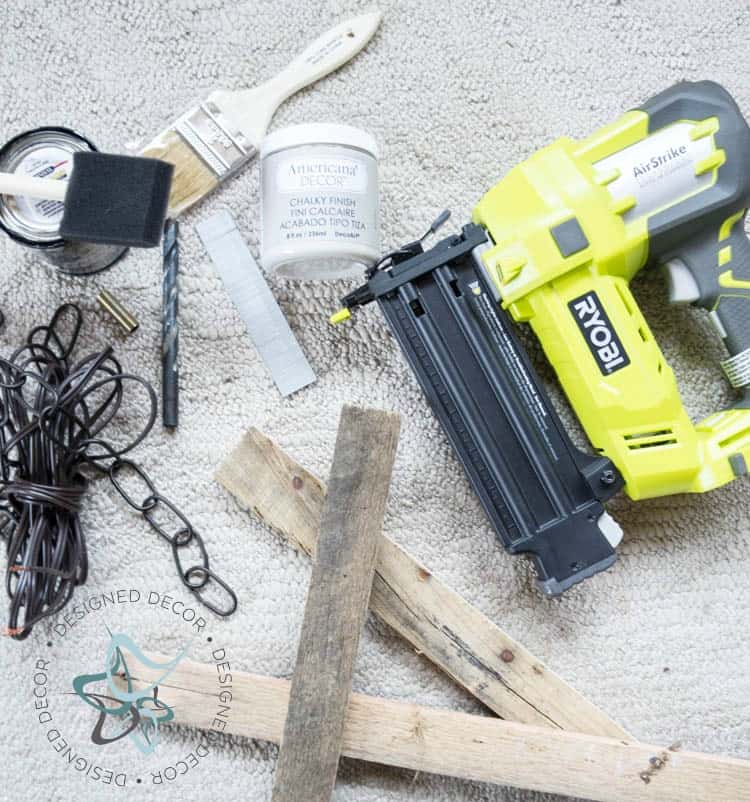
Supply List:
Pallet wood or wood of your choice – Black Stain by Minwax – 2 oz. jar of Americana Décor Chalky Finish Paint in Yester Year – Wood Glue by Gorilla Glue – Ryobi AirStrike Nailer – Ryobi Drill – size “Z” .413 drill bit – Phillips screwdriver, Swag Light Kit – Light Socket – Lamp Nipples – Cree Light Bulb
Step 1: Cutting the wood
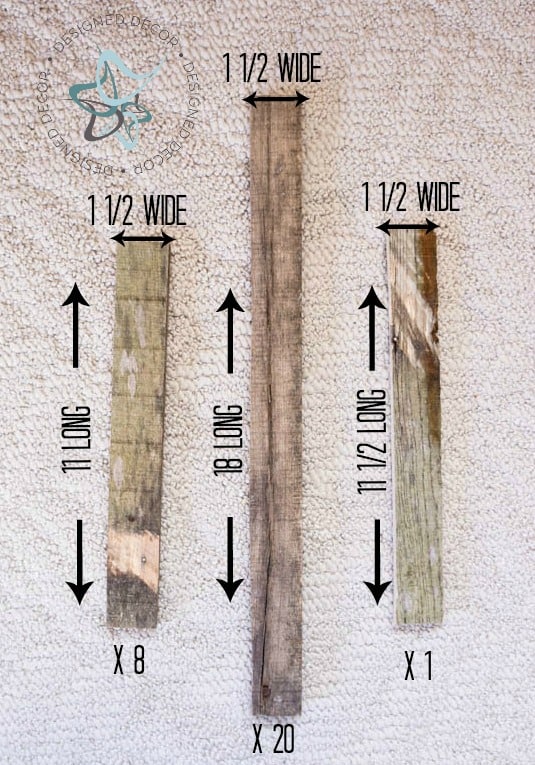
Start by cutting and preparing all the wood pieces. You will need one (1) piece to measure 1 ½ inch wide by 11 ½ inches long, eight (8) pieces to measure 1 ½ inch wide by 11 inches long, and twenty (20) pieces to measure 1 ½ inch wide by 18 inches long. After all, pieces have been cut, take the one (1) 11 ½ inch long piece of wood and drill a .413 hole in the center using the size “Z” bit and Ryobi Drill.
Step 2: Painting the wood
Stain all sides of wood pieces and let dry completely. Using a dry brush technique, paint all stained wood pieces on all sides and be sure to paint the ends.
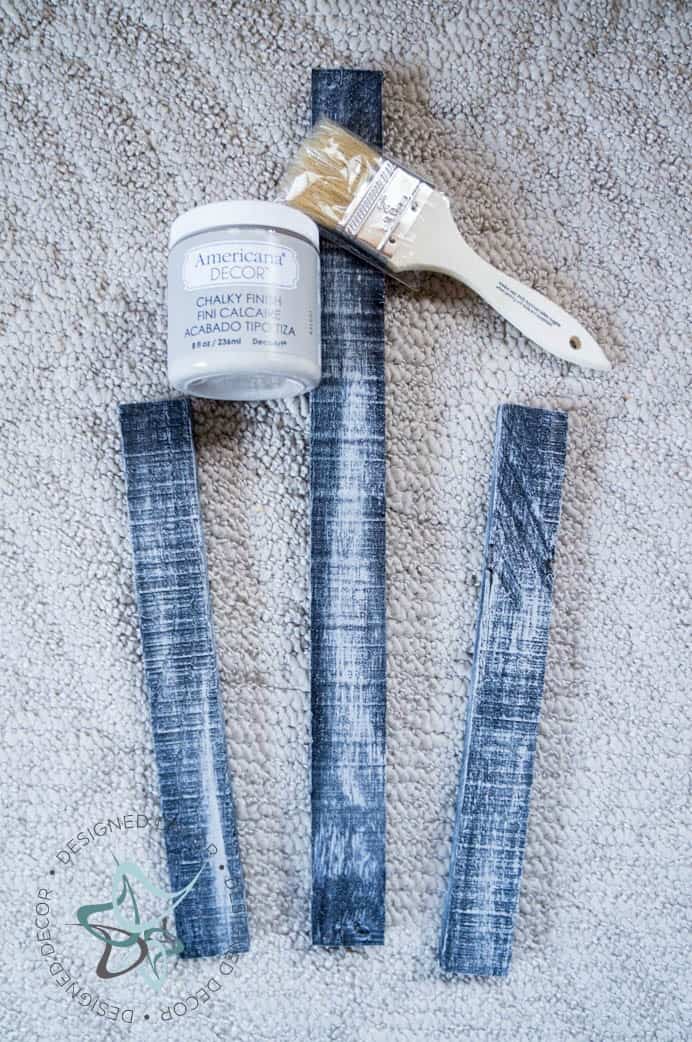
Step 3 Assembling the frames
Assemble both square support frames of the light fixture by using the eight (8) pieces of 11-inch long wood, the one (1) 11 1 ½ long wood piece, wood glue, and Airstrike nailer. Place four (4) pieces from end to “next” as shown in the photo. Glue the end and nail thru the next piece into the end forming a square.
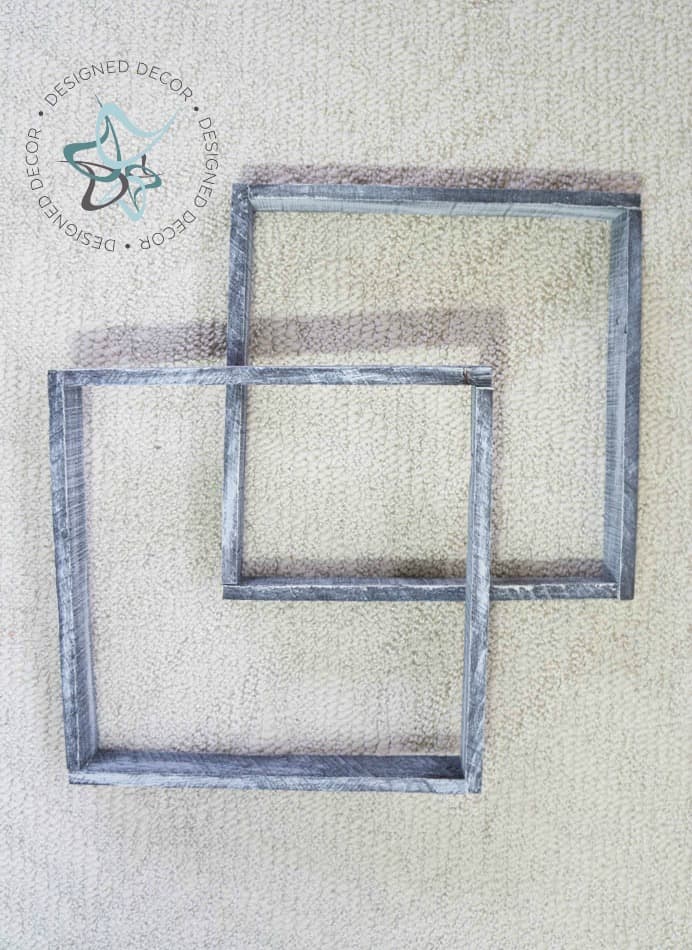
Step 4: Completing the sides of the light.
Glue and nail the twenty (20) 18-inch wood slats on the outside of frames starting in the center of each side, then the corners and then centering the remaining pieces between the center and the corners. The frames should be approximately three inches from each end of the 18-inch pieces of wood and there should be approximately one inch between the slats.
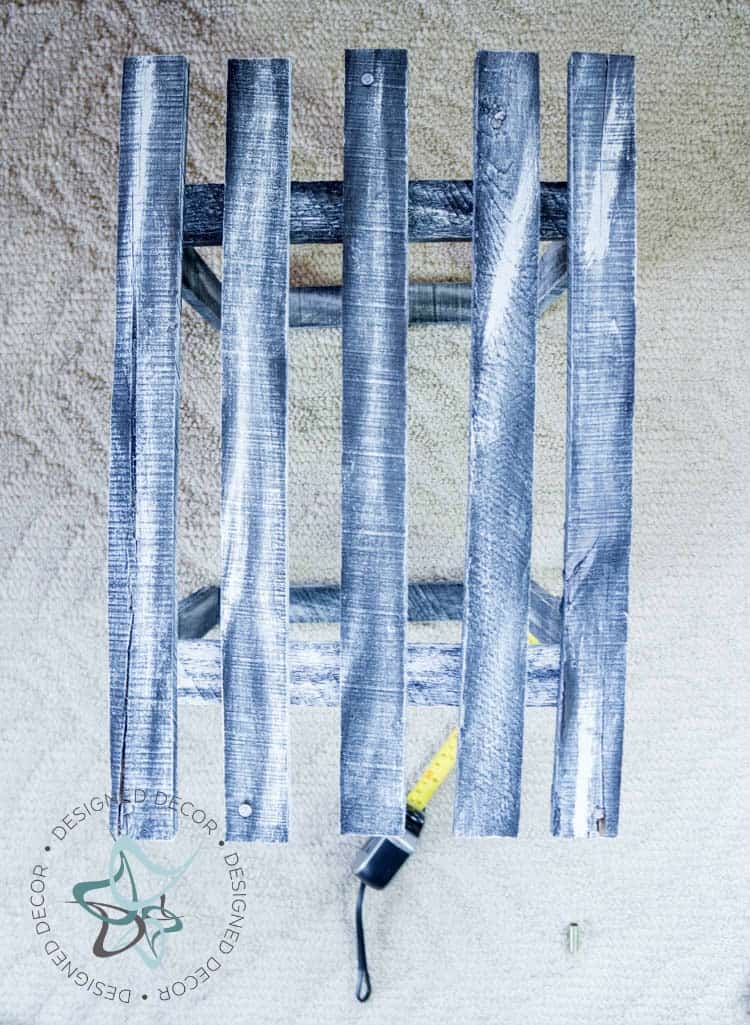
Step 5: Assembling the light kit.
Attach the light. First, open the end ring of the chain provided with the light kit and insert the threaded top ring piece. Next, thread the wire through the chain allowing enough wire at the end to pass through the top ring piece, threaded nipple, 11 ½ inch wood piece to the light socket as shown. Thread top ring piece on nipple provided in the light kit and insert nipple through the hole in the 11 ½ inch piece of wood at the center of the top frame. Next, attach the wires to the socket and screw the socket on the nipple to complete the light assembly.
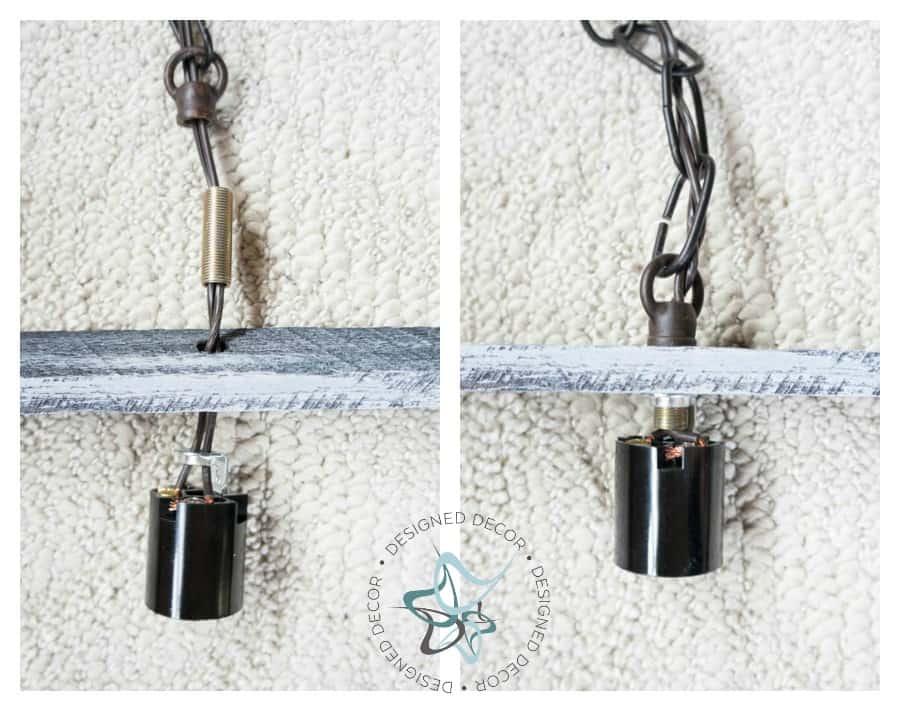
Next, attach the 11 ½ piece of wood on one of the frames in the center by gluing then nailing the ends on the underside of the frame. This will be the top frame and support the light as it hangs. Such a simple way to repurpose pallet wood and make a statement lighting piece.
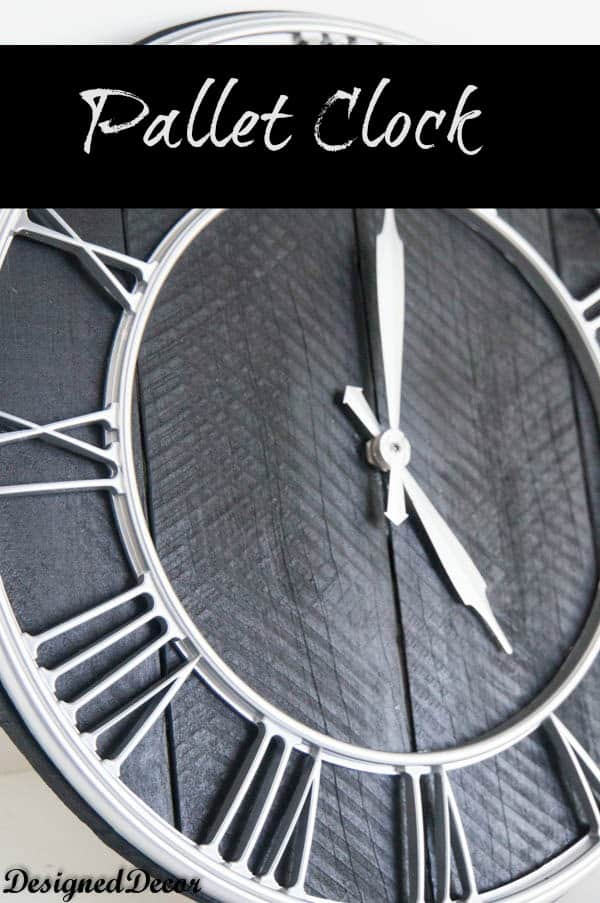
I love how the pallet clock turned out using pallet wood and an outdated clock that I found at a garage sale.
I used an easy way to cut down some of the pallets. If you know you only need smaller lengths of the pallet wood, it is easier to use a circular saw and just make cuts within the support wood. Some of the pallets I had were pretty beat up and a lot of the boards were not in good shape, so I just cut them, and had a bunch of 12 to 18-inch boards. For the pallets that were in good shape, I used a Ryobi Reciprocating Saw to cut the nails from behind the board, so I could have some long pallet wood boards.
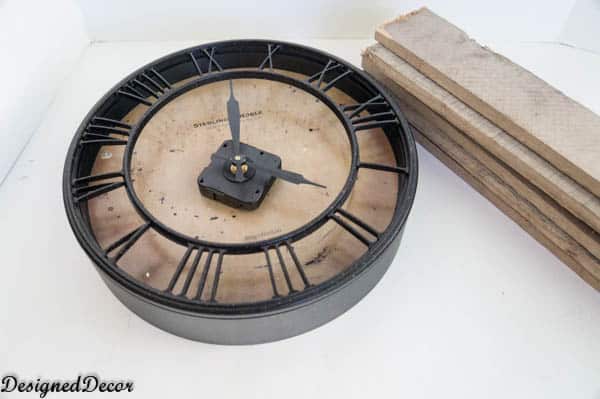
I found this clock at a garage sale a long time ago thinking I would use the clock hands and movement on some other project.
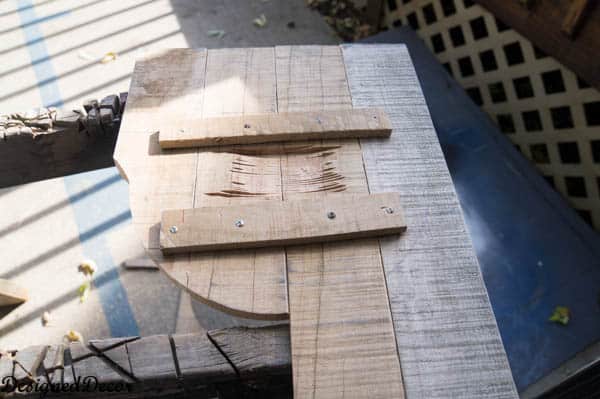
I learned a few things about clock movements. The middle post is called a shaft and these shafts come in different lengths. DING, DING, DING, that is the bells going off in my mind. I had no idea you needed different lengths until I drilled the hole in my pallet and the shaft was not long enough. Since I already had the clock movement and did not want to buy another, I was determined to figure out a way to make this one work. I decided I could hollow out the back of my pallets. I measured how much I needed to be taken off and then set my table saw blade. I began to run my pallet over the table saw. I only hollowed out a section large enough for the clock movement. You can see in the picture above where I used the table saw to hollow out a section. I placed 4 pallet boards together and used scrap pallets to make the support brackets for the back of the clock. I screwed the support brackets to each pallet piece. I used the base of the old clock to trace out the size of my pallet clock. I decided to keep it the same size and use the numbers from the old clock.
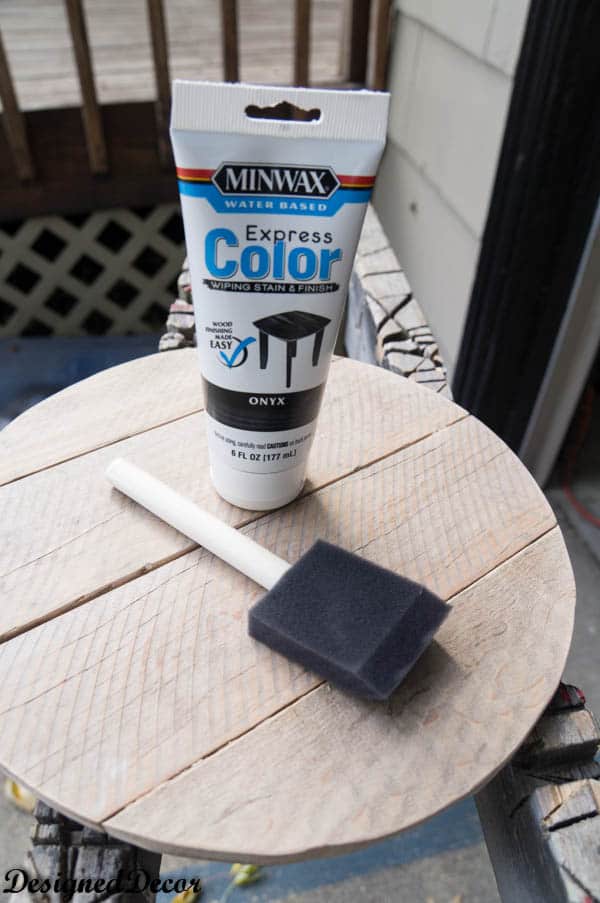
I used a jigsaw to cut out the pallet. I decided to stain the clock using Minwax 30808 Water Based Express Color Wiping Stain and Finish, Onyx. My advice is to stain the pallet boards before screwing them together. After I stained the clock, the pallet boards shrank a little and I had too much space between the boards. I had to take the boards apart and stain them in between and put them back together. So take my advice and stain before you begin, lesson learned!
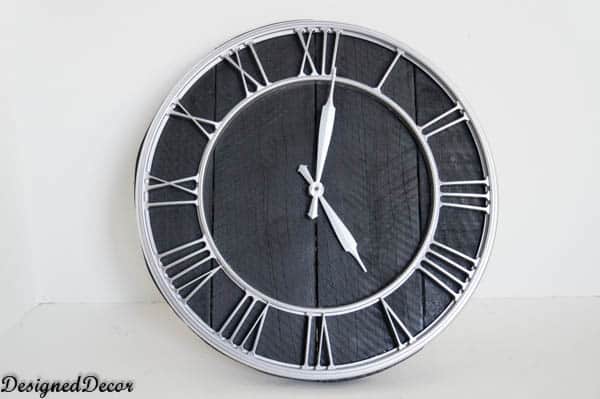
I spray painted the clock hands and numbers with a silver paint. I love how the silver gives the clock a modern feel.
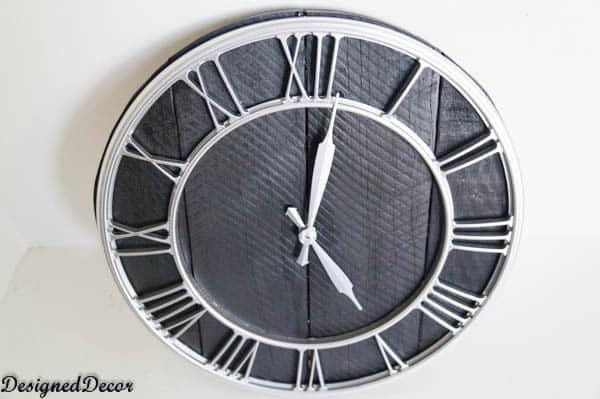
I will be on the look out for old clocks at garage sales to make a few more of these to sell at the shop.

Join the DD Community!

Join the Designed Decor Community and receive weekly free tips on DIY home projects, painted furniture, decorating, and much more.
Simone Garcia says
How do you put the chevron pieces together? Thanks.
Kim says
Hi! Just trying to do my second ever DIY project and I think I messed up!…so that bottom piece on the arrow isn’t 7.5″ to begin with? I cut my pieces the 7.5″ then read the post more thoroughly?Do you know about how long they should be before the cut? Sitting here trying to figure it out but…tks!
Designed Decor says
Kim, Oh no! I hope you have figured it out. No, you don’t cut the bottom piece 7.5 and then cut the angels. If I understand your statement, you cut the wood to 7.5 and then you cut the angels. If you did it that way, you should be ok, they will just be shorter than mine and they will still look ok. I think it is more about the 45-degree angle and not so much about the size. I have seen so many of these arrows done with different sizes. I would love to see your final project, send me an email.