Are you looking for a unique way to update the look of your furniture? Milk Paint provides an easy and versatile method for do-it-yourselfers to easily customize their furniture with beautiful colors and finishes. In this blog post, we will explore how to properly apply milk paint on furniture pieces for incredible results every time! We’ll share step-by-step instructions on how to transform a tired vanity into a gorgeous showpiece – from prepping the surface, mixing the paint, proper application techniques, and more. Read on to learn all about transforming your own piece of furniture with milk paint in no time at all!
Benefits of Using Milk Paint on Furniture
Milk paint is a popular choice among furniture DIYers and for good reasons. Unlike synthetic paints, milk paint is made primarily from water, pigment, and curdled milk protein. Its all-natural composition makes it an eco-friendly option. It has no harmful fumes or toxic substances that can hurt the environment, even when you’re using it indoors.
Aside from being an all-around green option, milk paint also adds beauty to your furniture. It provides a vintage aesthetic that is timeless and appeals to those who appreciate a classic look. Plus, it has a lot of character and depth, giving furniture painters a chance to be more creative with their pieces.
Milk paint reacts differently to each piece of furniture which gives your furniture a one-of-a-kind paint finish. Don’t hesitate to use milk paint on your next furniture project and see for yourself the many benefits this versatile paint can offer.
What You’ll Need to Apply Milk Paint
This post contains affiliate links. Click here to see my full disclosure policy.
If you’re ready to tackle your next DIY project and want to use paint that’s eco-friendly and all-natural, then milk paint is for you! Before diving into your project, however, it’s important to know what you’ll need to apply this unique paint.
Unlike traditional paint, milk paint requires a bit more effort to mix and prepare before use. But trust me, the end result is worth it, with a rustic and timeless finish that traditional paint simply can’t match. So pour yourself some milk (or whatever beverage you prefer) and let’s get painting!
Preparing the Furniture for the Milk Paint Application
Preparing your furniture properly before applying milk paint is crucial for achieving beautiful and long-lasting results. Before starting, make sure to thoroughly clean the piece, removing any dirt, dust, or debris. Then, examine the surface for any cracks, holes, or imperfections that would benefit from a filler or wood putty.
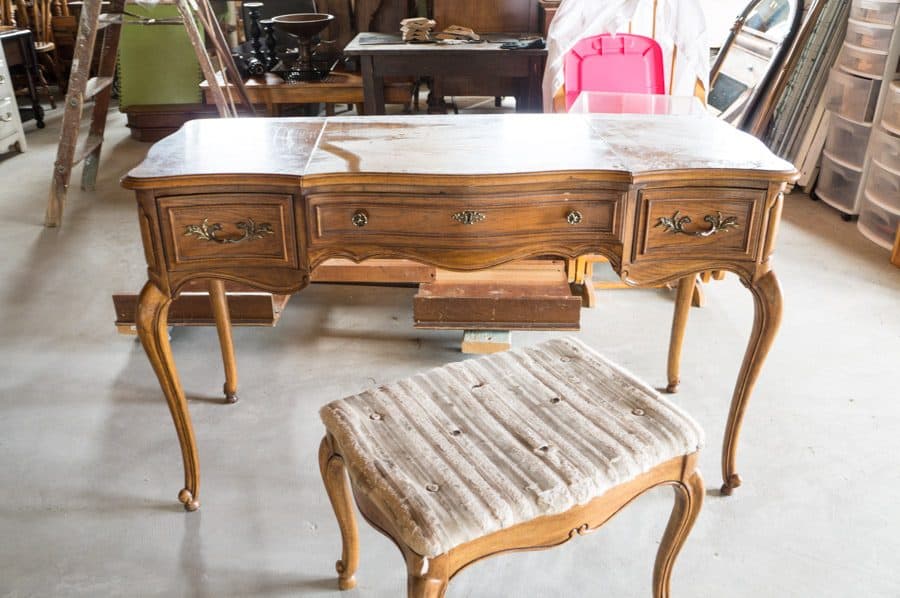
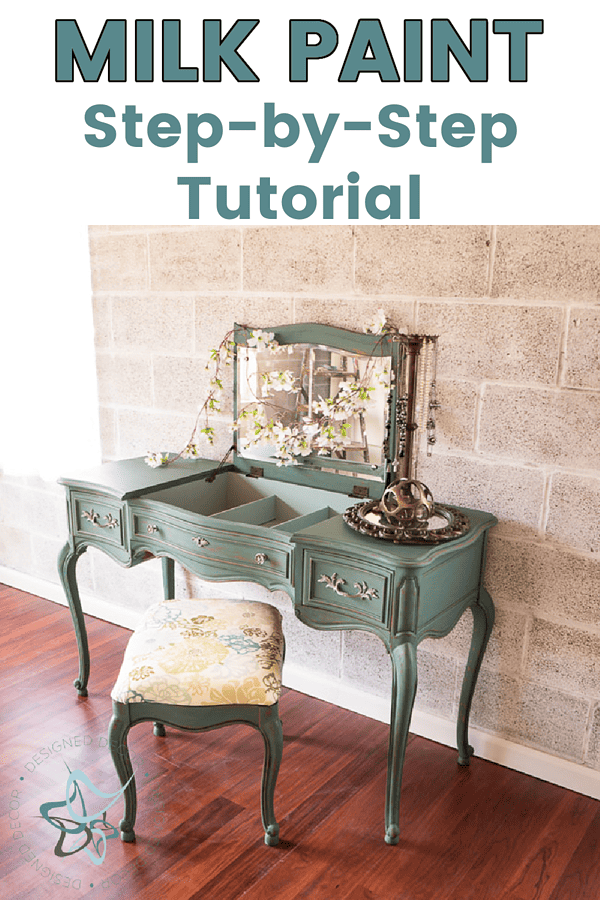
I used this French provincial vanity that I found at a garage sale. She is not an antique, but she was in great shape. Most second-hand pieces have major flaws due to age and use and most have been stored in musty basements or garages. I love a good garage sale find like this vanity and she made a great candidate to apply milk paint on furniture for a great makeover.
You do not need to prime furniture before using milk paint, however, you will need to lightly sand the entire surface, including the edges and corners, to ensure a smooth and even finish. If the piece was previously painted or finished, use light sandpaper this will make for better adhesion of the paint.
The shinier the surface, the more sanding you will need to do in order to have the milk paint adhere to the surface. Trust me on this one!
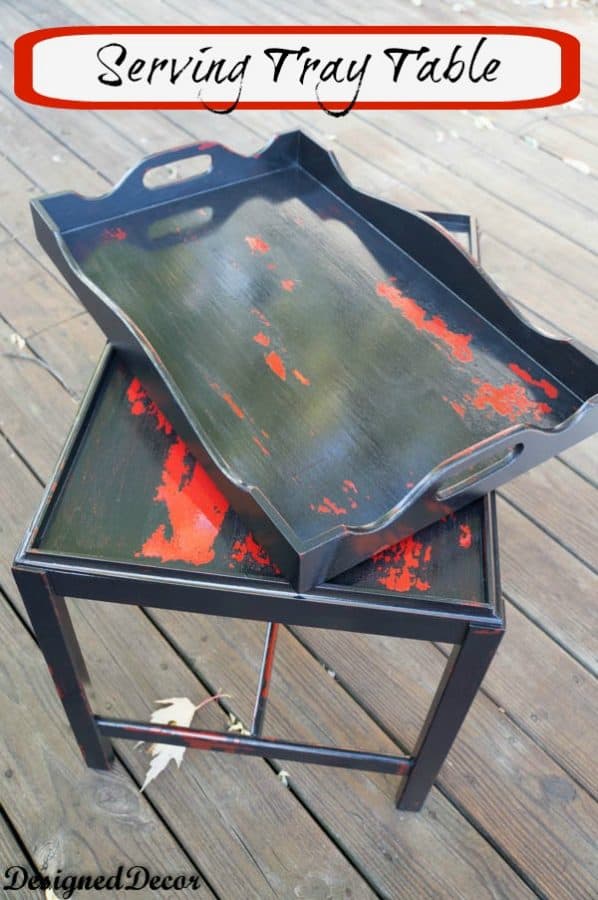
This serving tray table had a red glossy finish, I did sand lightly however, the milk paint just kept flacking off. I had to seal it quickly to get the flacking process to stop.
*Remember to remove all sanding dust before proceeding to apply the milk paint. By properly preparing your furniture, you’ll give yourself the best chance to achieve a fantastic result.

The best way to mix milk paint
When it comes to mixing milk paint, the secret to success is all in the technique. One of the most effective ways to get a smooth and consistent mixture is by using a submersion blender. This handy tool can quickly combine the milk paint powder with water, without leaving any lumps or clumps behind. Simply place the blender into the mixture and let it do its magic. With just a few short pulses, you’ll have a paint mixture that is perfectly mixed and ready to use.
You can mix the milk powder and water by hand, however, it takes longer to work out the lumps and the blender works easier. So, whether you’re a seasoned DIYer or just starting out, using a submersion blender is the way to go for the best results in your milk paint projects.
Also, make sure to keep mixing the paint mixture as you paint, it tends to separate over time, and this will give better lasting results.
I have used other milk paint powders in the past and decided to give Miss Mustard Seeds Milk paint a try. I used the color Kitchen Scale. It was hard to pick a color because she has some really pretty ones.
How to Apply Milk Paint
You never know how milk paint will react to a furniture piece. Sometimes it bonds and sometimes it chips as it is drying. That is the beauty of milk paint.
Milk paint goes on very thin and dries fast. So don’t be too concerned about how bad the first coat looks. The first coat looks very streaky and hardly seems to cover the original finish. Apply the milk paint using a paintbrush and work quickly, as I mentioned it dries quickly. Try to use long strokes or you can even use a roller to apply the paint.
Most milk paint colors will need 2 coats of paint. I recommend painting the second coat on right after the first coat dries. Once you paint the entire furniture piece with the first coat, it is dry and ready for the second coat.
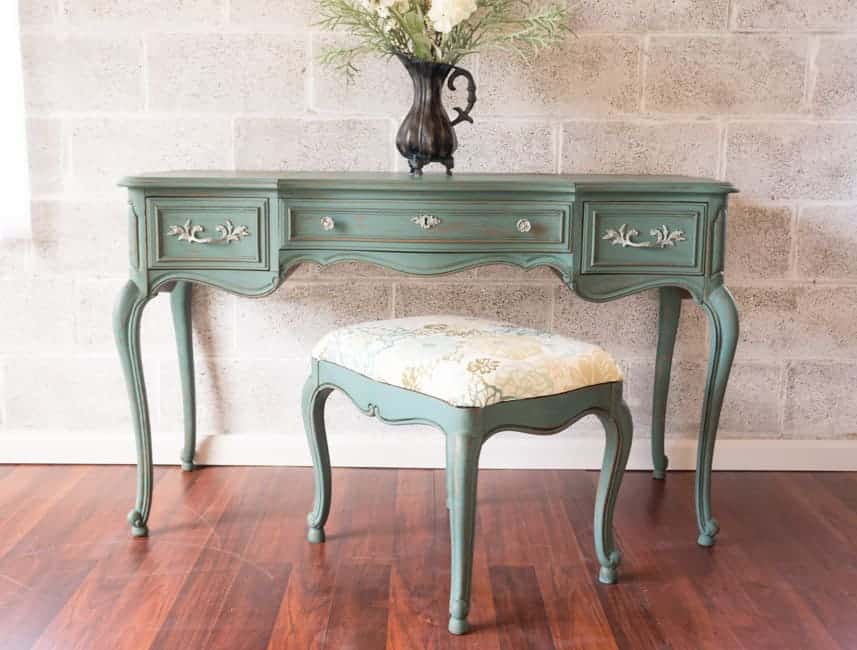
I did use the bonding agent in my milk paint mix, as I did not want the paint to chip too much.
How to seal milk paint
One of the main concerns with milk paint is its durability and ability to withstand wear and tear. That’s where sealing comes in. The best way to seal milk paint is to use a water-based sealer, oils, or wax.
A water-based sealer will provide a protective layer over the paint, preventing any scratches or chipping. On the other hand, the wax and oils will add a soft and subtle sheen to the surface, giving it a more natural and authentic feel.
Before you do any sealing, you will need to lightly sand down the milk paint after applying the 2 coats of paint. The sanding makes the furniture velvety smooth and it gives a perfect distressed finish on the edges.
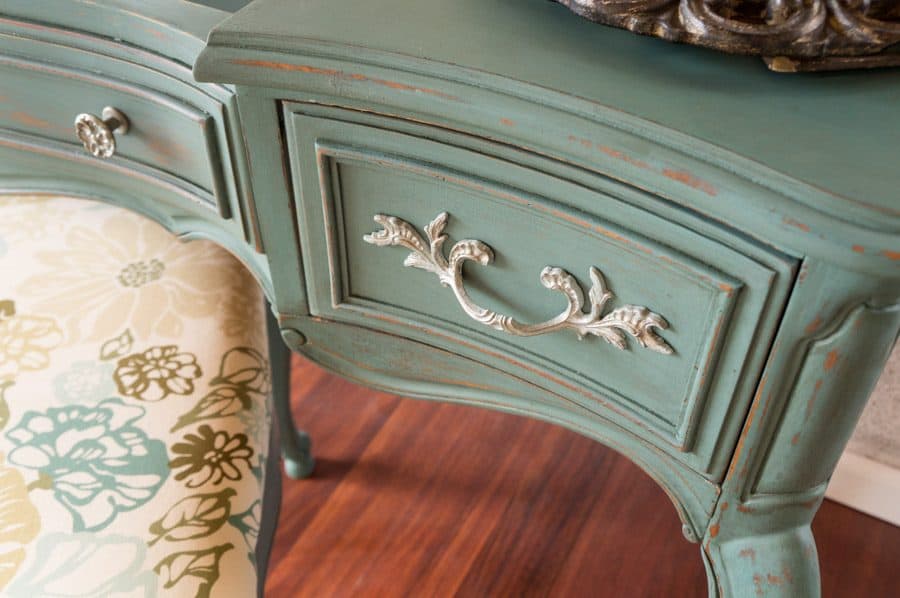
Once you have sanded down the furniture, be sure to remove all the dust before sealing.
Here are my favorite products for sealing milk paint:
- Water-based matte sealer by General Finishes
- Hemp oil by Country Chic Paint
- Furniture Wax by Country Chic Paint
I sealed the entire vanity with high performance in matte. She turned out to be a real beauty.
Whichever option you choose, be sure to follow the instructions carefully and apply the sealant in thin, even coats. With proper sealing, your milk paint project will last for years to come.
Finishing Touches
After spending time painting a piece of furniture, it’s important to take those extra steps to really make it shine. Adding finishing touches to painted furniture can transform it from a simple DIY project to a stunning piece that will catch anyone’s eye. Adding decorative elements such as stencils or hardware can also elevate the furniture’s design. Don’t forget to step back and admire your work once the finishing touches are complete – you deserve to feel proud of your beautiful creation!
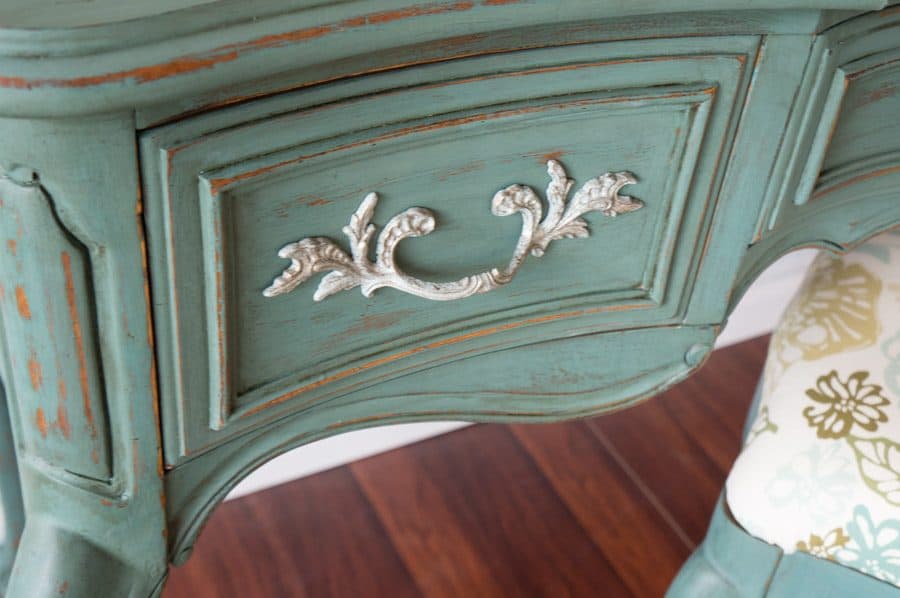
I refinished the original hardware using my favorite technique, with metallic glaze. You can learn how to paint furniture hardware with my online class as I teach 4 different methods to refinish hardware.
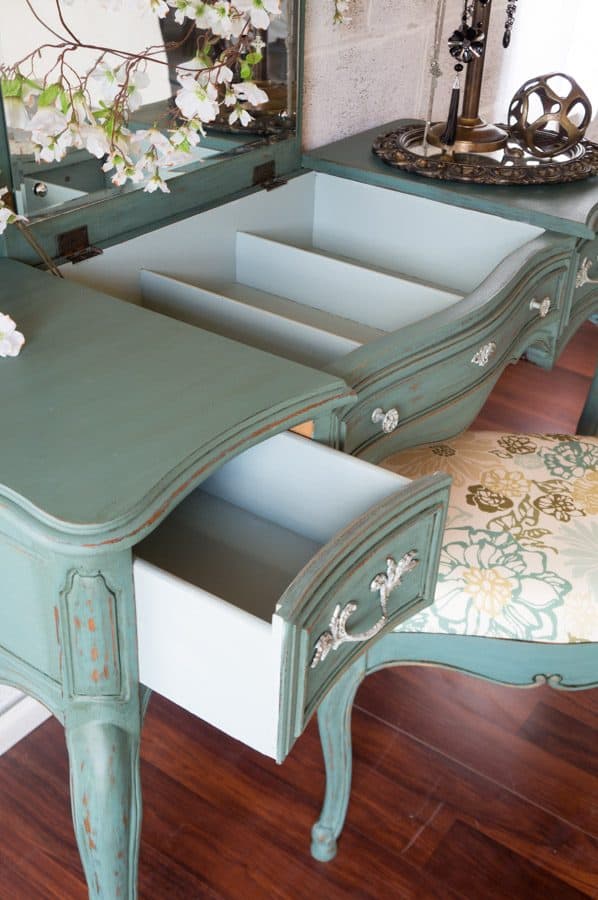
I painted the drawers and the inside of the vanity with happy hour, a coordinating paint. It is these finishing touches that make your painted furniture piece stand out.
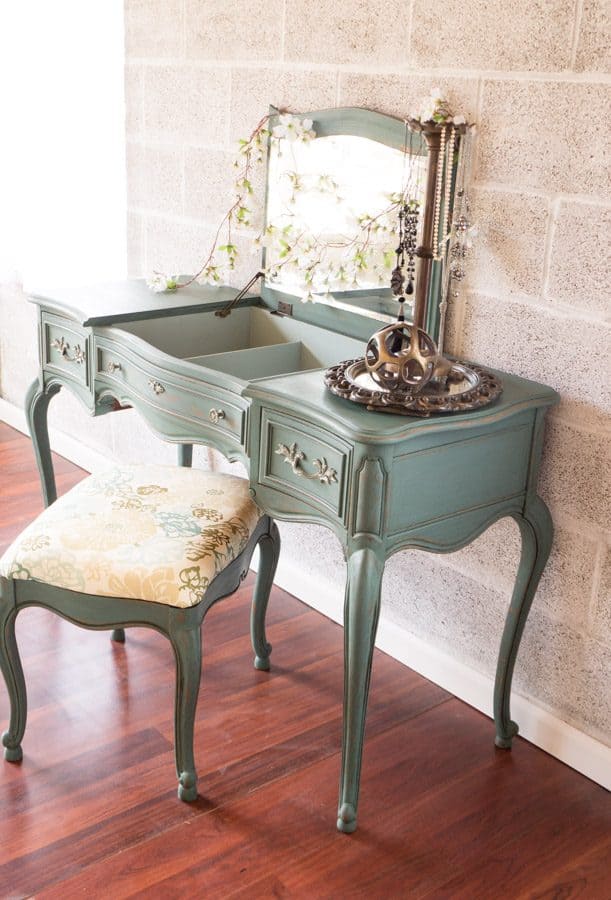
I found a coordinating fabric, Invigorate Coastal by Richloom, to recover the bench. That fabric color has been discontinued, however, I found a similar fabric, Finders Keepers Peacock Fabric.
Milk Painting Questions
- Do I need to sand before using milk paint? – It depends on the finish of the furniture you are painting. Most pieces will need to be lightly sanded. Please see the section above about prepping furniture before using milk paint.
- Do you need to prime before using milk paint? No, you do not need to use a primer before painting with milk paint. Especially if the piece you are painting is wood, as you would want to see the wood finish as the milk paint chips away.
- How long should milk paint dry between coats? Milk paint dries quickly, so just make sure the paint is dry to the touch before applying the second coat.
- How long does milk paint last? For the strongest bond possible, it’s best to use milk paint when it’s fresh. However, you can keep it in a sealed container for up to a month. When it’s in its dry powder form, it can last for more than three years on your shelf.
From the process of sanding to stirring up your own custom color recipe, applying milk paint is an easy and enjoyable task. Now you can have successful results from applying milk paint on wood furniture that will last for a long time without any cracks or peeling. Plus, you can experiment with a variety of colors and techniques in order to achieve your desired design style. With this tutorial on how to apply milk paint, you can create beautiful projects for any home space. Give it a try and show us how amazing it turned out!
Have you used milk paint before? Let me know if I can help you recreate this same look or answer any specific questions about how to use milk paint on furniture pieces! Together we can transform any piece into something truly beautiful!

Join the DD Community!

Join the Designed Decor Community and receive weekly free tips on DIY home projects, painted furniture, decorating, and much more.
catherine steele says
That turned out really pretty. Miss Mustard seed paint is great. I’ve used a few different colours and they have all been lovely. Sweet pickins milk paint is also great.
Designed Decor says
Thanks, Catherine! I still have not tried Sweet Pickens paint and I love her stuff!