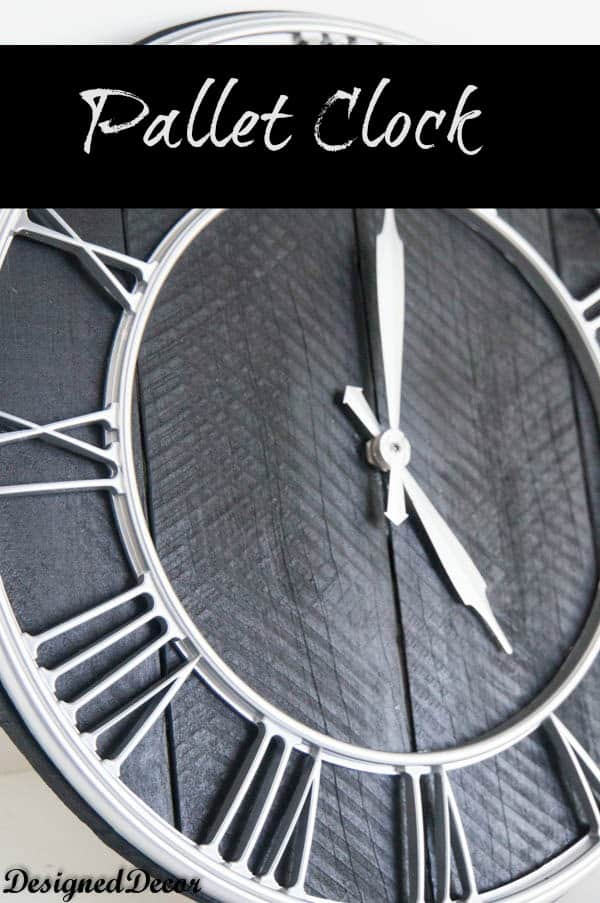
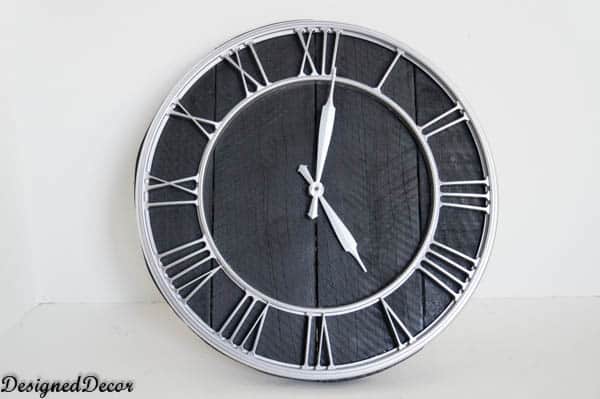
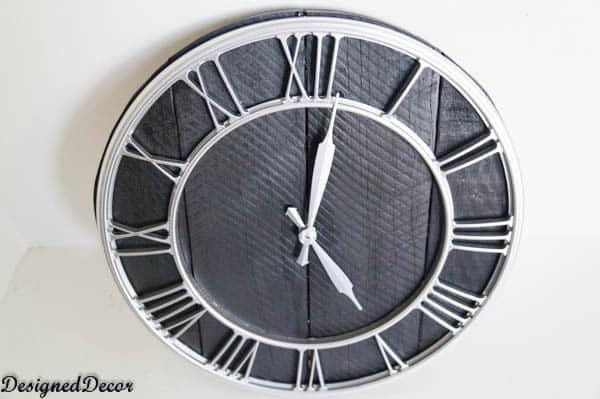
I made a pallet clock using some old pallets.
I finally tore apart the pallets that have sat in my backyard. I took the easy way and used a circular saw instead of keeping the boards long. The pallets I had were pretty beat up and a lot of the boards were not in good shape, so I just cut them, and had a bunch of 12 to 18 inch boards.
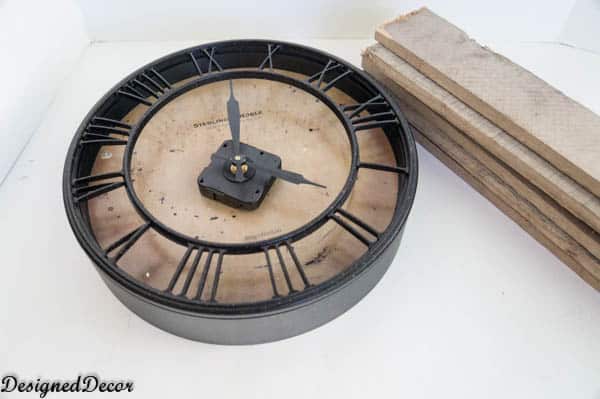
I found this clock at a garage sale a long time ago thinking I would use the clock hands and movement on some other project.
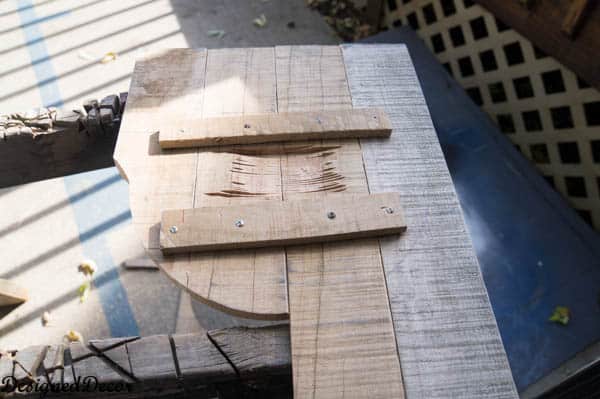
I learned a few things about clock movements. The middle post is called a shaft and these shafts come in different lengths. DING, DING, DING, that is the bells going off in my mind. I had no idea you needed different lengths until I drilled the hole in my pallet and the shaft was not long enough. Since I already had the clock movement and did not want to buy another, I was determined to figure out a way to make this one work. I decided I could hollow out the back of my pallets. I measured how much I needed taken off and then set my table saw blade. I began to run my pallet over the table saw. I only hollowed out a section large enough for the clock movement. You can see in the picture above where I used the table saw to hollow out a section. I placed 4 pallet boards together and used scrap pallets to make the support brackets for the back of the clock. I screwed the support brackets to each pallet piece. I used the base of the old clock to trace out the size of my pallet clock. I decided to keep it the same size and use the numbers from the old clock.
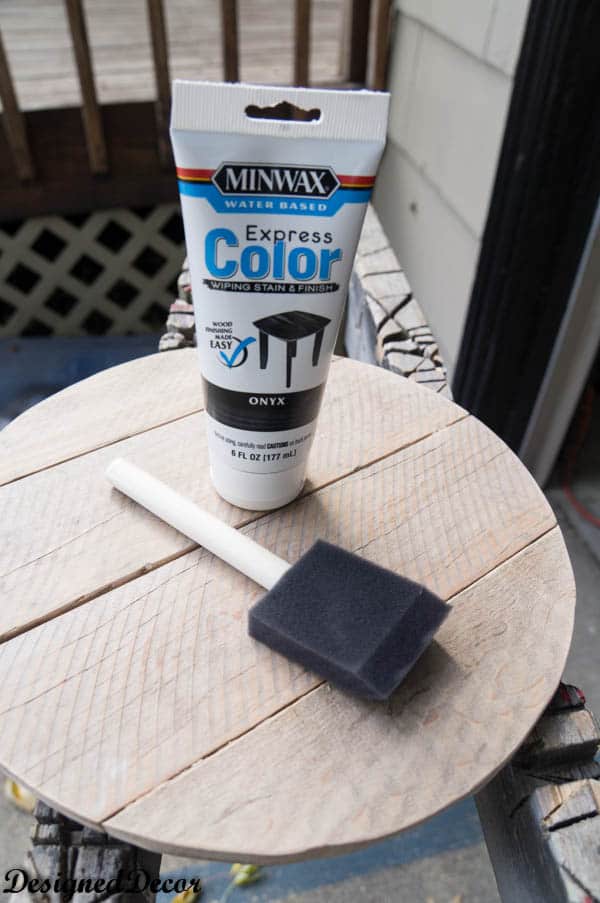
I used a jigsaw to cut out the pallet. I decided to stain the clock using Minwax 30808 Water Based Express Color Wiping Stain and Finish, Onyx. My advice is to stain the pallet boards before screwing together. After I stained the clock, the pallet boards shrank a little and I had too much space between the boards. I also did not have stain in between the boards and this really showed after they shrunk. I had to take the boards apart and stain in between and put back together. So take my advice and stain before you begin, lesson learned!
I spray painted the clock hands and numbers with a silver paint. I love how the silver gives the clock a modern feel.
I will be on the look out for old clocks at garage sales to make a few more of these to sell at the shop.
Check out these other top DIY projects from 2014
Join the DD Community!

Join the Designed Decor Community and receive weekly free tips on DIY home projects, painted furniture, decorating, and much more.


Omni Art says
Beautiful Art !!! Happy New Year 2020 !!!
Cass says
gorgeous!!
onel says
This is so gorgeous (with the Roman numerals!) Love how it turns out!!
Amy @ StowandTellU says
Very cool project. Love your choice of black and silver. Found you at Roadkill Rescue ~ Amy
Camila says
This is a lovely project. I love pallets and this watch turned out GREAT!!!! Pinning!
XOXO
Cami @ TitiCrafty
Joanna Sormunen says
The finished clock looks amazing! What a wonderful craft. And it must give a special touch to your house. Thank you for sharing this.
lydiaf says
My husband is a clock fanatic and he would absolutely love this! (Our compromise is he can’t buy any more with second hands hahaha). Stopping by from #DBB
Designed Decor says
Thanks Lydiaf! I love your compromise agreement! Thanks for stopping over, have a great day!
Sarah Fuller says
What an awesome way to repurpose a pallet. Great creative thinking!
Designed Decor says
Sarah, Sometimes a good idea just comes from the amount of pieces parts you have accumulating in your work studio! LOL
Crystal says
Stunning!! I love it!! When you get ready to sell one, let me know. I’d love to have one!! Beautiful!!
Designed Decor says
Crystal, This one sold! I do have another one in the making but now I need to find some clock parts and numbers. It will be one of those things, that when you look for it at a garage sale or thrift shop, you never find the things you need.